Can you believe this is the last week of September? Fall is definitely in the air in my corner of the world. At my house we are pulling on sweatshirts, enjoying apple cider, and harvesting our pumpkins. My grandkids are beginning to talk about their Halloween costumes and looking forward to Trick-or-Treating! As for me, I am busy making Halloween treat holders and Halloween cards. One day I was looking for a different way to make a night sky background. I decided to try adding color with blending brushes to a piece of Smoky Slate cardstock. I was quite surprised with the results - pleasantly and not so pleasantly! Here are the cards I made with the blending brush backgrounds:


I used Basic Gray along the bottom of the Smoky Slate cardstock for this card. If you look closely you can see the ink coverage is a bit blotchy, but it sort of works for this card.


SUPPLIES FOR THIS CARD

That is all for today Thanks for stopping by. Until next time…

One of the cards I shared last week contained elements of my first experiment in applying color with blending brushes to Smoky Slate cardstock. I used the inked cardstock as a background for my focal image and to die cut the banner for the greeting. Here is the card from last week:


All three cards are my version of a Mini Slimline cards. The folded card measures 3 1/2” x 6 3/8”. These cards will fit in a regular letter size envelope (# 6 3/4).

In my opinion applying ink with blending brushes works best on Basic White cardstock, but I think the Smoky Slate is a good choice if creating a background piece for a night sky, a stormy sky, or maybe an ocean. I did find some ink colors work better than others, and purples and blues seemed to work best, and yellows did okay. I was disappointed to find Basic Gray did not work as well as hoped.
To create my cards I used items from the Stampin’ Up!®️ July-December 2022 Mini Catalog.
SCARY CUTE BUNDLE

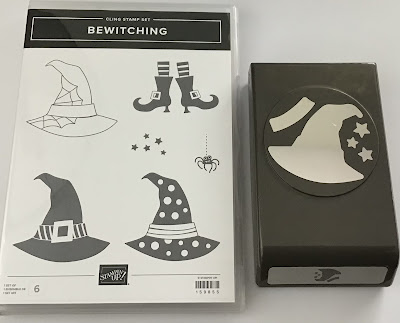
BEWITCHING BUNDLE

BEST WITCHES STAMP SET

MINI SLIMLINE CARD MEASUREMENTS
* Card base - 6 3/8” x 7” scored and folded at 3 1/2” along the 7” side
* Focal and inside panel are cut at 6 1/8” x 3 1/4”
+ NOTE: For all three cards the front panel is cut from Smoky Slate cardstock and the inside panel is cut from Basic White.
SCARY CUTE SILHOUETTES CARD

SUPPLIES FOR THIS CARD
* Scary Cute Bundle
* Card base - Basic Black
* Cardstock for front panel and inside panel
* Cardstock for die cuts - Basic Black and Mango Melody
* Inks - Memento Tuxedo Black, Basic Gray, Gorgeous Grape, Daffodil Delight, and Starry Sky.
ASSEMBLY
* Die cut the haunted house and bats from Basic Black. Die cut the moon from Mango Melody. Adhere a piece of Mango Melody cardstock to the back side of the haunted house.
* Apply ink with blending brushes to the Smokey Slate cardstock. I started at the bottom with Basic Gray then added some Daffodil Delight from the Basic Gray clear to the top. Next I put down some Gorgeous Grape, but left an area of the Daffodil Delight untouched in the area where I wanted the moon. Next I added some Starry Sky. Finally, I added more Gorgeous Grape and Starry Sky.
* Stamp the three silhouette shapes on the inked Smoky Slate cardstock using Memento Tuxedo Black ink. NOTE - I used my Stamparatus to stamp the images because I could stamp all three images at once and I could “re-stamp” if need be to get a nice crisp black image.
* Adhere the moon and haunted house with dimensionals.
* Use liquid glue to adhere bats. Stamp the “Boo” image three times.
* Adhere inside panel - decorate it with stamped images if you desire.
BEWITCHING WITCH HATS CARD

SUPPLIES FOR THIS CARD
* Bewitching Bundle
* Best Witches stamp set
* Card base - Parakeet Party
* Cardstock for front panel and inside panel
* Inks - Memento Tuxedo Black, Gorgeous Grape, Starry Sky; Stampin’ Blends - Pumpkin Pie (light & dark), Parakeet Party (light & dark), Daffodil Delight (dark), Polished Pink (light)
* Adhesive and dimensionals
ASSEMBLY
* Stamp , color, and punch out the hats.
* Create the background on the Smoky Slate, I started at the bottom of the cardstock and worked my way a little over half way, the switched to Starry Sky.
* Stamp the spider then position the hats and adhere with dimensionals
* Stamp the stars beside or around the hats and stamp the greeting.
* Adhere the panel to the card front
* Adhere the inside panel add a greeting and stamped images if you like.
WITCHY SPELL CARD

* Best Witches stamp set
* Pumpkin Pie cardstock for card base
* Cardstock for front panel and inside panel
* Inks - Memento Tuxedo Black, Gorgeous Grape, Starry Sky; Stampin’ Blends - Basic Black (dark), Highland Heather (light), Daffodil Delight (light & dark), Cajun Craze (dark), Soft Sea Foam (light), Poppy Parade (light), Gray Granite (light & dark), Parakeet Party (light& dark)
* Black Baker’s Twine - about 36”
* Black and White Gingham Ribbon about 6”
* Adhesive, dimensionals, and glue dots (for ribbon)
* Paper Snips / scissors
ASSEMBLY
* Stamp and color images, then fussy cut them
* Add ink to the Smoky Slate cardstock. I used the same method on this card as I did for the previous card.
* Stamp the greeting on the panel
* Stamp the stars on the top 2/3 of the cardsdtock
* Adhere the images to the panel with dimensionals
* Wrap the twine around the card base adhere on back side of panel
* Attach the bow on top of the twine.
* Adhere the panel to the cardbase.
* Decorate the inside panel as you wish and adhere to the inside

Stamp Happy!
Kim
All stamps and stamped images ©️1990-2022 Stampin’ Up!®️
This posting is dedicated to the memory of my best stamping buddy.
Meredith Brown
(August 1972 - September 2021)
No comments:
Post a Comment