Hi Stampers!
Christmas is quickly approaching, and many of you have finished making your greeting cards or soon will. That is great, but what if you still need several cards and have limited time to create them? What if you just haven’t had time to create any cards yet, but would like to do so? No need to panic as there is still time to create pretty Christmas cards and send a bit of cheer to family and friends. All you need is a good strategy and a couple of hours in your craft space. The cards I am sharing today were created using the background stamp called Fragrant Forest, and all 6 cards were created in less than one hour. That included deciding on a design and color schemes, switching out a load of laundry, and answering a text. Let’s take a look:

As you can see, my cards are similar, but a bit different. I tend to get very bored when making multiples of cards. Sometimes it is necessary, for example when making party invitations, but since today’s cards were made to send to family and friends I can switch things up a bit. I did stick with the basic theme of the original layout, but varied the size and position of the focal panel. I used three colors for card bases and the coordinating ink. For mats I used Basic White cardstock or gold foil
So, here is how I made these six cards in under one hour.
1. I had a design in mind that included an A-2 card base, a mat layer, and a focal panel, a greeting, and an inside panel. I decided some focal panels would be cut in half to create focal images for two cards.
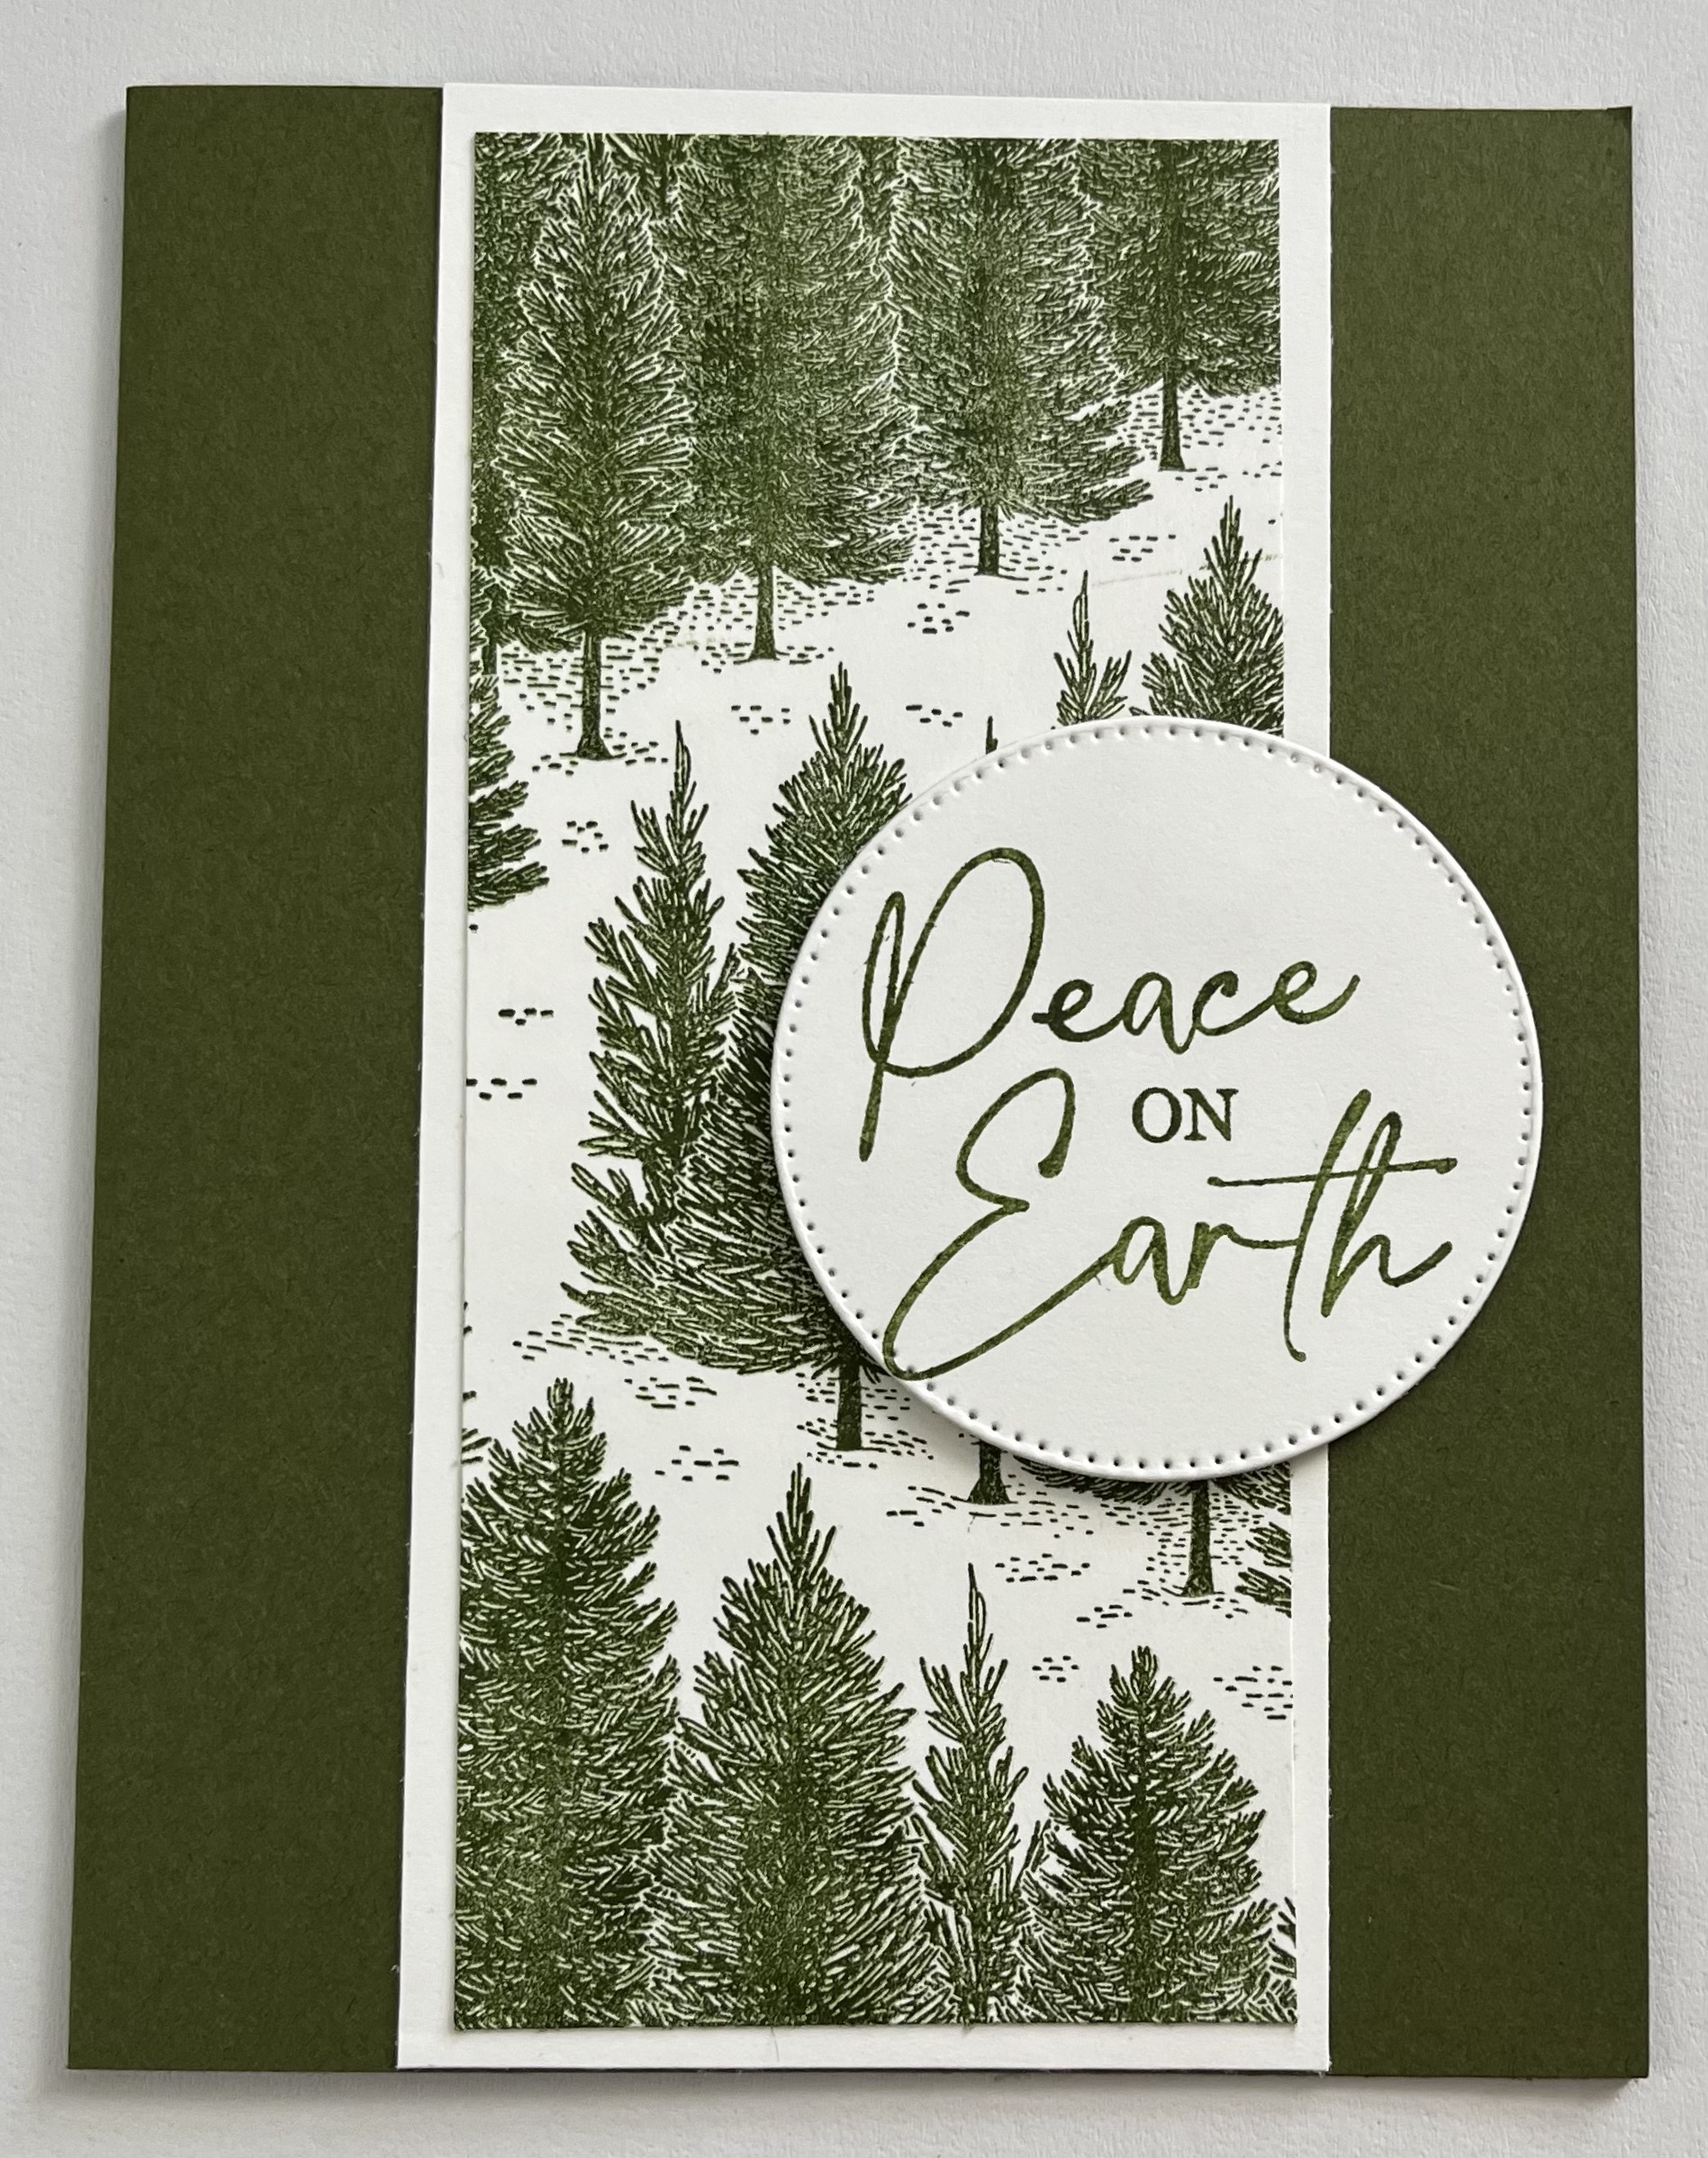
2. I used a background stamp for the focal panel. This meant I would simple stamp the image, no coloring needed. Also I knew I could use the entire panel as the focal image, or cut the panel in two pieces and have focal images for two cards. (I used the Fragrant Forest background stamp.)
3. I used the same greeting and inside sentiment on all cards.
4. I decided the number of cards I needed, then cut and scored all the card bases.
5. I cut all the cardstock for the focal panels and inside panels.
6. I cut the mat layers.
7. I used scraps of Basic White cardstock for my greetings, but you can cut strips that are a bit larger in height than the die cut or if using a punch, the punched image.
8. Stamp the focal panels. Cut apart some panels if you like.
9. Stamp and die cut or punch the greeting. If you prefer die cut or punch the pieces for the greeting, then stamp the greeting. Selecting the method that works best for you is a time saver.
10. Stamp the inside panel.
11. Assemble the card. Attach the greeting with dimensionals
12. Sign the cards, grab some envelopes, insert the card, address the envelopes, add stamps, and send handmade Christmas cheer to family and friends!
Yes, it is just that quick and easy!
OTHER TIPS
* If you have a stamp positioning tool, use it. This tool allows you to restamp an image multiple times to ensure a richly inked image. It is also great when you are creating multiples of an image.
* I like the cards I created with the Basic White mats, but if you are like me, and have a growing stash of specialty paper, use it for mats. I used gold foil, but silver foil or glimmer papers would all be great choices as well. The specialty papers add a little extra without a lot of extra time consuming effort!
* As it is now crunch time for Christmas card creating, skip heat embossing. For the cards I matted with the gold foil instead of embossing the greeting with gold embossing powder, I stamped the greeting with Crumb Cake ink. When used with gold, Crumb Cake ink takes on a gold-like appearance. If you use silver on your cards pair it with Smoky Slate ink as it will take on a silver-like appearance.
* When using a background stamp, I cut my panels a bit larger than needed, this allows me to trim away any areas along the outer edges I am not happy with. I there is an interior area I am not happy with, I cut the piece in half and mat those pieces. Next I place the greeting strategically to cover the less desirable ares.
* I used a die to cut out my greeting pieces, but if you have a suitable punch for the greeting, use it. I find it is so much quicker to punch out my greeting than die cutting them.
VIDEO
HOLIDAY CRUNCH TIME CARDS
USING THE FRAGRANT FOREST BACKGROUND STAMP
NOTES:
*For all the sample cards I used the Fragrant Forest background stamp and or the sentiments I used the Christmas Classics stamp set.
* All card bases are A-2 size - 8 1/2” x 5 1/2” scored and folded at 4 1/4” OR 11” x 4 1/4” scored and folded at 5 1/2”.
* For my focal panels I started with Basic White cardstock cut at 5 1/2” x 4 1/4” and trimmed 5hem to the size needed.
* All of my cards are portrait oriented. The orientation of your cards will depend on the design of your background stamp.
FULL PANEL CARDS


SUPPLIES FOR THESE CARDS
* Background stamp and stamp for greeting and inside sentiment
* Card base - Shades Spruce
* Mat - Basic White cardstock or Gold Foil cut at 5 1/2” x 4”
* Inside panel - Basic White cut at 5 1/4” x 4”
* Focal panel - 5” x 3 3/4”
* Cardstock for greeting - Basic White
* Ink - Shaded Spruce / Crumb Cake (for card with gold foil mat)
* Dies - Stylish Shapes - circle that best fits greeting
* Adhesive and dimensionals
PARTIAL PANEL OFFSET CARDS


* Background stamp and greeting stamp
* Card base - Garden Green
* Mat - Basic White cardstock or gold foil cut at 5 1/2” x 2 1/4”
* Inside panel - Basic White cardstock cut at 5 1/4” x 4”
* Focal panel - start with a that is 5 1/4” x 4” and cut it in half long ways so you have two pieces that measure 5 1/4” x 2” - this makes focal panels for two cards
* Cardstock for greeting - Basic White
* Ink - Garden Green / Crumb Cake
* Dies - Stylish Shapes - circle - size that fits greeting best
* Adhesive and dimensionals
PARTIAL PANEL CENTERED CARDS


SUPPLIES FOR THESE CARDS
* Background stamp and sentiment stamps
* Card base - Mossy Meadow cardstock
* Mat - Basic White cardstock or gold foil cut at 5 1/2” x 2 1/4
* Inside Panel - Basic White cardstock cut at 5 1/4” x 4”
* Focal panel - start with a focal panel that is 5 1/4” x 4” and cut it in half. Yo7 will have two panels that are 5 1/4” x 2”
* Ink - Mossy Meadow / Crumb Cake
* Dies - Stylish Shapes - circles - select die that best fits your greeting
* Adhesive and dimensionals
VIDEO CARDS

These cards are made the same as their counter parts above, I just changed up the colors a bit. These three cards feature Shaded Spruce card bases, and Basic White inside panels. The full panel card above has a silver foil mat, and the greeting is stamped with Smoky Slate ink. Just as Crumb Cake takes on a gold tone when paired with gold, Smoky Slate takes on a silver tone when paired with silver.
The middle card is the offset partial panel card. The mat is Poppy Parade cardstock, and the greeting is stamped with Poppy Parade ink.
The final card is the partial panel centered card. I think the simple Basic White mat adds that touch of understated elegance to the card. The greeting is stamped with Shaded Spruce ink.
FRAGRANT FOREST CRUNCH TIME CARDS

There you have it, cards that are easy to make, take very little time to create, and are pretty. No one but you will know they are crunch time cards!
LITTLE EXTRAS
If you have time you could add one or more of the following to the cards
* Gems or sequins
* Ribbon behind the greeting
* Mat the greeting
That is all for today. Thank you so much for stopping by. Until next time . . .
Stamp Happy!
Kim
All stamps and stamped images ©️1990-2023 Stampin’ Up!®️
No comments:
Post a Comment