Hi Stampers!
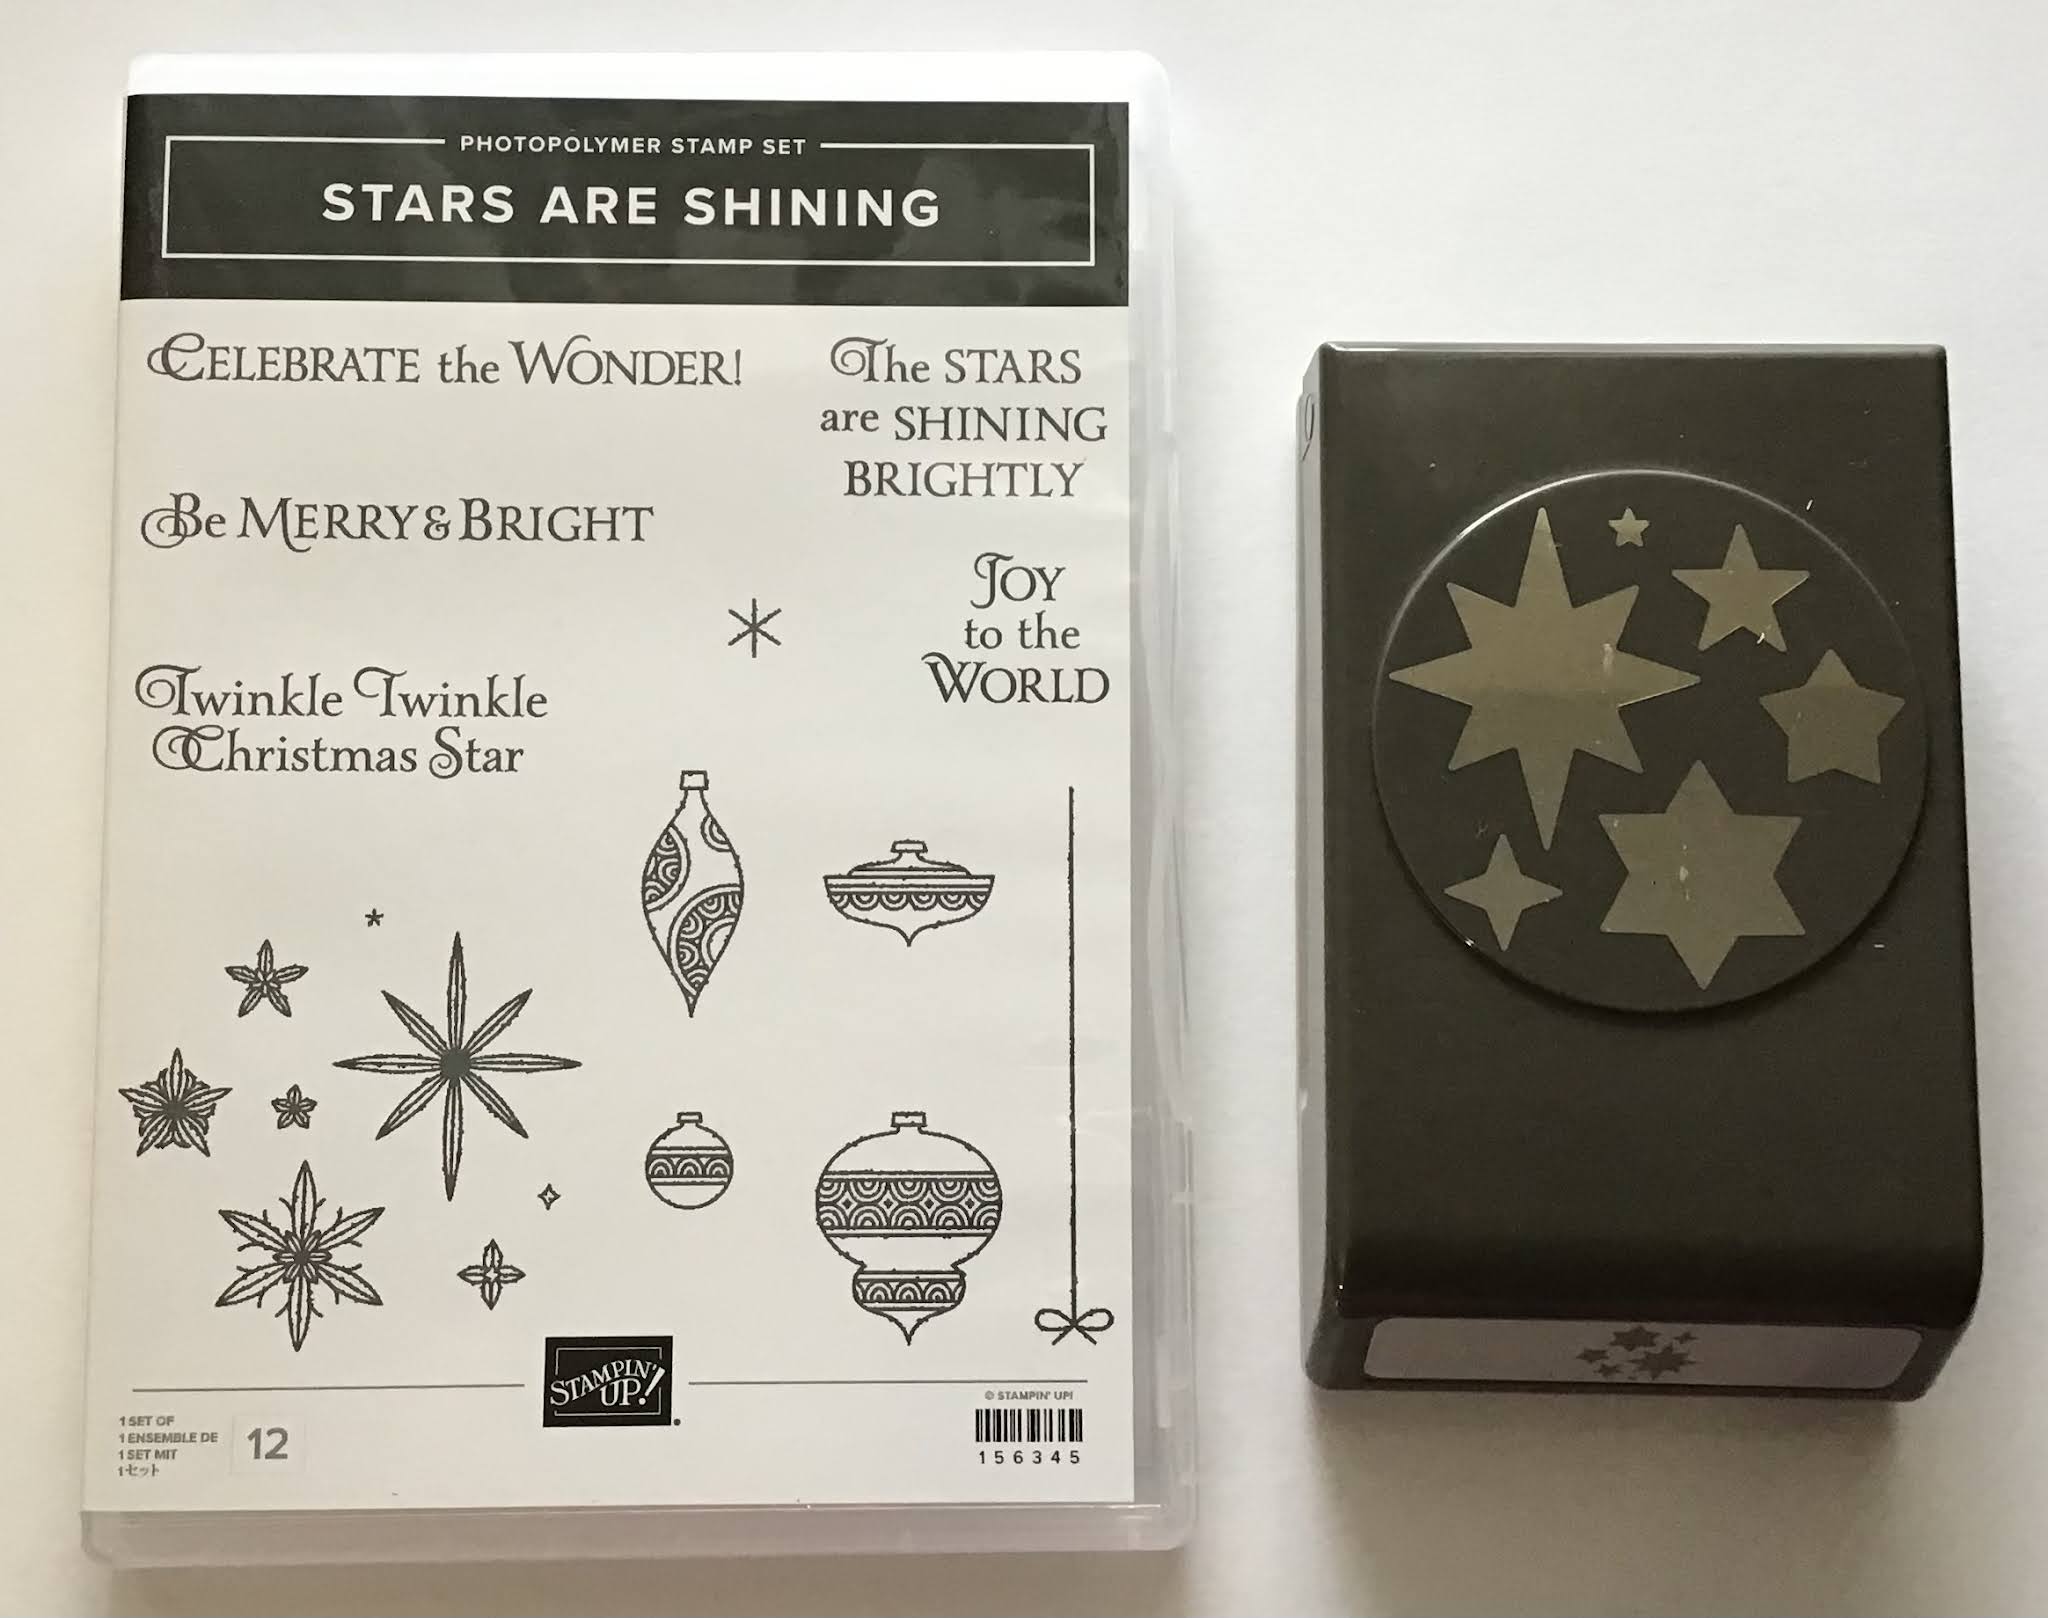
It is time for another TINSEL TIME TUESDAY card idea. Today’s cards were made using the STARS ARE SHINING BUNDLE. The cards were inspired by a card on page 14 of the Stampin’ Up!®️ July-December 2021 Mini Catalog. I made the card in two sizes (A-2 and a letter sized card), and 4 different color combinations. Here are the cards:

STARS ARE SHINING STAMP SET & STARLIT PUNCH
HOLLY JOLLY WISHES

SUPPLIES TO MAKE THE CARDS:
* A card base (color of choice) that is either 81/2” x 5 1/2” scored and folded at 4 1/4” for the A-2 size, or 7” x 6 1/4” scored and folded at 3 1/2” along the 7” side for the letter sized version.
* Foil sheets or metallic card stock (color of choice) cut at 5 1/4” x 4”.
* Basic White or Very Vanilla cardstock for focal panel cut at 4 1/2” x 3 1/4” or 5 1/2” x 2 3/4”
* Piece of cardstock the same color of card base cut at 2 3/4” x 3/4” to mat greeting.
* Large scrap of Basic White or Very Vanilla cardstock for stamping star images and greeting
* Stitched Rectangle Die that measures 2 3/4” x 1/2”.
* Adhesive, glue dots, and dimensionals.
* Ink colors of choice and / or embossing powder, Versa Mark, and heat tool.


* Complete the die cutting and punching.


A-2 VERSIONS OF THE CARD

SUPPLIES FOR THIS VERSION
* Real Red A-2 card base plus a Real Red mat for the greeting.
* Green Foil Sheet for mat.
* Basic White cardstock for focal panel and a piece for the inside panel, and for the greeting.
* Inks - Shaded Spruce, Real Red, Crushed Curry, and Misty Moonlight.

* Shaded Spruce A-2 card base and small scrap to mat greeting.
* Red Foil Sheet for mat.
* Basic White for focal panel and inside panel, plus a piece for the greeting and for stamping the star images.
* Inks - Shaded Spruce, Real Red, Crushed Curry, and Misty Moonlight.
These two versions of the card are made to fit inside a letter sized envelope. the card base is cut at 7” x 6 1/4” scored and folded at 3 1/2” along the 7” side.
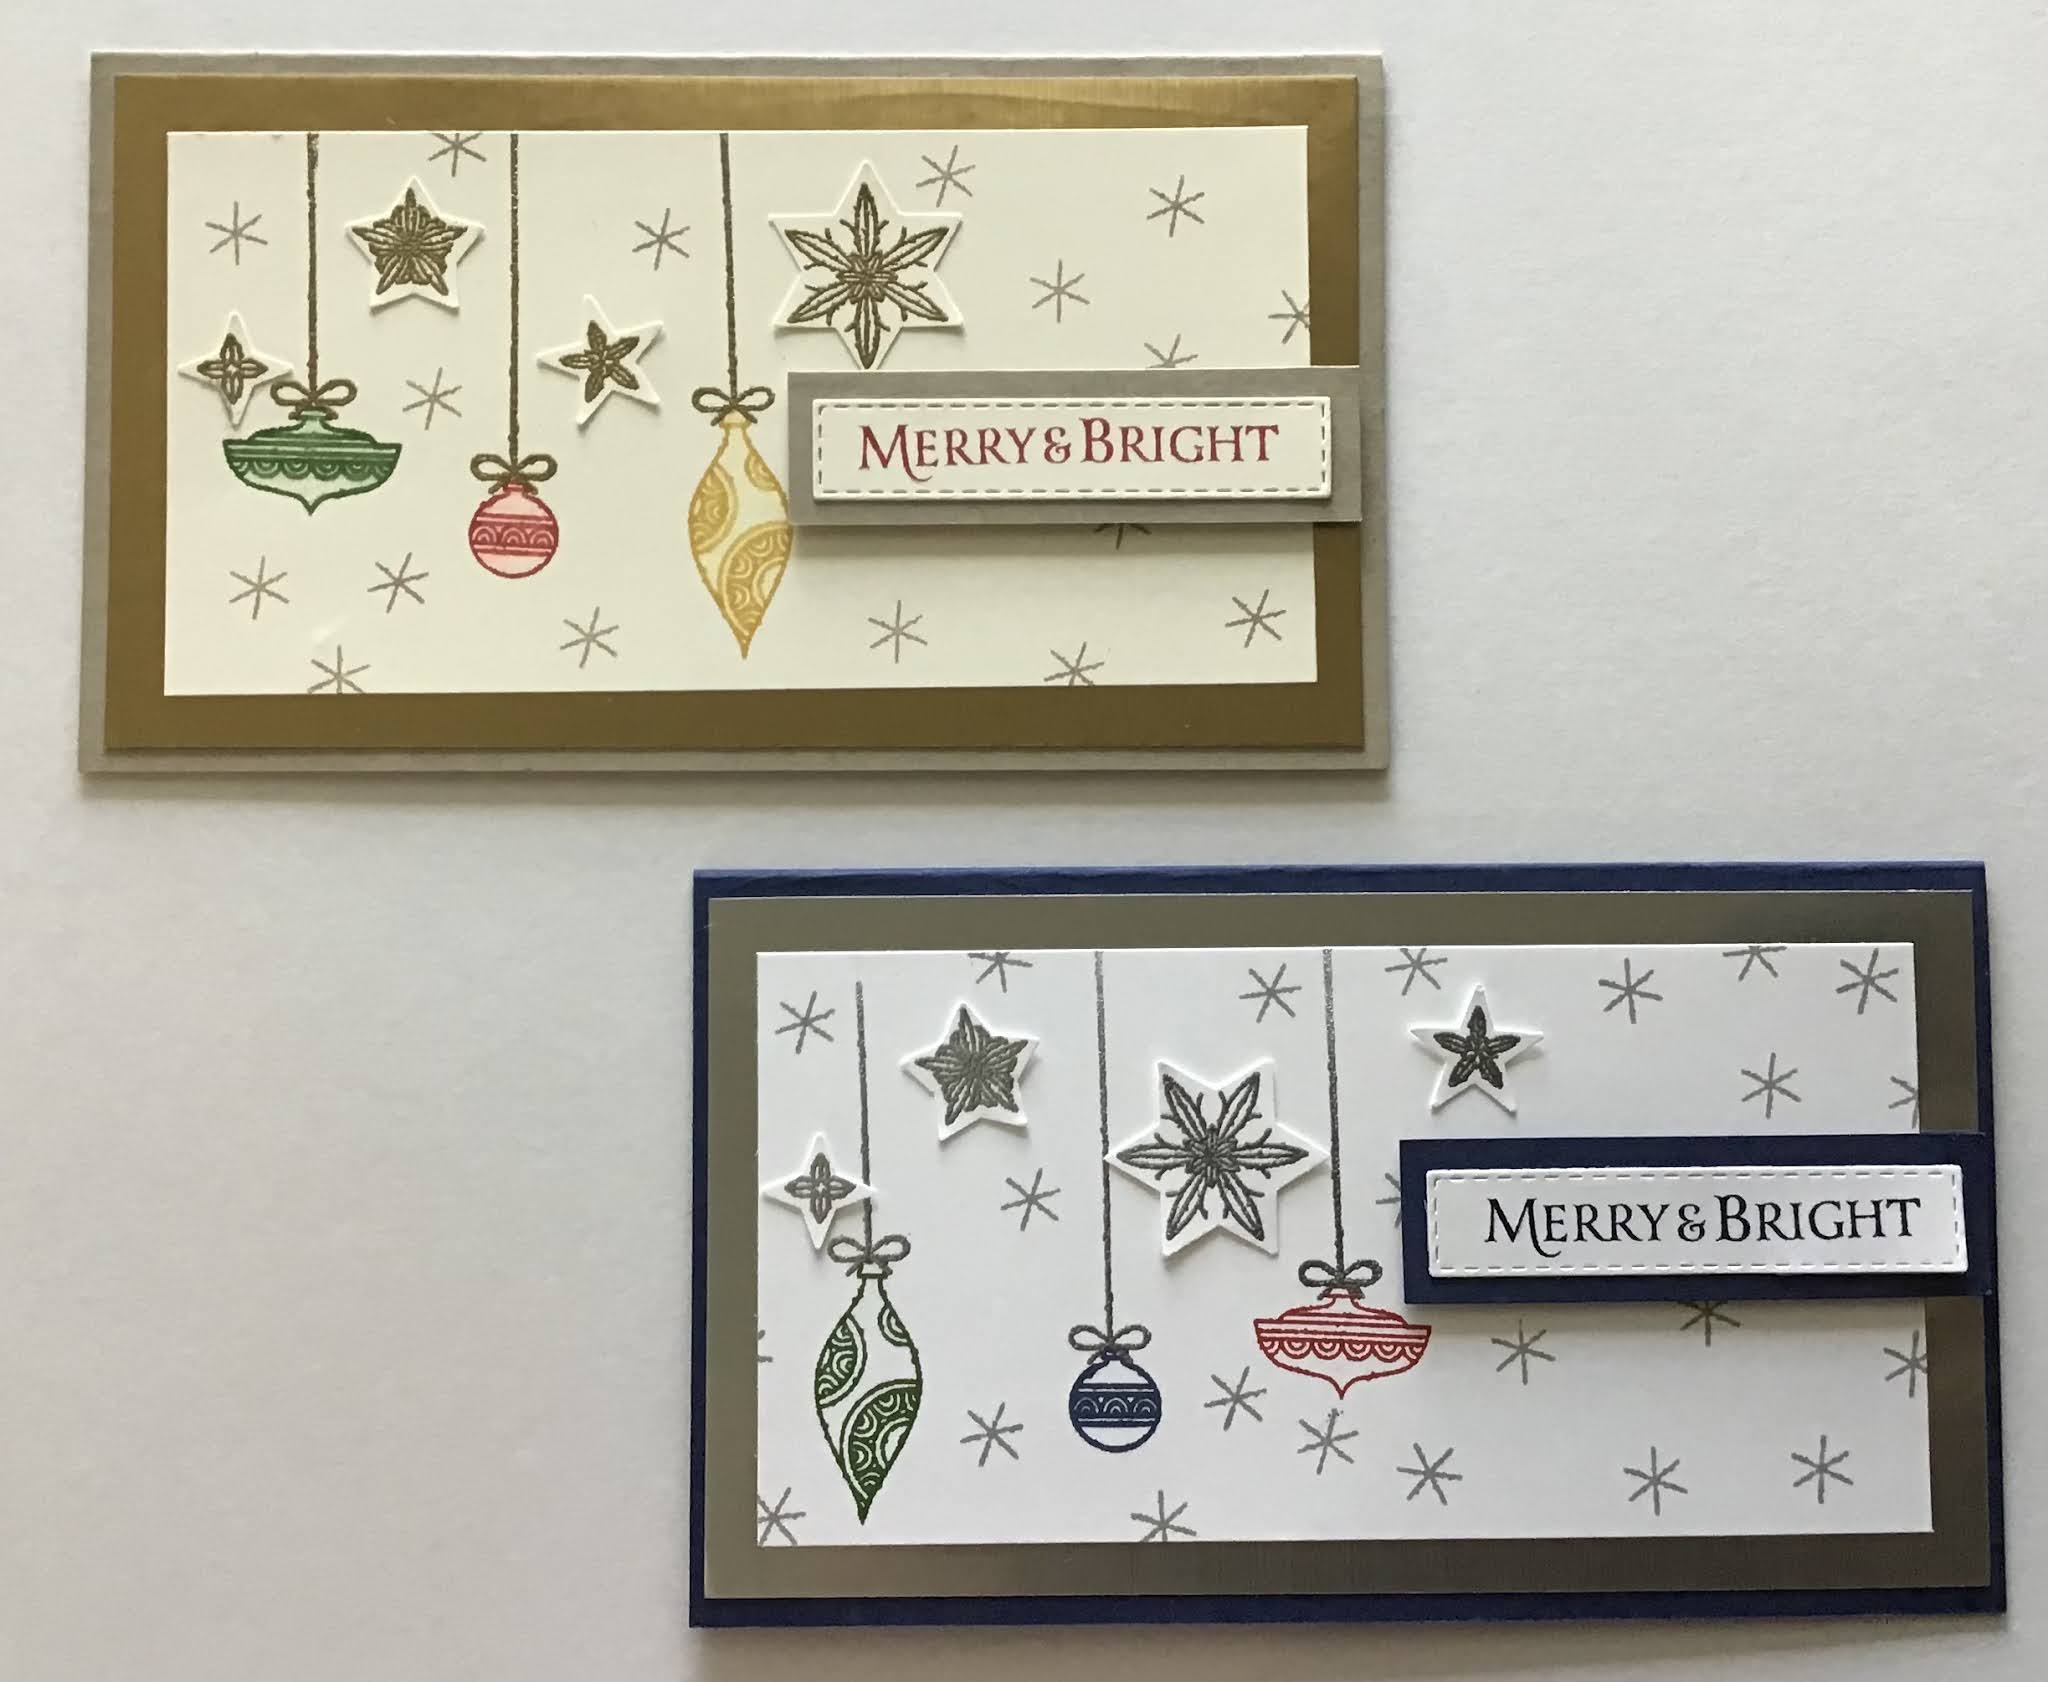

* Crumb Cake card base and a piece to mat the greeting.
* Brushed Metallic Cardstock (gold) for focal panel mat.
* Very Vanilla for focal panel, inside panel, for stamping stars, and greeting.
* Inks - Garden Green, Real Red, Crushed Curry, Crumb Cake, Versa Mark and gold embossing powder.

* Night of Navy card base and piece to mat greeting
* Silver Foil Specialty Paper for focal panel mat.
* Basic White for focal panel, inside panel, for stamping stars, and for greeting.
* Inks - Night of Navy, Real Red, Garden Green, Smoky Slate, Versa Mark and silver embossing powder.

* To ensure perfect alignment of the stars stamped image and the punch mark the top of the stamp with a Sharpie. Watch the video below for more tips on lining up the punch with the stamped images.
* To omit a word from a sentiment stamp, cover the word with washi tape (masking tape, painter’s tape, etc), ink the stamp, remove the tape, and stamp.
* When using foil sheets or metallic cardstock (or any cardstock or DSP) for mats punch or die cut shapes from the center to use on other projects. The focal panel hides the holes in the mat.
* When using gold cardstock or gold embossing on a card use Crumb Cake ink for any stamping on the card. The Crumb Cake ink will appear to be gold. If using silver cardstock or silver embossing powder use Smokey Slate for stamping. The Smoky Slate will appear silver.
STARS ARE SHINING CARDS TIPS VIDEO
That’s all for today. Thanks for checking in for Tinsel Time Tuesday. Until next time…
Stamp Happy!
Kim
All stamps and stamped images ©️1990-2021 Stampin’ Up!®️
No comments:
Post a Comment