Hi Stampers!
For today’s edition of Tinsel Time Tuesday I have a snowflake themed shaker card to share. It is not just a shaker card; it is a double shaker card. I also have two different options for the card - no bow, or add a bow, it’s totally up to you. To create the cards I used the TIME OF GIVING BUNDLE (Time of Giving stamp set and Giving Gifts Dies).
Let’s take a look at the cards:
DOUBLE SHAKER CARD - NO BOW

DOUBLE SHAKER CARD - WITH BOW

TIME OF GIVING

GIVING GIFTS DIES

SUPPLIES NEEDED TO MAKE THE CARD

* Basic White (thick) card base - 11” x 4 1/4” scored and folded at 5 1/2”
* Basic White cardstock - 2 pieces cut at 4 3/4” x 3 1/2” and a scrap for the greeting
* Peaceful Place DSP - snowflake pattern; one piece cut at 4 3/4” x 3 1/2” and one piece cut at 5 1/4” x 4”
* Window sheet cut at 4 3/4”x 3 1/2”

* Giving Gifts Die (snowflake tag) and Stitched Rectangles Die (one that fits greeting)
* Take Your Pick Tool -paper piercing end and brush end -optional, but very helpful with the snowflake tag die.
* Stampin’ Seal + or Tear & Tape (other adhesive of choice), dimensionals
* Subtle Shimmer Sequins (or sequins of choice) and coarse sea salt (optional)
* Metallic Pearls -Silver

* Foam Adhesive Strips
* Smoky Slate ink
* Metallic Mesh Ribbon and glue dots (for bow version)
TO MAKE THE CARD
* Adhere the 5 1/4’ x 4” piece of DSP to the card base.
* Adhere the remaining piece of DSP to one of the 4 3/4” x 3 1/2” pieces of Basic White cardstock.
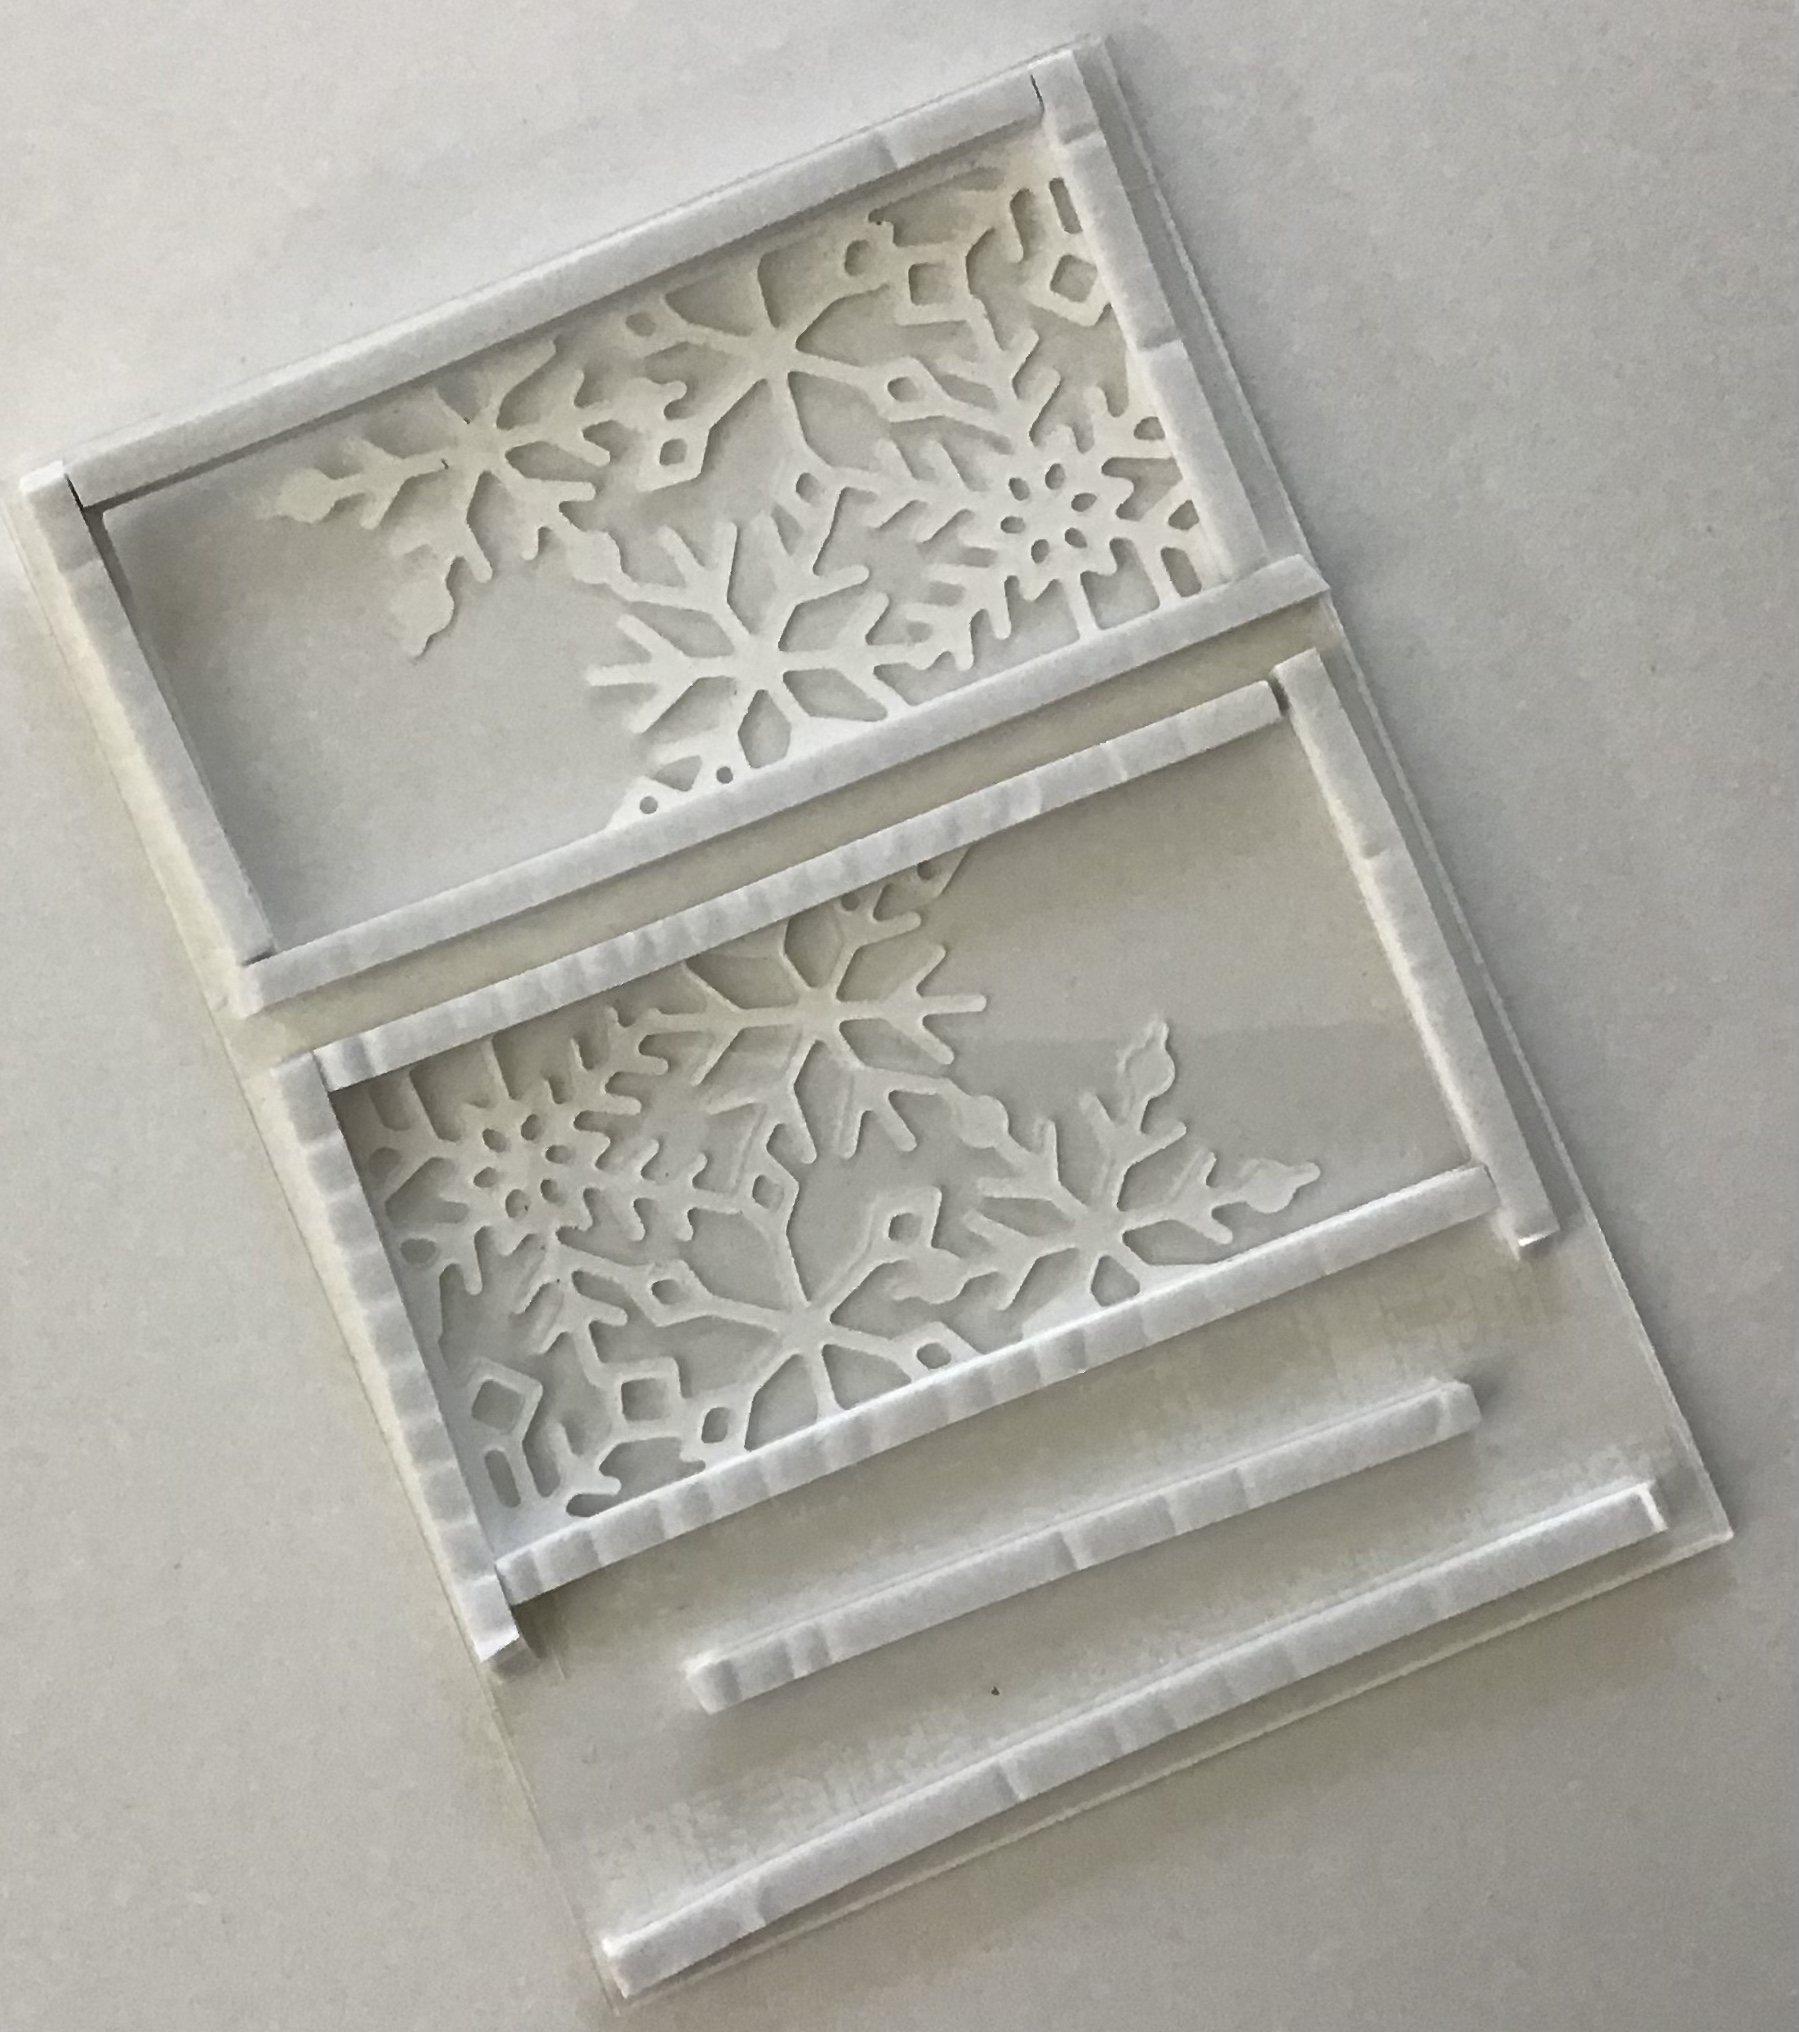
* Die cut the remaining 4 3/4” x 3 1/2” piece of Basic White. Center the snowflake die about 1/4” from the top of the cardstock, and run through the Stampin’ Cut & Emboss or other die cut machine. Use the Take Your Pick tool to remove small die cut pieces from the cardstock and the die.
* Place the cardstock face up on the cutting plate of the die cut machine. Position the die 1/2” to 5/8” below previous die cut out; make sure the snowflake pattern is on the opposite side in comparison to the previous die cut. (Refer to photo below.) Run the cardstock and die through the machine, remove the small bits of cardstock as before.
* Use the snowflake with swirl stamp and Smoky Slate ink to stamp images along the bottom of the cardstock.
- This piece is the focal panel used for the shaker card piece.-
* Stamp the greeting with the Smoky Slate ink on the scrap of Basic White. Die cut it with the Stitched Rectangles Die. Place dimensionals on the back.

* Adhere the window sheet to the back side of the focal piece.
* On the back side of the focal piece use the foam adhesive strips to form boxes around the two die cut areas. These areas will hold the shaker elements (sequins and / or salt). * Add two more strips toward the bottom of the piece. (See photo below.)
* Carefully remove the backing from the adhesive foam strips. Line up the cardstock backed DSP (DSP side facing down) with the focal piece and gently press to adhere into place. The double shaker panel is finished.


* Add the silver metallic pearls to the centers of the die cut snowflakes and the stamped snowflakes, and one on each side of the greeting.
* If you are not adding the bow, the card is finished.

* If you are adding a bow, cut about 20” of the the Metallic Mesh Ribbon. Tie it in a bow so that each loop is about 1 1/2” long and each tail is about 2 - 2 1/4” long. Trim the ends if needed.
* Use glue dots to adhere the bow to the left side of the card even with the greeting.
* The card is finished.


Until next time…
Stamp Happy!
Kim
Do you need a Stampin’ Up! Demonstrator?
All stamps and stamped images ©️1990 - 2021 Stampin’ Up!®️
No comments:
Post a Comment