Hi Stampers!
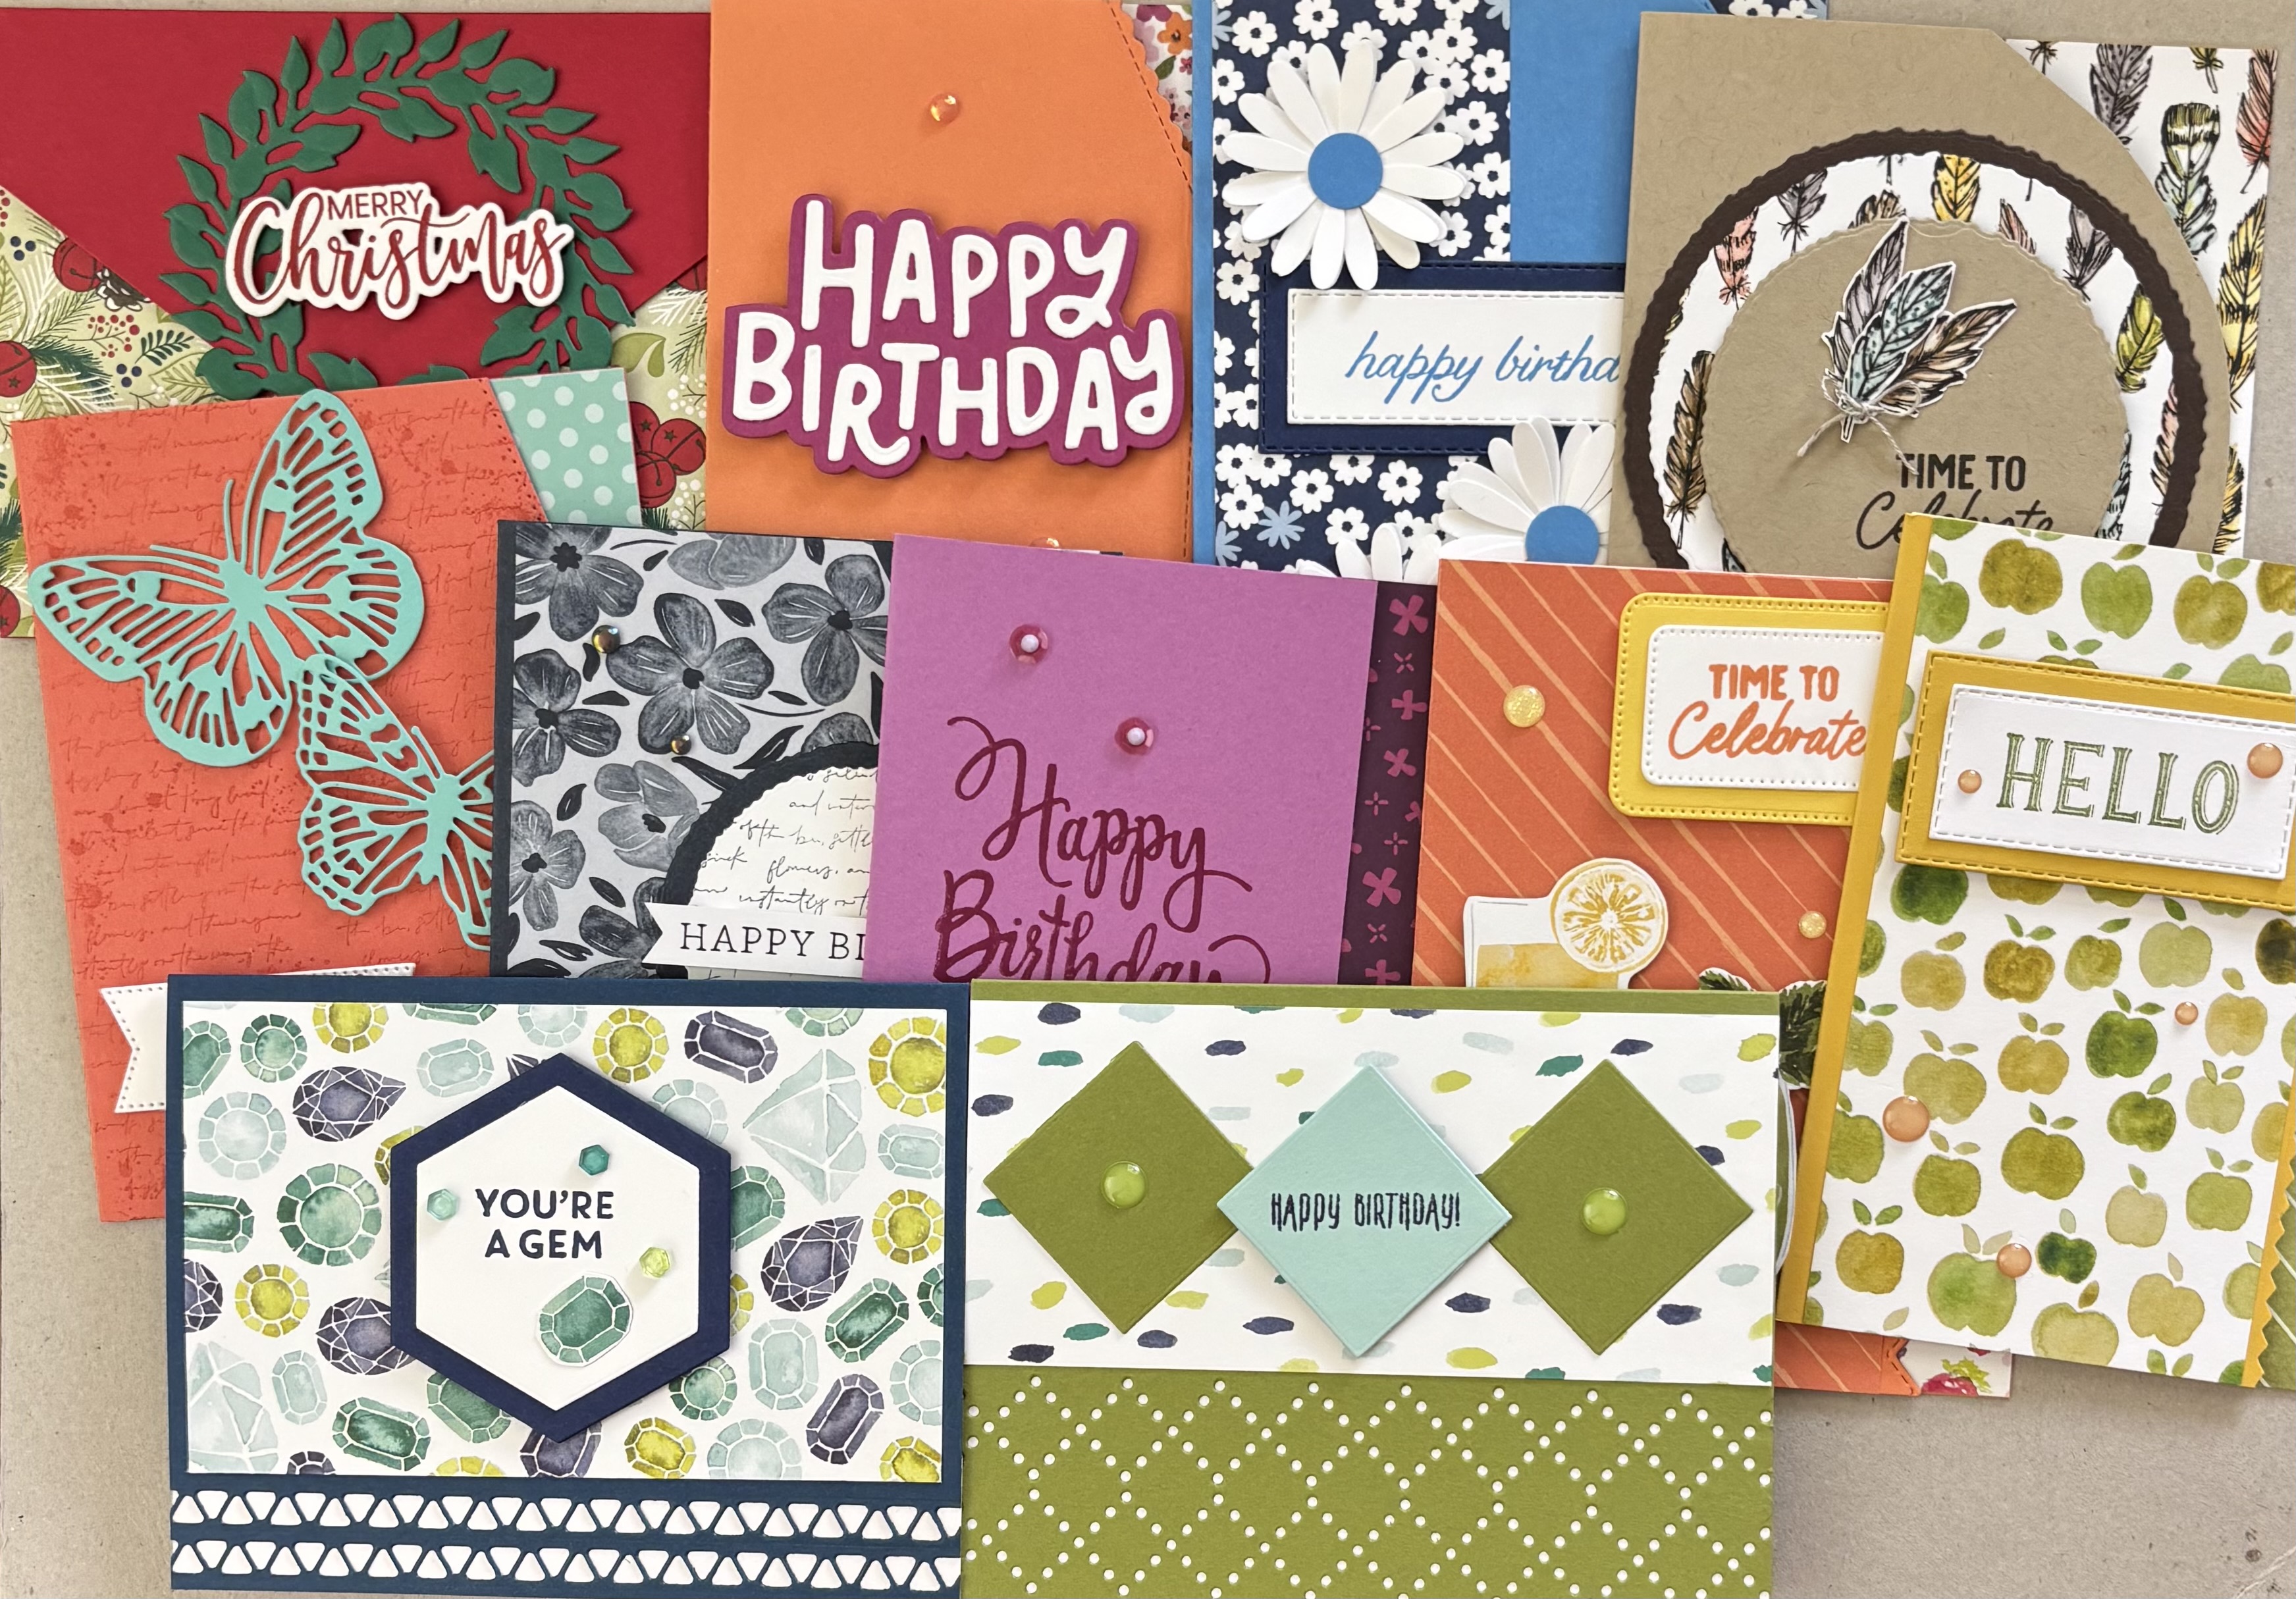
Today we’re looking at cards with atypical edges. There are all kinds of tools to help you cut decorative edges on your card; all manner of dies, decorative edge scissors, and of course - paper trimmers and regular scissors! Creating the edges are easy, but there are a couple of things to keep in mind, such as how much of the edge do you want to cut away - if any. Maybe you just want to use a die that cuts a design into the cardstock, or maybe you want to create your own design with a pencil and scissors. There are so many options, and each and every one one creates a cutting edge card!Let’s take a look at the sample cards:
VIDEO
THE CUTTING EDGE - CREATING DECORATIVE CARD EDGES
USE A PAPER TRIMMER
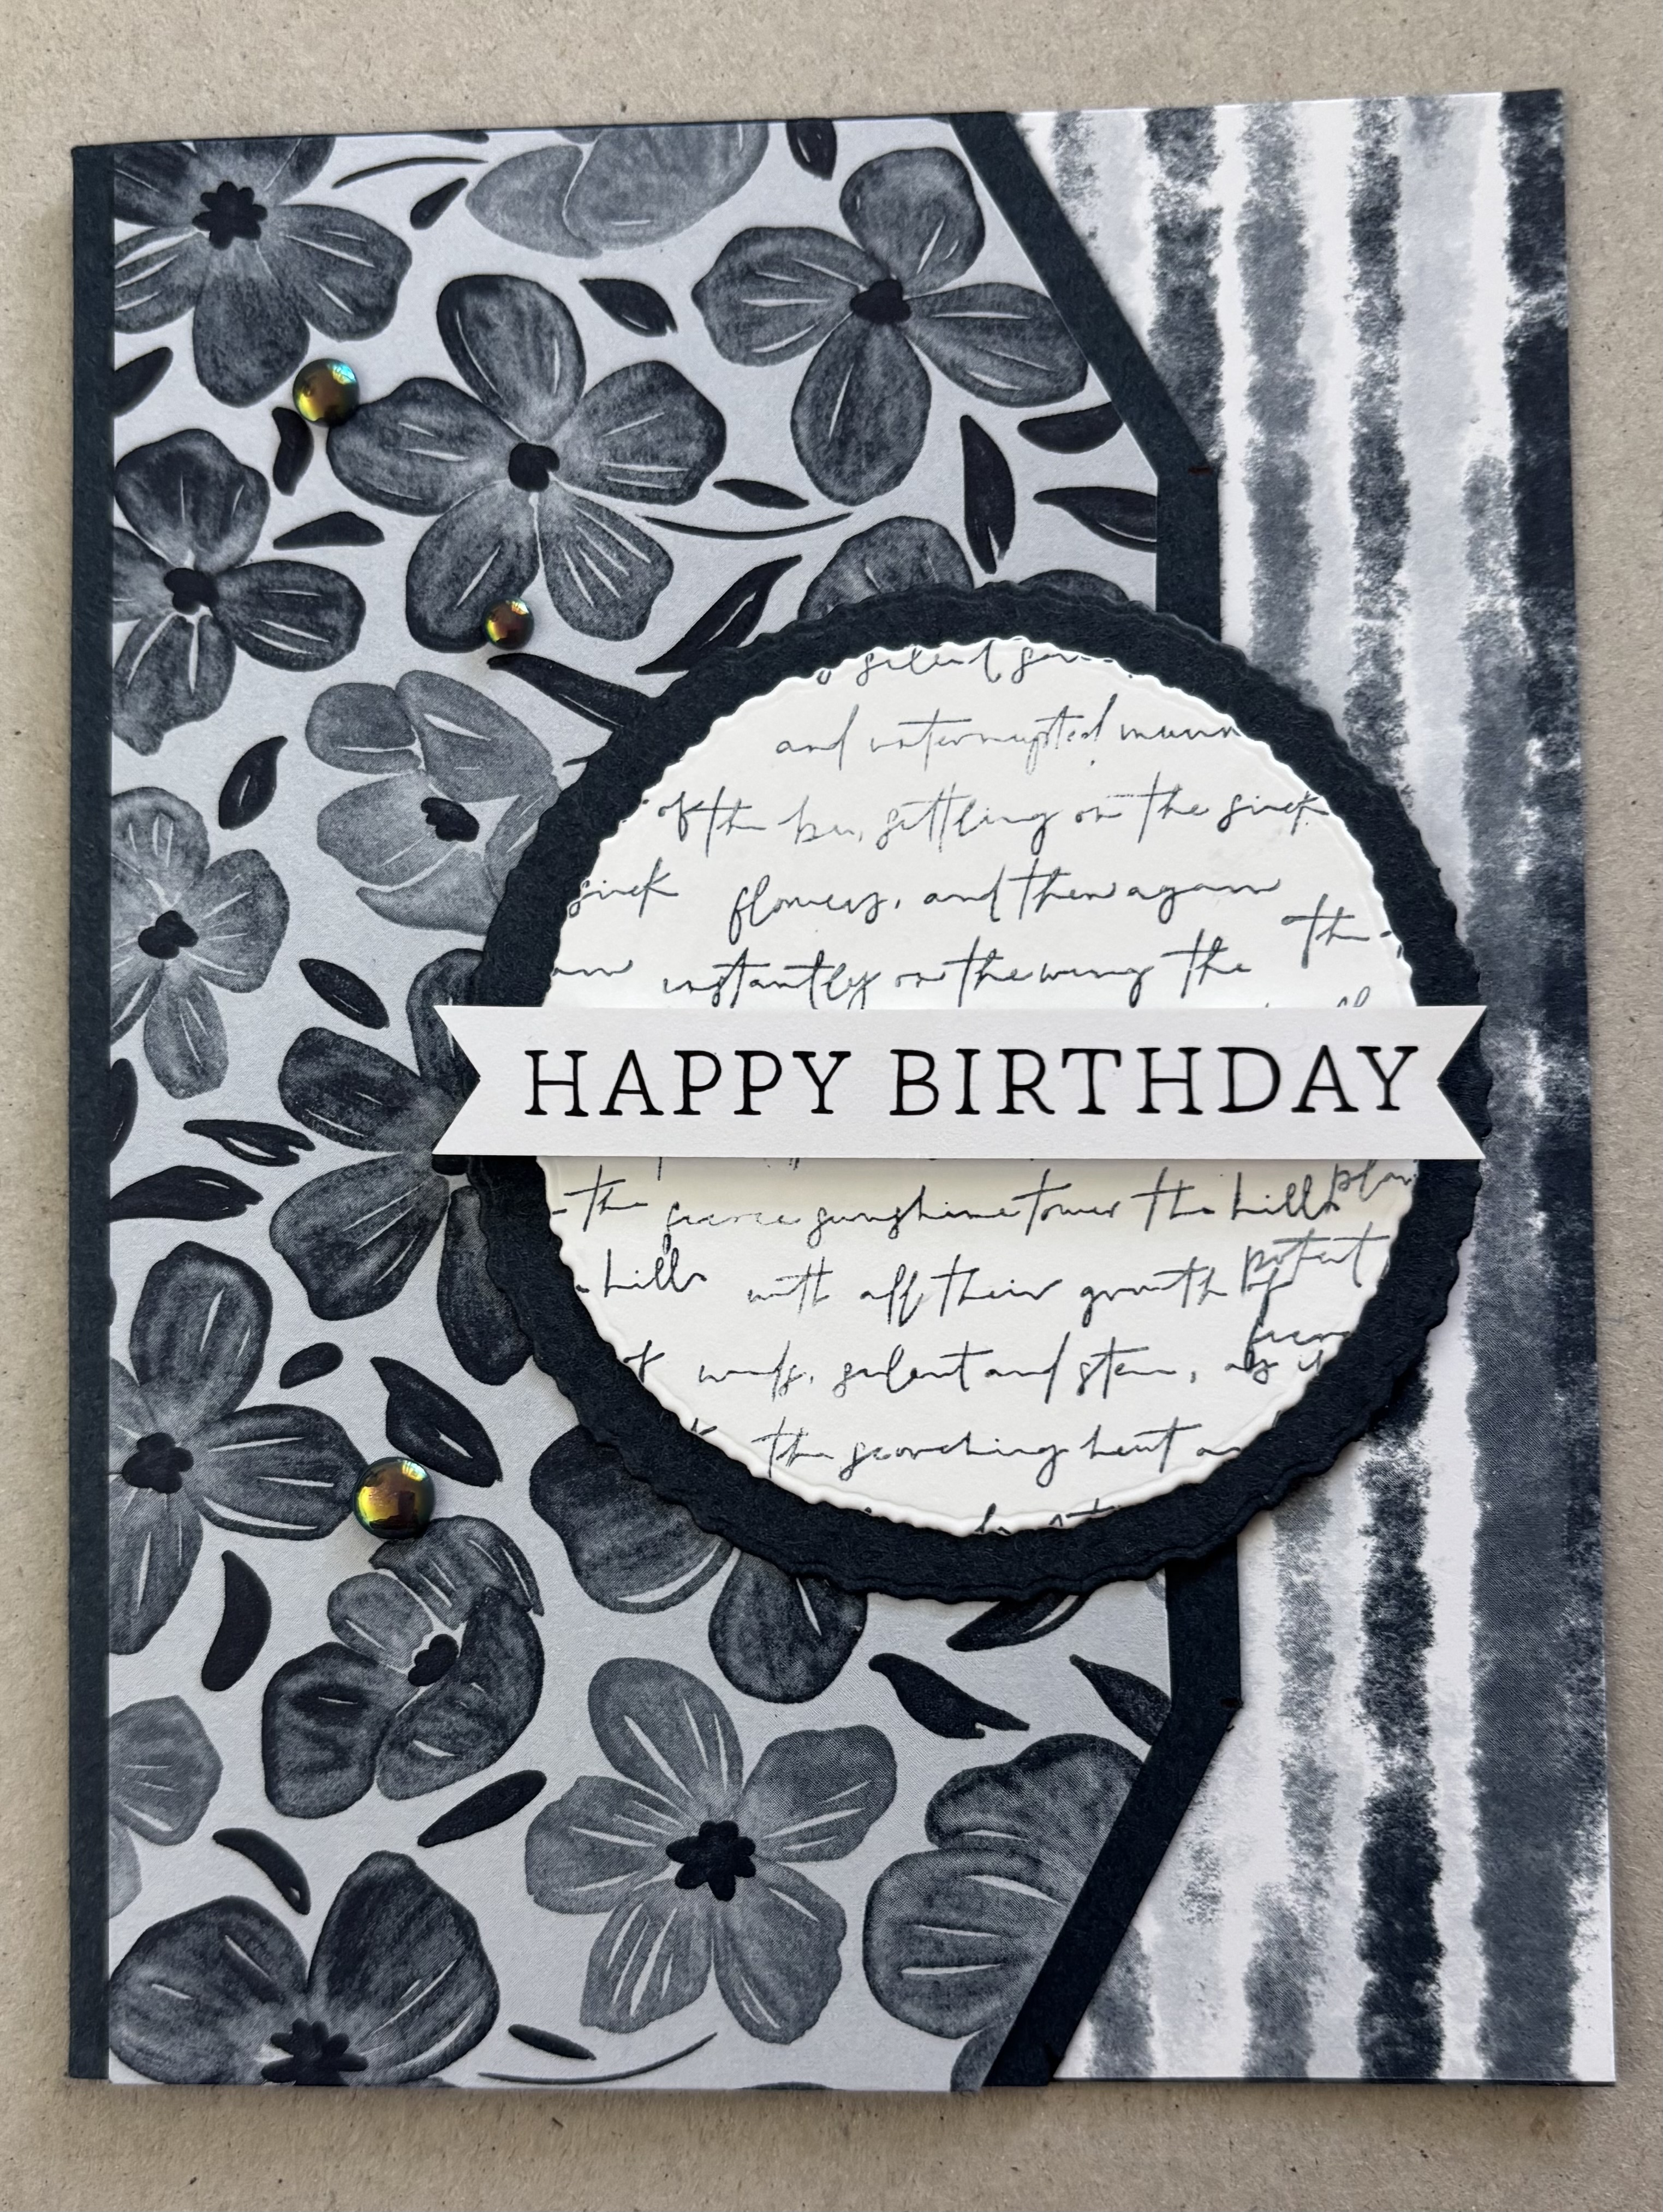
HAPPY BIRTHDAY CARD

This is a super easy edge. The card front is 1” shorter than the back allowing pretty patterned paper layer to be seen.
CREATING THE CARD
* Card Base - cut cardstock at 7 1/2” x 5 1/2” score along 7 1/2” side at 4 1/4” OR cut cardstock at 8 1/2” x 5 1/2”. Score along 8 1/2” side at 4 1/4”, then with 8 1/2” side at top of trimmer, slide to 7 1/2” and cut.
* For the inside of the card cut a strip of patterned paper at 1 1/4” x 5 1/2” and cut white or light colored cardstock at 3” x 5 1/2”. Adher the patterned paper along the outside edge of the card and adher rhe white cardstock next to it.
SUPPLIES I USED
* Card Base - Petunia Pop cardstock
* Patterned Paper - Celabratory Sips
* Ink - Berry Burst
* Stamp - Stylized Birthday, Best Day (both retired)
* Embellishments - Christmas Pines sequins (Buttons Galore), Thistle Rhinestones (Trinity Stamps)
USE DIES THAT CUT A DESIGN

CREATING THE CARD
*For each of the cards above I placed the die along the edge of the cardstock and ran it through the die cut machine. I lined up the die again along the previous cut, and ran it through the due cut machine again.
* I cut a piece of white cardstock the width of the design and adhered it to the backside of the card front. This strengthens the edge of the card base and allows it to stand up.
* I cut the inside panel as usual.
GEM CARD

* Card Base - Night of Navy cardstock
* Other cardstock - Basic White and Night if Navy scraps
* Dies - Stitched Rectangles, Beautiful Shapes (both retired)
* Stamp - Picture Perfect Birthday (retired), Paper Pumpkin
* Ink - Night of Navy
* Patterned Paper - (retired)
* Embellishments - Shades of Green Hexagons
DIAMOND BIRTHDAY

SUPPLIES I USED
* Card Base - Old Olive
* Other Cardstock - Basic White, Pool Party
* Patterned Paper - (retired)
* Stamp - On the ocean (retired)
* Ink - Night of Navy
* Dies - Everyday Details, Layering Squares (both retired)
* Embellishments- Enamel Dots - Simple Stories
USE A DIE OR A TRIMMER

For the butterfly card I used the border die shown in the photo. I use an A-2 card base cut at 8 1/2” x 5 1/2” scored and folded along the 8 1/2 “ side at 4 1/4”. I lined up the die with the center of the cardstock side (2 3/4”) at the edge of the cardstock. I could have positioned the die farther back from the edge, or at a different point along the edge to create different looks.
The card on the right was created using a card base measuring 7 1/2” x 5 1/2” and scored along the 7 1/2” side at 4 1/4”. Along the side edge of the card front I marked the center point (2 3/4”). Along the top edge I measured over 2” and marked it. I repeated the process along the bottom edge. I placed the card base in my trimmer and lined up the center mark with the mark along the top edge and cut. I repeated the process with the center mark and the mark on the bottom edge. This creates a look similar to the die cut card. I could have use a standard A-2 card base and created a fuller card front. Adjust the the placement of the marks along the top and bottoms edges to adjust the slope of your angles.
USE A DIE

SUPPLIES I USED
* Card Base - Calypso Coral cardstock
* Other Cardstock - Coastal Cabana, Basic White
* Ink Calypso Coral
* Patterned Paper - Coastal Cabana (retired)
* Stamps - Elements of Text, Birthday Wishes (Waffle Flower)
* Dies - Nested Essentials, Beautiful Butterflies (retired), Basic Border Dies (retired)
USE A TRIMMER FOR A SIMILAR LOOK

This card has a secret! It is actually a gift card holder. This is demonstrated in the video.
* Card Base - Real Red cardstock -
* Other Cardstock - Shaded Spruce, Basic White
* Patterned Paper - (retired)
* Ink - Real Red
* Dies - All Around Wreath (retired)
* Stamps - Essential Sentiments and dies (Waffle Flower)
* Pencils, ruler, paper trimmer
USING A DIE OR A TRIMMER II

For the card on the left I used the die shown to cut the edge. I started with a card base that measured 7 1/2” x 5 1/2” and scored on the 7 1/2” side at 4 1/2”. I centered the die along the edge of the card front , and you see the result.
To achieve a similar look without a die, cut and score your card base as stated above. On the cut edge of the card front measure 1” from the top toward the center of the edge, and mark. Now measure from the card edge over 1/2” and mark it. Do this at the top and bottom of the card. In a trimmer line up one set of the two marks and trim. Now repeat on the other end. The result is a similar look of the die cut without a die.
USING A DIE

SUPPLIES I USED
* Card Base - Timid Tiger cardstock
* Other Cardstock - Berry Burst, Basic White
* Patterned Paper - Celebratory Sips
* Dies - Fun Happy Birthday (Scrapbook.com), Basic Border Dies (retired)
* Stamps - Round We Go - inside card
* Ink - Timid Tiger - inside card
* Embellishments - 2025-2027 In Color Flat Pearls
USING THE TRIMMER FOR A SIMILAR LOOK
SUPPLIES I USED
* Card Base - Secret Sea cardstock
* Other Cardstock - Basic White
* Patterned Paper - 2025-2027 In Color Designer Series Paper - Secret Sea
* Stamps - Elements of Text, Round We Go
* Ink - Secret Sea
* Dies - Deckled Circles
* Pencil, ruler, paper trimmer
* Embellishments - 2025-2027 In Color Flat Pearls
USE A DIE OR USE DECORATIVE SCISSORS

For both cards shown above, I used a regular A-2 card base cut at 8 1/2” x 5 1/2” scored at 4 1/4”. With a pencil and ruler I marked a line from top to bottom of the card at the 1” mark. I lined up the edge of the die with the mark, and cut.
To get a similar look without a die, I dragged out my decorative scissors! And yes, I literally had to dust them off. They were in a cute bucket way up on a shelf serving as a colorful decorative item. I chose the pinking edge to mimic the die I used. It created an edge with a smaller zig zag than the die, but it is still a similar look. I used the pencil and ruler as I did for the first card. I cut just above the line, then erased the line.
As for the decorative scissors, I think I will sit the bucket of them on the desk my granddaughter uses when she comes to craft.
USING A DIE

SUPPLIES I USED
* Card Base - Timid Tiger Cardstock
* Other Cardstock - Basic White, Daffodil Delight
* Patterned Paper - Celebratory Sips
* Ink - Timid Tiger
* Dies - Basic Border Dies (retired), Nested Essentials
* Embellushments - Glitter Dots (Simple Stories)
USING DECORATIVE SCISSORS FOR A SIMILAR LOOK

* Card Base - Crushed Curry cardstocl
* Other Cardstock - Basic White
* Patterned Paper - (retired)
* Stamps - Hello Harvest (retired), Harvest Blessings (retired)
* Ink - Old Olive
* Dies - Stitched Rectangles (retired)
* Embellishments - Enamel Dots (Simply Stories)
* Decorative Scissors - Pinking edge (Fiskars)
USING A DIE OR SCISSORS AND A TEMPLATE FOR A SIMILAR LOOK

For these cards I wanted a bit of an arced edge and I had a die for that. To get a similar look I thought a template would work, so a lid (to a package of Frog Tape) became my template! Just find something round to trace around - the catch - it has to reach across the card front. If you have some larger circle dies one of those might work. A saucer might work too. Just decide how far over you want to cut the edge at the top and bottom. Measure and mark. Line up your “template” along the edge of the card front. Move the template until you have it where you can trace the edge of the circle from one of the marked lines along the edge, then to the next mark. Use scissors to cut along the drawn line. The look is similar to the die cut edge.
USING THE DIE

SUPPLIES I USED
* Card Base - Azure Afternoon cardstock
* Other Cardstock - Basic White, Night of Navy
* Patterned Paper - (retired)
* Stamp - Birthday Blossoms (retired)
* Ink - Azure Afternoon
* Dies - Stitched Rectangles (retired), Basic Border Dies (retired)
* Punch - Medium Daisy (retired)
USING SCISSORS AND A TEMPLATE FOR A SIMILAR LOOK

SUPPLIES I USED
* Card Base - Crumb Cake cardstock
* Other Cardstock - Basic White, Early Espresso
* Ink - Early Espresso
* Patterned Paper - (retired)
* Dies - Deckled Circles
* “Template”, scissors
* Embellishment - Linen Thread
THE CUTTING EDGE CARDS

Cutting the edge is an easy way to add a little pizzazz to handmade cards. I hope you give it a try.
Until next time . . .
Stamp Happy!
Kim
I am not affiliated with, nor do I receive compensation from any manufacturer, company, or other entity.
I use mostly Stampin’ Up! products, many of which are retired. Products used from other companies are noted as such. Supplies are listed for reference purposes only. I encourage you to take ideas offered and use supplies you have on hand to create your own versions of the cards.
No comments:
Post a Comment