A few days ago my sister texted and informed me Christmas is100 days away. I felt a wave of panic pass through my body! There is a lot to do between now and December 25th! My Christmas card stash is growing, and I am on track to have plenty of cards by 1 December. I have made a list of possible gifts, but of course I have done no shopping. I do need to do a bit of shopping soon as my son and his family live overseas. I have made some tags, but not nearly enough. So… I decided I still have a few days before I need to get serious about gifts, and decided to design some tags, and share them with you.
I used dies and punches for the images on all the tags. For all the tag bases I used two dies from the TAILOR MADE TAGS (Stampin’ Up!®️ 2021-2022 Annual Catalog). For these tags I also used a bit more of my specialty papers, gems / embellishments, ribbon, and the tag bases were all cut from cardstock I had precut for card bases. Let’s take a look at the tags:
LET IT SNOW TAG
FRONT & BACK OF TAG
SUPPLIES FOR THIS TAG
* Snowman Season stamp set.
* Pool Party cardstock 8 1/2” x 5 1/2” for tag bases.
* Basic White cardstock about 5” x 2” to die cut two 1 5/8” diameter circles.
* Pumpkin Pie cardstock about 1 1/2” x 2” to die cut one 1 1/8” diameter circle.
* Dies shown in the photo below - tag die and the coordinating die that cuts the reenforcement piece, two dies from the Layering Circles Dies 1 5/8” diameter and 1 1/8” diameter. (You can also use circle punches - 1 1/2” and 1” will work just fine.)
NOTE - The photo below shows how I cut 4 tag bases and the reenforcement pieces from 1/2 sheet of cardstock (8 1/2” x 5 1/2”). The reenforcement die cuts three images. I used two on each tag, one on each side of the hole in the tag. I ran the die through the machine 3 times for enough reinforcements for four tag.
* Inks - Pool Party, Real Red; Wink of Stella; Black Stampin’ Write Marker; Flirty Flamingo (light) Stampin’ Blend, and Stampin’ Blends Color Lifter.
* Ribbon - White Organdy Glittered Ribbon and/ or Pool Party Striped Grosgrain Ribbon - about 6-7 inches per tag.
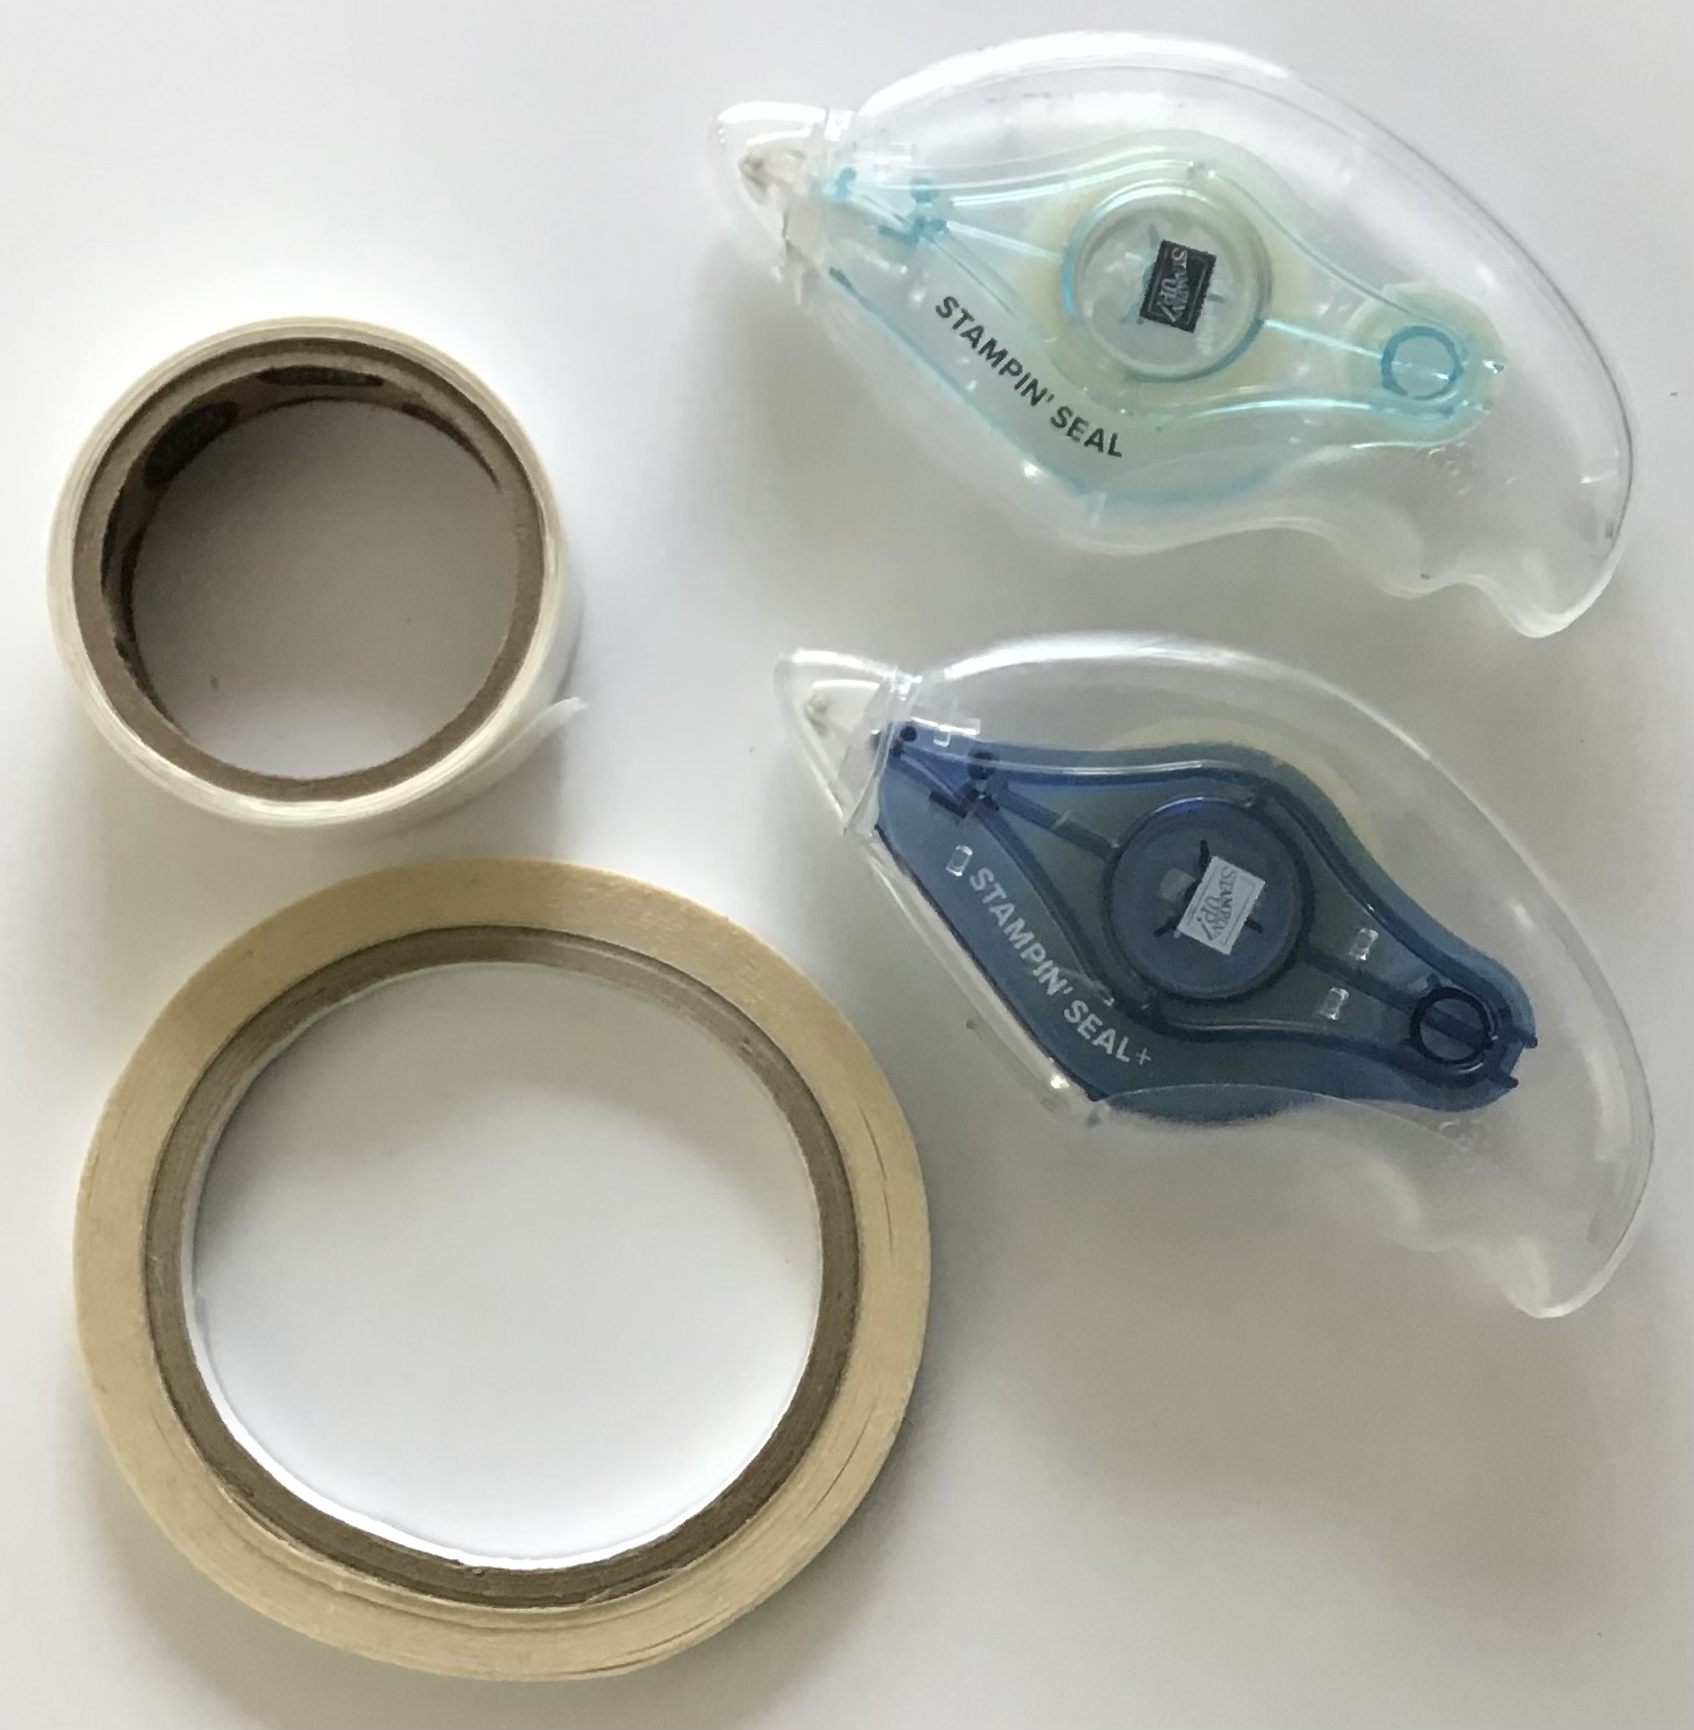
* Adhesive of choice (for me the liquid glue worked best for this project), and glue dots.
ASSEMBLY
* Do all the die cutting.
* Cut each of the two Basic White circles in half for snowman heads.
* Cut the Pumpkin Pie circle in half then cut four wedges for snowman carrot noses from one of the halves.
* Use a glue dot to attach the carrot noses to the center top of the snowman head. Use the Basic Black marker to create the snowman’s mouth. Use the Flirty Flamingo (light) Stampin’ Blend to add cheeks. Go over the cheeks with the Color Lifter.
* Use a snowflake stamp and Pool Party ink to add a snowflake background to the tag - on both sides of the tag. (I used the image from the Penguin Place on my tags, but you can use the one in the Snowman Season set, or any one you have.)
* Use the Real Red ink to stamp the greeting (Let It Snow) on the front side of the tag, and to stamp the “to/from” on the reverse side.
* Adhere the snowman face to the bottom of the tag along the die cut stitching line.
* Go over the snowman’s face and nose with Wink of Stella.
* Use liquid glue to add the reenforcement pieces to the top of the card on the front and back. (You can skip this if you like, but the die cut piece makes the tag look more finished and it reenforcement the hole keeping the ribbon from tearing the tag.)
* Fold the ribbon in half, then fold it in half again, and thread it through the die cut hole, pull the two ends through the ribbon’s loop, and pull. Trim ends.
PINE TREE TAG
FRONT & BACK OF TAG
SUPPLIES FOR THIS TAG
* Stamp sets - Penguin Place and Banner Year.
* Pine Tree Punch
* Scraps of DSP- pattern(s) of choice. I used patterns from 2021-23 In Color 6” x 6” DSP Assortment in Soft Succulent and Tidings of Christmas - Pine Cone, Holly, and Greenery pattern in Soft Succulent.
* For these tags I used one of the Basic White card bases from my stash. This piece is cut at 11” x 4 1/4”. As you can see from the photo below, I was able to cut 5 tags from this orientation. I needed10 of the reenforcements. I was able to cut nine from one end of the cardstock, the positioned the die cut just one of the items from the cardstock by positioning the die along the edge.
* Ink - Real Red
* Embellishments - In Color Sheer Ribbon in Soft Succulent, gems, pearls, rhinestones of choice, 3 per tag. (I used a variety - all are found in the Annual Catalog - Metallic Pearls in silver, Holiday Rhinestones - Coastal Cabana, Genial Gems - Mint Macaron, Blue Adhesive Backed Gems, and 2021-2023 In Color Jewels in Soft Succulent.)
* Adhesive of choice.
ASSEMBLY
* Die cut the tags and the reenforcements; punch out the trees.
* Stamp the greeting on the front of the tag near the top with Real Red ink, and stamp the To/From (Banner Year) on the backside of the tag.
* Adhere the trees to the tags. Adhere the reenforcements to the tag.
* Add the ribbon just as for the snowman tag.
* Add 3 gems to each tag.
PENGUIN TAG
FRONT AND BACK OF TAG
SUPPLIES FOR THIS TAG
* Penguin Place Bundle - Penguin Place stamp set and Penguin Builder Punch
* For Unto Us stamp set.
* Balmy Blue cardstock for tag bases cut at 8 1/2” x 5 1/2”.
* Scraps of Basic Black, Basic White, and Mango Melody.
NOTE - this card base from my stash had been scored and folded. I could not die cut it the same way I did for the snowman tag as the score line would have run through one of the tag bases. I was still able to get four tags from the cardstock as you can see in the photo below.
* Specialty Papers - Black Glimmer Paper, Rainbow Glimmer Paper (Annual Catalog) - you will need the area that is green, blue, purple, and a small piece that is the darker yellow-orange color, Snowy White Velvet paper. (You will need small scraps of these for each tag.)
* Inks - Balmy Blue, Night of Navy, Mango Melody, Memento Tuxedo Black; Wink of Stella and White Stampin’ Chalk Marker.
* Other - Basic Borders Dies - the one that sort of looks like clouds or bubbles; White Glittered Organdy Ribbon, Simply Elegant Trim - silver - 6 or so inches of each.
* Liquid adhesive (this worked best for me), glue dots, and dimensionals.
ASSEMBLY
* Die cut the tag pieces and die cut two each, 1 3/4” square pieces of the Velvet paper and the Rainbow shimmer paper (green/blue/purple) along the top edge with the border die. ( I angled the die just a little bit.)
* Punch out the penguins - 2 penguins Basic Black, Basic Whire, and Mango Melody, and 2 penguins with Black Glimmer paper, Basic White cardstock, and the dark yellow/ orange portion of the Rainbow Glimmer paper.
* Use Balmy Blue ink and stamp the snowflake images on the front of the tag. Stamp the greeting (from For Unto Us) with Night of Navy. Stamp the To/From on the back of the tag.
* On the Basic White layer of the penguins use the Memento Tuxedo Black ink to stamp the eyes, and Mango Melody to stamp the Beal. Use the chalk marker and add a little dot to the eyes to add a bit of personality to the penguin .
* Assemble the penguins and place dimensionals on the back.
* Adhere the Rainbow Glimmer paper or the velvet paper to the tag along the bottom of the tag just above the stitching.
* Add the reenforcement pieces as for previous tags.
Add the penguin.
* Add the ribbon or trim as for the previous tags. (I used the glittered ribbon for the tags on which I used glimmer papers and the Simply Elegant trim with the other design.)
With each step written out it seems like these tags take forever to make, but they don’t. It took me just under an hour to make these tags. The Tailor Made Tags Dies made it so easy to create the tags. There is another tag design, and several tag sizes included in the set of dies. I almost passed on purchasing them. I am so glad I changed my mind!
HOLIDAY TAG TIPS VIDEO
That is all for the edition of Tinsel Time Tuesday. Be sure to check in next Tuesday when we will be hanging our stockings with flair! Until next time…
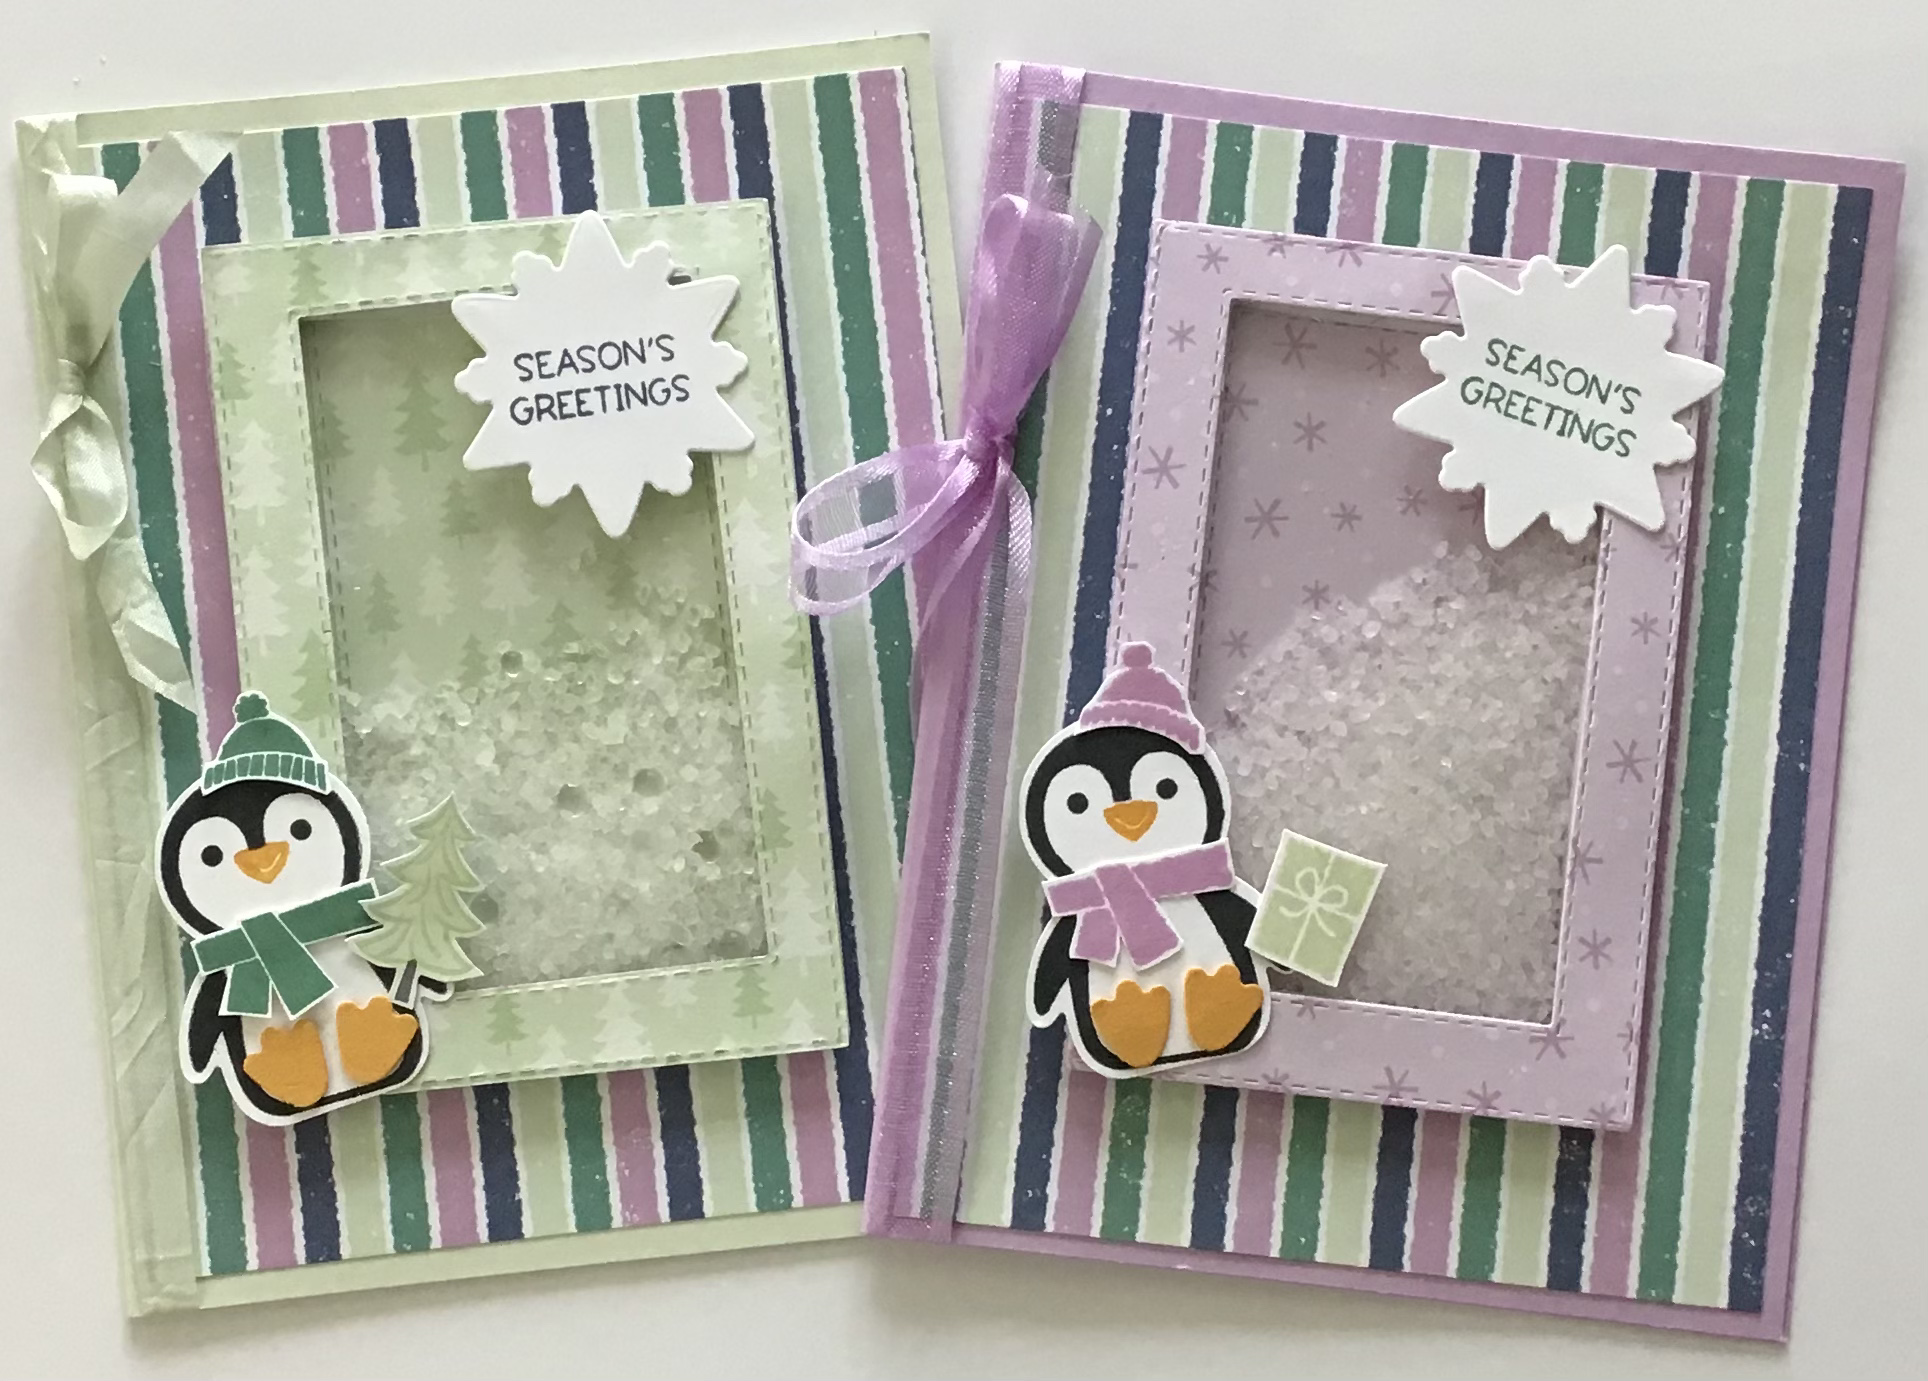
Welcome to week three of TINSEL TIME TUESDAY. Today’s card features the PENGUIN PLACE BUNDLE (Stampin’ Up!®️ July-December 2021 Mini Catalog), and PENGUIN PLAYMATES DSP - free with a $50 Stampin’ Up! Product purchase during SALEA-BRATION (now through 30 September).
When I first saw this bundle I immediately thought “shaker card.” I was so excited to see the SUBTLE SHIMMER SEQUINS in the mini catalog, because they would be perfect for the shaker card idea I had floating around inside my head. Well, the other day I realized I had not ordered the sequins! What to do? What to do? I needed something to put inside my shaker card; something that resembled snow. Where I live we are right in the middle of canning season, and I have been very busy canning all matter of tomato products. All the recipes require canning/pickling salt, and using all that canning salt lead me to consider salt for snow in my shaker card - specifically coarse sea salt! The crystals are the perfect size and the salt has a natural shimmer and shine. Here is a look at the shaker card:
And here is the stamp set:
SUPPLIES FOR THIS CARD:
* Penguin Place Bundle (stamp set and Penguin Builder Punch)
* Paper Snips (scissors)
* Stitched Snowflakes Dies
* Stitched Rectangles Dies - one that measures 2 3/4” x 4” (cuts a rectangle that measures 2 5/8” x 3 8/8”), and the die two sizes smaller
* Soft Sea Foam card base and scrap of Soft Sea Foam cardstock die cut with the largest of the two Stitched Rectangle Dies
* Striped patterned DSP cut at 5 1/4” x 4”, the tree patterned DSP die cut with both of the Stitched Rectangle Dies to make a frame - you will need the center of the frame as well, and a scrap of DSP containing the tree image
* Scraps of Mango Melody and Basic White
* Basic White cardstock cut at 5 1/4” x 4” for the inside of the card
* Window Sheet cut at 3 7/8” x 2 5/8”
* Inks - Mango Melody, Just Jade, Soft Sea Foam, Misty Moonlight, Memento Tuxedo Black, Early Espresso Stampin’ Write Marker, and Soft Sea Foam Stampin’ Blend (dark)
* About 22” of white crinkled seam binding ribbon that will be dyed with the Stampin’ Blend marker
* Foam Adhesive Strips
* Coarse sea salt
* Stampin’Seal or adhesive of choice
* Glue Dots
* Strong Adhesive such as Tear & Tape or Stampin’ Seal+
ASSEMBLY
*Stamp the penguin image with Tuxedo Black ink, stamp the beak with Mango Melody, use the Just Jade ink to stamp the hat and scarf
* Die cut the snowflake shape and stamp the greeting with Misty Moonlight
* Punch out the penguin and punch out two penguin feet from the Mango Melody cardstock scrap.
* Fussy cut the hat and scarf.
* Fussy cut the tree image from the DSP
* Place the frame on top of the Soft Sea Foam die cut rectangle. Use it as a guide to adhere the center piece cut from the frame to the cardstock. Put adhesive on the back of the frame and attach the window sheet.
* This what you should have; the frame with a window sheet and cardstock with the DSP in the center
* Place 1/2” to 1” teaspoon of the sea salt in the center of the DSP adhere to the cardstock. If you have some sequins or small clear or white gems, you can add a few of them as well.
* This is what you should have at this point.
*Place the frame on top of the cardstock and salt. Press along the frame to make sure the adhesive strips make good contact with the cardstock
* Adhere the striped DSP to the card base
* Put Stampin’ Seal+ or Tear & Tape on the back side of the shaker box, and adhere to the center of the card
* Assemble the penguin - I used glue dots to adhere the feet, hat, scarf, and tree to the penguin
* Use adhesive of choice to adhere the penguin and the “snowflake greeting” to the card
* On the 5 1/4” x 4” stamp the sentiment in Misty Moonlight
* Ink the tree stamp with Soft Sea Foam, use the Early Espresso Stampin’ Write Marker and ink the tree trunk
* Stamp two trees, one on each side of the sentiment.
* Adhere this piece to the inside of the card
* Use the Soft Sea Foam Stampin’ Blend (dark) to dye the white Crinkled Seam binding Ribbon
* Wrap the ribbon around the card and tie in a bow to finish the card
Here is the card and a version using Fresh Freesia instead of Soft Sea Foam. The Fresh Freesia version’s shaker element is just the salt. The greeting is stamped with Just Jade.
OTHER SHAKER ELEMENTS OPTIONS
* If you have course Kosher salt, it is a good replacement for the sea salt
* The SUBTLE SHIMMER SEQUINS would look great - remember to order them!
* FROM MY HEART FACETED GEMS (Annual Catalog) - white ones
* SEQUINS FOR EVERYTHING (Annual Catalog) - some of the metallic ones
* Seed Beads
* Glitter
For this version of the card I used some random sequins and gems. I substituted white Baker’s twine for the ribbon, and used a different sentiment.
I hope you will give this “salt shaker” card a try! Join me next week when Tinsel Time Tuesday features the STARS ARE SHINING BUNDLE.
Today’s card uses products from the Stampin’ Up!®️ 2021-2022 Annual Catalog, the July- December Mini Catalog (premiering 3 August), and the Sale-A-Bration brochure (3 August - 30 September 2021). Here is a look at the card:
I used the STITCHED WITH WHIMSY DIES for the focal panel, the PENGUIN PLACE BUNDLE for the balloon, gifts, and greeting, and the PENGUIN PLAYMATES DSP for the penguin image and the background DSP.
PENGUIN PLACE STAMP SET & PENGUIN BUILDER PUNCH
(STAMPIN’ UP! JULY-DECEMBER 2021 MINI CATALOG)
This stamp set is not just for Christmas! It includes sentiments for birthday celebrations, thank you cards, friendship, and of course Christmas!
PENGUIN PLAYMATES DSP
(SALE-A-BRATION BROCHURE)
This DSP will only be available during Sale-A-Bration (3 August - 30 September).
STITCHED WITH WHIMSY DIES
(STAMPIN’ UP! 2021-2022 ANNUAL CATALOG)
The STITCHED WITH WHIMSY DIES do not cut out an image; they emboss and leave stitching.
Here is the DSP design I used to punch out the penguin.
SUPPLIES FOR THIS CARD:
* Basic White card base 11” x 4 1/4” scored and folded at 5 1/2”
* Basic White cardstock cut at 2 3/4” square, and a scrap piece for the balloon, gifts, and penguin punch out.
* Center the 2 1/2” square die on the 2 3/4” square of Basic White and run it through your die cutting machine.
* Punch out a penguin shape from the scrap of Basic White cardstock and punch out one of the penguin images from he DSP.
* On the Basic White scrap of cardstock stamp four of the package images (2 in Poppy Parade and 2 in Misty Moonlight).
* Use the blending brush to add a bit of Misty Moonlight to the BP center of the focal panel.
* Stamp the balloon string on the focal panel using Memento Tuxedo Black ink.
* Stamp the greeting in the upper right corner of the focal panel using Misty Moonlight ink.
* Adhere the DSP to the card base, then adhere the focal panel to the DSP.
* Fussy cut the balloon, and adhere it to the card at the top of the stamped balloon string.
* Punch out a penguin from the DSP and adhere it to the Basic White punched out penguin shape. Adhere this to the focal panel with dimensionals.
* Fussy cut the packages and adhere one to the penguin’s wing with adhesive. Use dimensionals to attach the remaining three packages to the card below the focal panel.
As you can see, the STITCHED WITH WHIMSY DIES do not cut out an image. The dies emboss and add stitching. I considered using the DETAILED TRIO PUNCH(Annual Catalog) to round the corners of the focal panel, but I decided I liked the 90 degree angles.
That’s it for today. Thank you for stopping by today. Until next time…..