Hi Stampers!
Today I have two techniques to share that go hand on hand. The Reverse Stamping Technique (See 15 January 2021 post) combined with the Reverse Die Cutting Technique allows you to change the orientation of outline image stamps and use a coordinating die to cut them in reverse.
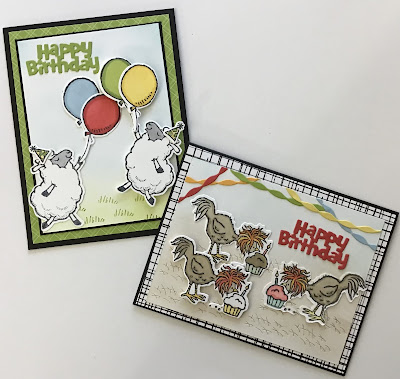
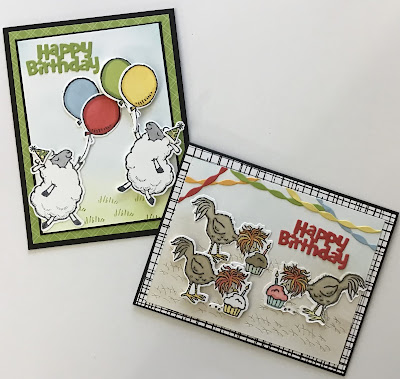
Here are the cards I made using these techniques:
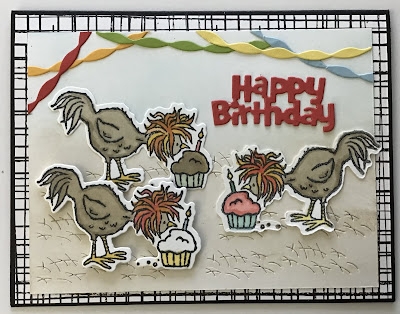
BIRTHDAY CHICKS CARD
* Basic Black card base - 8 1/2” x 5 1/2” scored and folded at 4 1/4”.
* Basic White cardstock - for card front cut it at 5” x 3 3/4”; for the inside of the card cut a piece that is 5 1/4” x 4”. Pieces of Basic White to stamp the chickens (I cut mine at 3 1/2” x 3”.)
* Multiple colors of scrap cardstock for the Happy Birthday and the streamers. (I used Poppy Parade, Mango Melody, Granny Apple Green, Daffodil Delight, and Balmy Blue.)
* DSP - Pattern Party cut at 5 1/4” x 4”.
* Inks - Memento Tuxedo Black, Crumb Cake, Balmy Blue; Stampin’ Blends - Crumb Cake (light and dark), Daffodil Delight (dark and light), Pumpkin Pie (dark and light), Poppy Parade (dark and light), Pool Party (dark and light), Soft Seafoam (dark and light).
* Blending Brushes
* Adhesive of choice and dimensionals.
* Hey Birthday Chick and Birthday Chick Dies (Stampin’ Up!®️ 2021-2022 Annual Catalog)
ASSEMBLY:
* Using blending brushes, the Crumb Cake and Balmy Blue inks apply color to the 5” x 3 3/4” piece of Basic White cardstock. Take the Crumb Cake ink from the bottom of the cardstock about 3/4 of the way up. Now add the Balmy Blue to cover the remainder of the cardstock.
* Stamp two of the chicken images on two of the 3 1/2” x 3” pieces of Basic White cardstock.
* Use the Reverse Stamping Technique to stamp the third chicken.+
* Die cut the three chickens using the Reverse Die Cutting Technique for reversed stamped image.+
* Die cut the Happy Birthday and the streamers. Die cut the chicken scratches.
* Use liquid glue to attach the streamers, the Happy Birthday, and two of the chickens to the focal panel. Adhere the 3rd chicken with dimensionals.
* Adhere the DSP panel to the card front.
* Adhere focal panel to card.
* Adhere inside panel to inside of card.
(+ See video for details.)
* Basic Black card base - 8 1/2” x 5 1/2” scored and folded at 4 1/4”.
* Basic White cardstock 5” x 4 1/4” and one piece cut at 4 3/4” x 3 1/2” for front focal panel. Two pieces cut at 3 1/2” x 3” for the sheep, and scraps for the balloons and party hats.
* Basic Black cardstock cut at 4 7/8” x 3 5/8”.
* Scrap f Granny Apple Green cardstock for Happy Birthday
* DSP - 6” x 7” DSP Brights, Granny Apple Green cut at 5 1/4” x 4”.
* Inks - Tuxedo Memento Black, Balmy Blue, and Granny Apple Green; Stampin’ Blends - Granny Apple Green (dark and light), Poppy Parade (dark and light), Balmy Blue (dark and light), Daffodil Delight (dark and light), Smoky Slate (light), Basic Black (light).
* Blending Brushes
* Adhesive of choice and dimensionals.
* Counting Sheep stamp set and Sheep Dies; Hey Birthday Chick and Birthday Chick Dies.
(The Counting Sheep stamp set and the coordinating Sheep Dies will be available beginning 3 August 2021 as Sale-a-bration offerings.)
ASSEMBLY:
* Use the blending brushes and the Granny Apple Green and Balmy Blue inks to add color to the Basic White focal panel. Stamp the grass image several times toward the bottom area of the focal panel.
* Stamp the sheep - use the Reverse Stamping Technique for one sheep. Color the sheeps’ hooves and faces.
* Stamp and color the the balloons and party hats.
* Die cut the sheep, the balloons, the party hats, and the Happy Birthday.
* Adhere the DSP to the card base.
* Adhere the focal panel to the Basic Black mat. Adhere this piece to the card.
* Adhere the greeting die cut and the die cut images to the card. The sheep on the right and it’s balloons are adhered with dimensionals.
COUNTING SHEEP
+ For full tutorial video see my 15 January 2021 post.
REVERSE DIE CUTTING
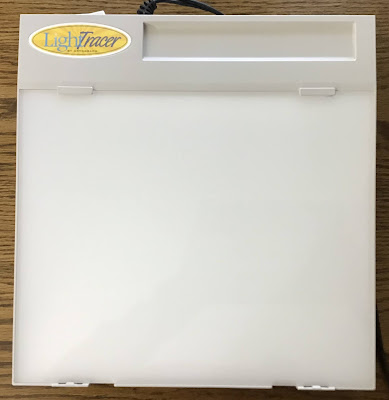
+ See the video above for reverse die cutting directions using a light box / tracing light. These lights are sold by Amazon, Walmart (on line), and many art supply outlets.
An alternative to using the light box / tracing light is to use a window - during daylight hours, of course!
*Stamp the reversed image.
* Use Washi tape, painter’s tape or other low tack tape and tape the stamped image to the window making sure the image is facing he window. I put tape on 2-3 corners. You should be able to see the image clearly.
* Line up the die around the image. Use two more pieces of tape to hold the die in place.
* Remove the cardstock from the window taking care to keep the die on place.
* Run this through your die cutting machine. You now have a reversed die cut image.
Below are two photos demonstrating how to tape the image to the window and how to align the die. (Yes, that is the view from my craft room - it is part of our back yard and part of a pasture.)


No comments:
Post a Comment