Hi Stampers!
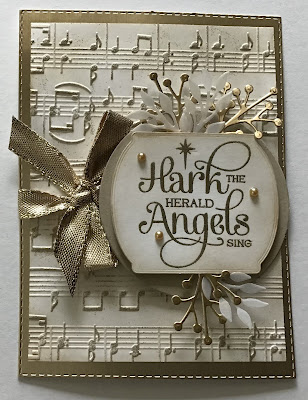
Welcome to another addition of TINSEL TIME TUESDAY! Today I have two versions of the same Christmas card; one in gold and one in silver. I used a combination of dry embossing and heat embossing along with ink and a blending brush to achieve an antiqued look. My “antiqued” look can also be described as aged, distressed, shabby chic, etc. The card is made up of several bits and pieces, and does take a little longer to make than most cards, but if you have someone in your life who enjoys receiving cards in this style, it is worth the extra time. Let’s take a look at the card in both, the gold and silver versions:
I used the FOR UNTO US stamp set to create the card. This stamp set was introduced in last year’s Stampin’ Up! Mini Catalog, and is a “returning favorite” in the current Stampin’ Up! July-December 2021 Mini Catalog. This stamp set contains phrases from Christmas carols as well as sentiments that work well for inside cards. Here is a look at the stamp set:
FOR UNTO US
HERE IS HOW I MADE THE CARD:
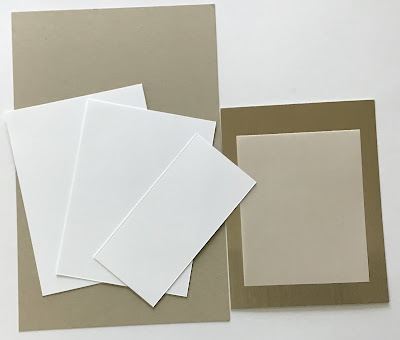
* Basic White cardstock - one piece cut at 5” x 3 3/4”, one piece cut at 4 3/4” x 3 1/2”, and a piece of scrap for the greeting.
* Brushed Metallic cardstock- gold, at least 5 1/4” x 4”
* Vellum scrap
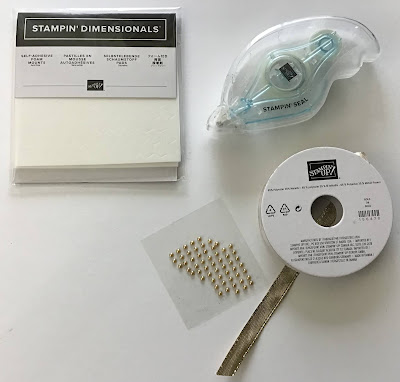
* Blending brush
* Heat tool
* Gold shimmer ribbon - 18 - 20 inches
* Stampin’ Seal (or adhesive of choice) and dimensionals
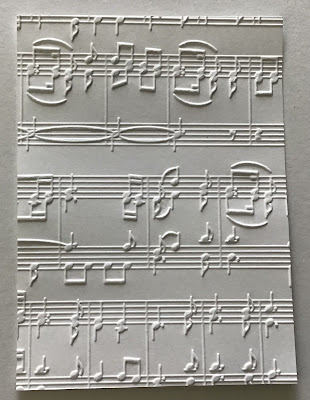
* Merry Melody 3-D embossing folder.
ASSEMBLING THE CARD
* Die cut 3 of the leaves images from the vellum.
* Die cut the Crumb Cake circle.
* Use the Tasteful labels die and cut the label for the greeting. (OPTION - Heat emboss the greeting, then die cut it.)
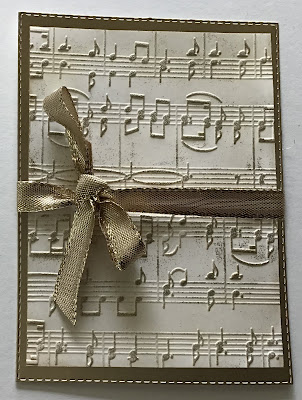
* With a very light touch, brush the Versa Mark over the musical notes on the dry embossed cardstock. Sprinkle with gold embossing powder, brush off some excess. It is okay for the embossing powder to be a bit hit and miss. Set with heat tool. (SEE VIDEO - page down to view the video demonstration of this process.)
* Use the blending brush and Crumb Cake ink to “antique” the greeting - just as for the background piece.
* “Antique” the edges of the 5” x 3 3/4” Basic White cardstock.
* Stamp the greeting for the inside on the “antiqued” cardstock.
* Adhere the panel to the inside of the card base.
* “Antique” the dies on the card base front.
* Adhere the gold berry and vellum leaves die cuts to the back side of the greeting. Add dimensionals to the back of the greeting and place it on the Crumb Cake mat. Add dimensionals to the mat. Do not remove the backings.
* Place the greeting piece on the focal panel. It should be centered and to the right side of the focal panel. The greeting should extend just slightly over the edge of the focal panel.
* Adjust the ribbon as needed and re-tie.
* Remove the backings from the dimensionals, and put the greeting in place.
* Add the metallic pearls to the greeting panel.
SUPPLY LIST FOR SILVER CARD
ALL SUPPLIES, CUTTING MEASUREMENTS, & ASSEMBLY INSTRUCTIONS ARE THE SAME AS FOR THE GOLD CARD WITH THE FOLLOWING SUBSTITUTIONS:
* Card base & cardstock - same as for the gold version, but substitute Smoky Slate for the Crumb Cake, and substitute silver foil (mirrored finish) for the gold brushed metallic cardstock.
* Use Smoky Slate ink instead of Crumb Cake and silver embossing powder instead of gold.
* Use the silver metallic pearls instead of the gold.
* Instead of gold shimmer ribbon use the silver metallic mesh ribbon found in the Stampin’ Up!®️ Annual Catalog.
HOW TO CREATE A DRY EMBOSSED/ HEAT EMBOSSED ANTIQUED BACKGROUND VIDEO
Thank you for checking in for Tinsel Time Tuesday. Until next time…
Stamp Happy!
Kim
All stamps and stamped images ©️1990-2021 Stampin’ Up!®️








BEAUTIFUL!
ReplyDeleteI am having so much trouble with the embossing powder sticking to the whole card.
ReplyDeleteWhen applying the Versa Mark over the embossed image, hold the pad so that it is barely touching the paper. Apply the least amount of pressure possible as you proceed from the top to bottom of the embossed cardstock. Try “sprinkling on embossing powder over a small area, flick off what you can, then move on to another area and repeat the process over the entire piece. Once you have done that, you can try using a small paint brush to remove some excess embossing powder. For this technique the embossing will not be perfect. There will be stray bits of embossing powder here and there. It contributes to the antique look.
DeleteThis is Lovely.
ReplyDeleteThanks.
ReplyDelete