Hi Stampers,
It has been a while since I have shared a “kid card.” Today’s card is a simple window card and a thank you card geared toward kids. I think it is important to set a good example for kids - if they are expected to send me thank you cards, I need to be certain I send them thank you cards as well. The SEASONS OF FUN is the perfect stamp set for creating cards for kids (of all ages).
The SEASONS OF FUN stamp set is found on page 78 of the Stampin’ Up!®️July-December 2021 Mini Catalog. It is a set that can be purchased with Stampin’ Rewards. Orders of $150 and up earn Stampin’ Rewards (See page 78 of the mini catalog for further details.)
Okay, let’s take a look at this sweet stamp set:
SEASONS OF FUN
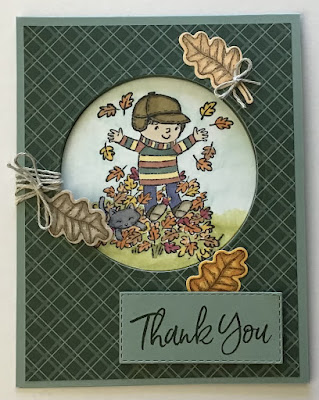
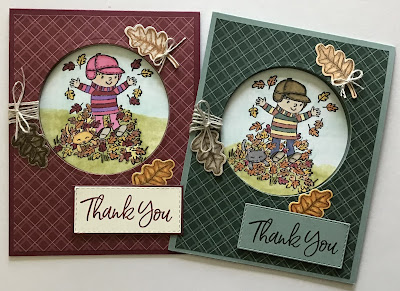
As you can see I made a version for a girl and a version for a boy. The greeting is from the SWEET ICE CREAM stamp set found in the Stampin’ Up! 2021-2022 Annual Catalog. The oak leaf images are from the TIME OF GIVING stamp set and were die cut with the coordinating GIVING GIFTS dies. The window was die cut using the largest circle of the Layering Circles Dies. Below is a photo of each card with a list of other supplies needed to create the card.
EVENING EVERGREEN / SOFT SUCCULENT CARD
SUPPLIES:
* Soft Succulent cardbase cut at 11” x 4 1/4” scored and folded at 5 1/2” plus a scrap that is about 2 1/2” x 1 1/4” for the greeting.
* Evening Evergreen 2021-2023 In Color DSP cut at 5 1/4” x 4” plus scraps of other colors for the three oak leaves stamped with the TIME IF GIVING stamp set.
* Basic White cardstock about 4” square for focal image.
* Inks - Memento Tuxedo Black, Evening Evergreen, Early Espresso; various Stampin’ Blends markers to color image and to add shadow/dimension to the three oak leaves.
* Linen Thread
* Adhesive of choice, dimensionals, and glue dots
* Stitched Rectangles Dies (2 3/8” x 1”)
* Card base Merry Merlot cut at 11” x 4 1/4” scored and folded at 5 1/2” and a piece cut at 2 1/2” x 1 1/4” to mat the greeting.
* Basic White cardstock about 4” x 4” for focal image
* Very Vanilla cardstock cut at 5 1/4” x 4” for inside the card and a piece that is about 2 1/2” x 1 1/4” for the greeting.
* Merry Merlot Neutrals DSP cut at 5 1/4” x 4” plus scraps of other colors for the three oak leaves.
* Inks - Memento Tuxedo Black, Merry Merlot, Early Espresso; various Stampin’ Blends markers to color focal image and to add dimension to die cut oak leaves.
*Linen thread.
* Adhesive of choice, dimensionals, glue dots.
* Stitched Rectangles Dies (2 3/8 x 1)
ASSEMBLY
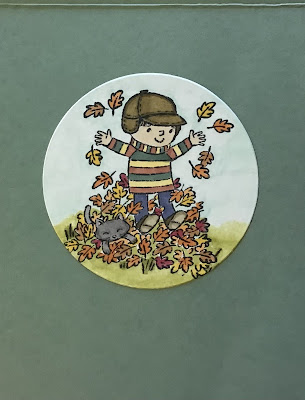
* Stamp the focal image with the Tuxedo Black ink, and color with Stampin’ Blends
* Stamp the greeting on either the Soft Succulent (use the Evening Evergreen ink) or the Very Vanilla (use Merry Merlot ink) cardstock strip.
* Stamp the leaves image on the 3 scraps of DSP with Early Espresso ink and add a little color along the edges with a similar colored Stampin’ Blends marker to add some depth and dimension to the leaves.
* Adhere the 5 1/4” x4” piece of DSP to the card front and use the Layering Circles die to cut the “window” through the card front only.
* Die cut the focal image with the circle die.
* Die cut the greeting with the Stitched Rectangles die
* Die cut the leaves.
* For the Merry Merlot card - adhere the Very Vanilla layer to the inside of the card.
* Put adhesive on the back of the focal image. Close the card and place the focal image in window (the cut out area).
* Use dimensionals to adhere the greeting to the card (adhere the Very Vanilla greeting on the Merry Merlot mat before adhering to card).
* Wrap the linen thread around the left side of the card/window 7-8 times and tie in a bow.
* Use glue dots to adhere the oak leaves to the front of the card. (See card for placement.)
* Make a small bow with the linen thread and adhere it to the oak leaf that is placed in the upper right corner of the card.
Stamp Happy!
Kim
All stamps and stamped images ©️1990-2021 Stampin’ Up!®️


No comments:
Post a Comment