Hi Stampers!
I have a lifetime supply of - well, everything for card making! I enjoy using all the supplies and tools I have, but sometimes I like to go back basics, and see what I can come up with using stamps, inks, and paper - for the most part - and just a card base. No, patterned paper, no die cuts, no embellishments, nothing like that. I allow myself to use a punch to create widows, and I use dies to create some masks. As someone who has made cards for more years than I care to admit, this exercise is a great opportunity to see just how much I can do with minimal supplies. It also gets me out of my routine. For example, a no layer card means my focal image will be stamped directly onto the front of the card, so no alcohol markers as they tend to bleed through white cardstock. This provides an opportunity to use my often ignored dye based markers, two-step stamps, or images that require no extra coloring! This exercise also is a great opportunity for me to come up with other ways to add color and depth to my cards.
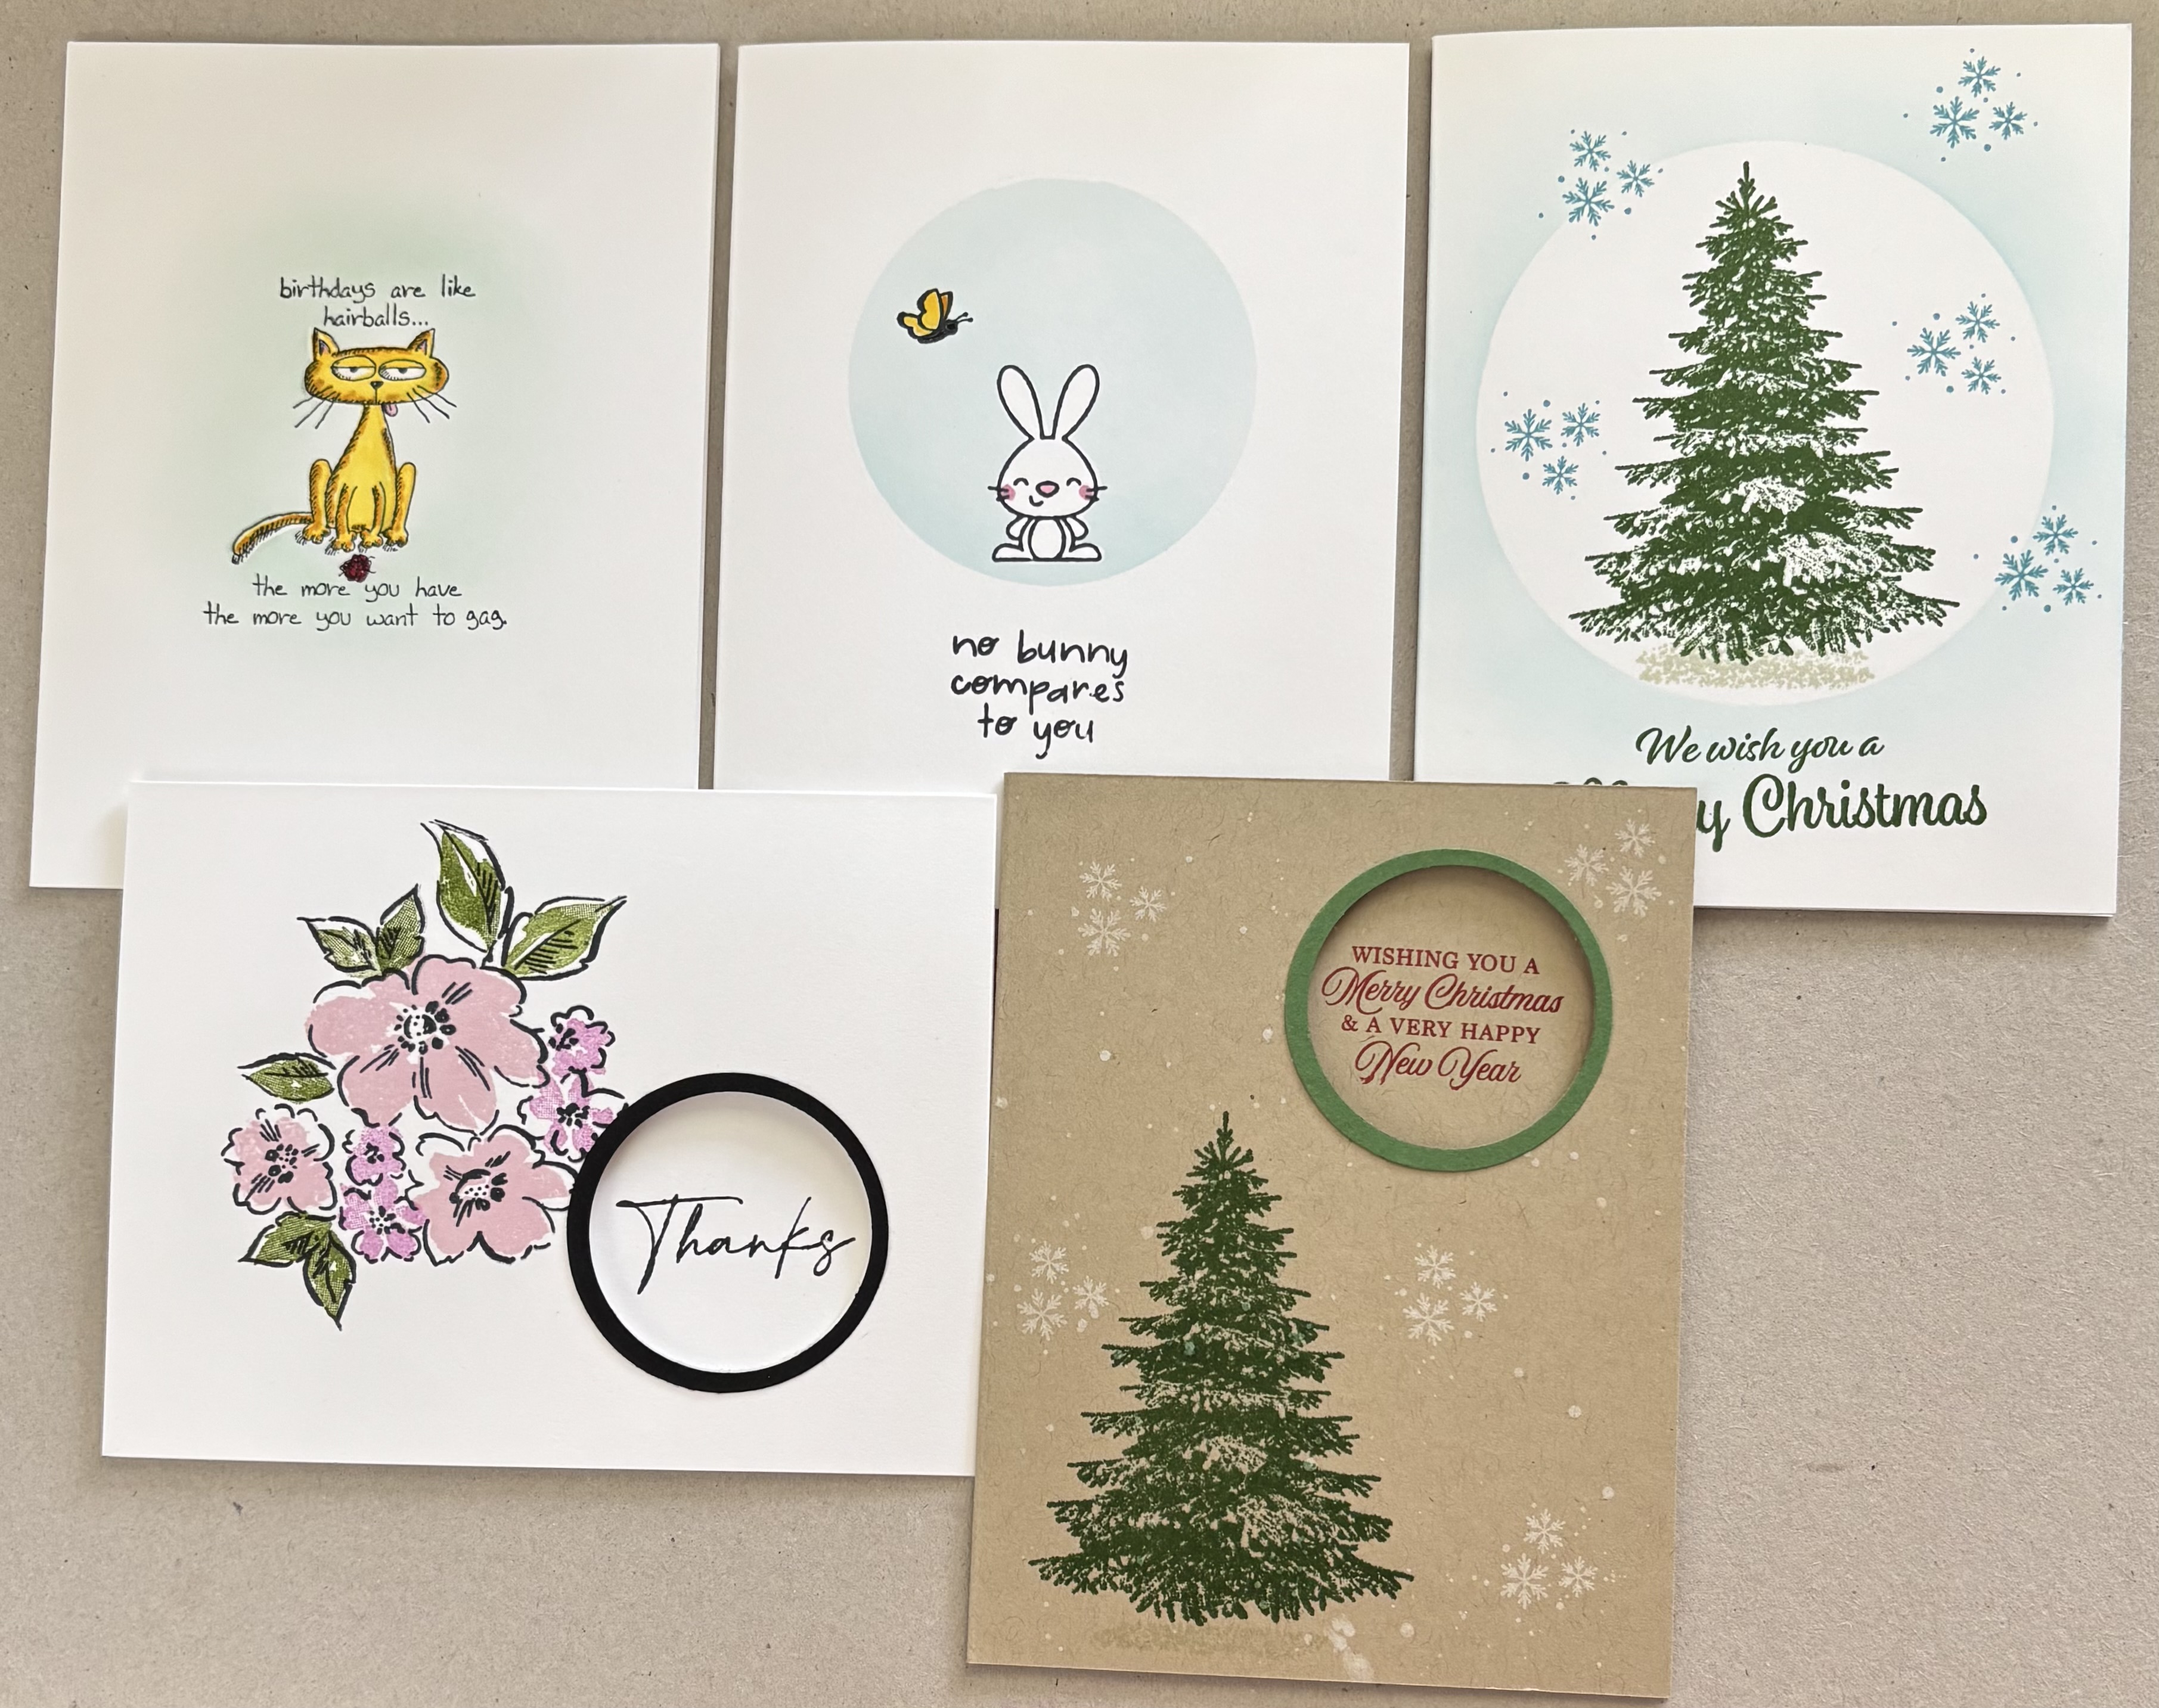
What if you are a beginner? How does this post help you? Well, the techniques and tips can help you expand your skills and get the most out of the supplies you have. Beginner or seasoned stamper, we all want to get the most from our supplies! So, let’s get started. Here is a look at the sample cards:
VIDEO
ADDING INTEREST TO NO LAYER CARDS
MASK IMAGE AND ADD A BACKGROUND

The stamp I used for this card includes the image and text. I stamped it using black ink, then colored the cat with my dye ink markers. Next I stamped the image on a piece of masking paper (you can use a post it not, or printer paper). I fussy cut the image right along the line (I left no white border), then I placed it over the image. I took a blending brush inked it, and added a bit of ink over the sentiment and around the image in a freeform shape that turned out to be rectangular. I remove the mask, and my card front was finished.
SUPPLIES I USED
* Card Base - Basic White (thick) cardstock
* Stamps - Giggle Greetings (retired)
* Inks -Tuxedo Black (Memento), Pool Party; Stampin’ Write Markers - Lemon Lolly, Daffodil Delight, Crushed Curry, Real Red, BubbleBath
* Masking Paper or other paper to use as a mask
* Blending brush or sponge
MASK WITH WINDOW

SUPPLIES I USED
* Card Base -Basic White (thick) cardstock
* Stamps - Forest Friends (Doodlebug Designs Inc.) Kangaroo & Company (retired)
* Inks - Tuxedo Black (Memento), Balmy Blue; Stampin’ Write Markers - Bubble Bath, DaffodilDelight, Crushed Curry
* Masking Paper or other paper - create a mask that is 5 1/2” x 4 14” and cut a 2 1/2” circle out of it about 1/2 in from top and centered from right to left.
* Blending Brush
MASK THE CENTER

For this card I did the opposite of what I did for the previous card. I cut out a circle to use as a mask and placed it on the card. I used a blending brush to add color around the mask. I removed the masked, stamped the images and the greeting. The great thing about the tree stamp I used is that I did not have to color it in. I just used the color ink I wanted the tree to be. Even better, the image is self shading and even creates the illusion of snow on the branches! How great is that. I stamped a greeting, and called it good!
SUPPLIES I USED
* Card Base - Basic White (thick) cardstock
* Stamp - Winter Woods
* Inks - Garden Green, Basic Beige, Balmy Blue
* BlendingBrush
* Masking Paper or substitute - create a circle from it that is about 3 1/2” in diameter
PEEK-A-BOO GREETING

A nice feature to add to a no layer card is a peek-a-boo window. I used two circle punches to create a frame for the window. Once upon a time I used my punches almost every time I made a card! Then dies came along! I still love my punches, but I admit they do get overlooked a bit these days. I show how I created the frame down below the next card. The first thing I did was punch out the circle. I stamped my image. This is a two-step image, meaning there is a stamp for the outline of the image, and a stamp or stamps to fill in the image with color. With the card closed I stamped the greeting. I added the frame (optional), and the card was complete.
* Card Base - Basic White (thick) cardstock
* Stamps - Hand Penned (retired)
* Inks - Tuxedo Black (Memento), BubbleBath,Old Olive
* Scrap of black cardstock
* Circle punches -1 3/4” and 2”
PEEK-A-BOO GREETING II
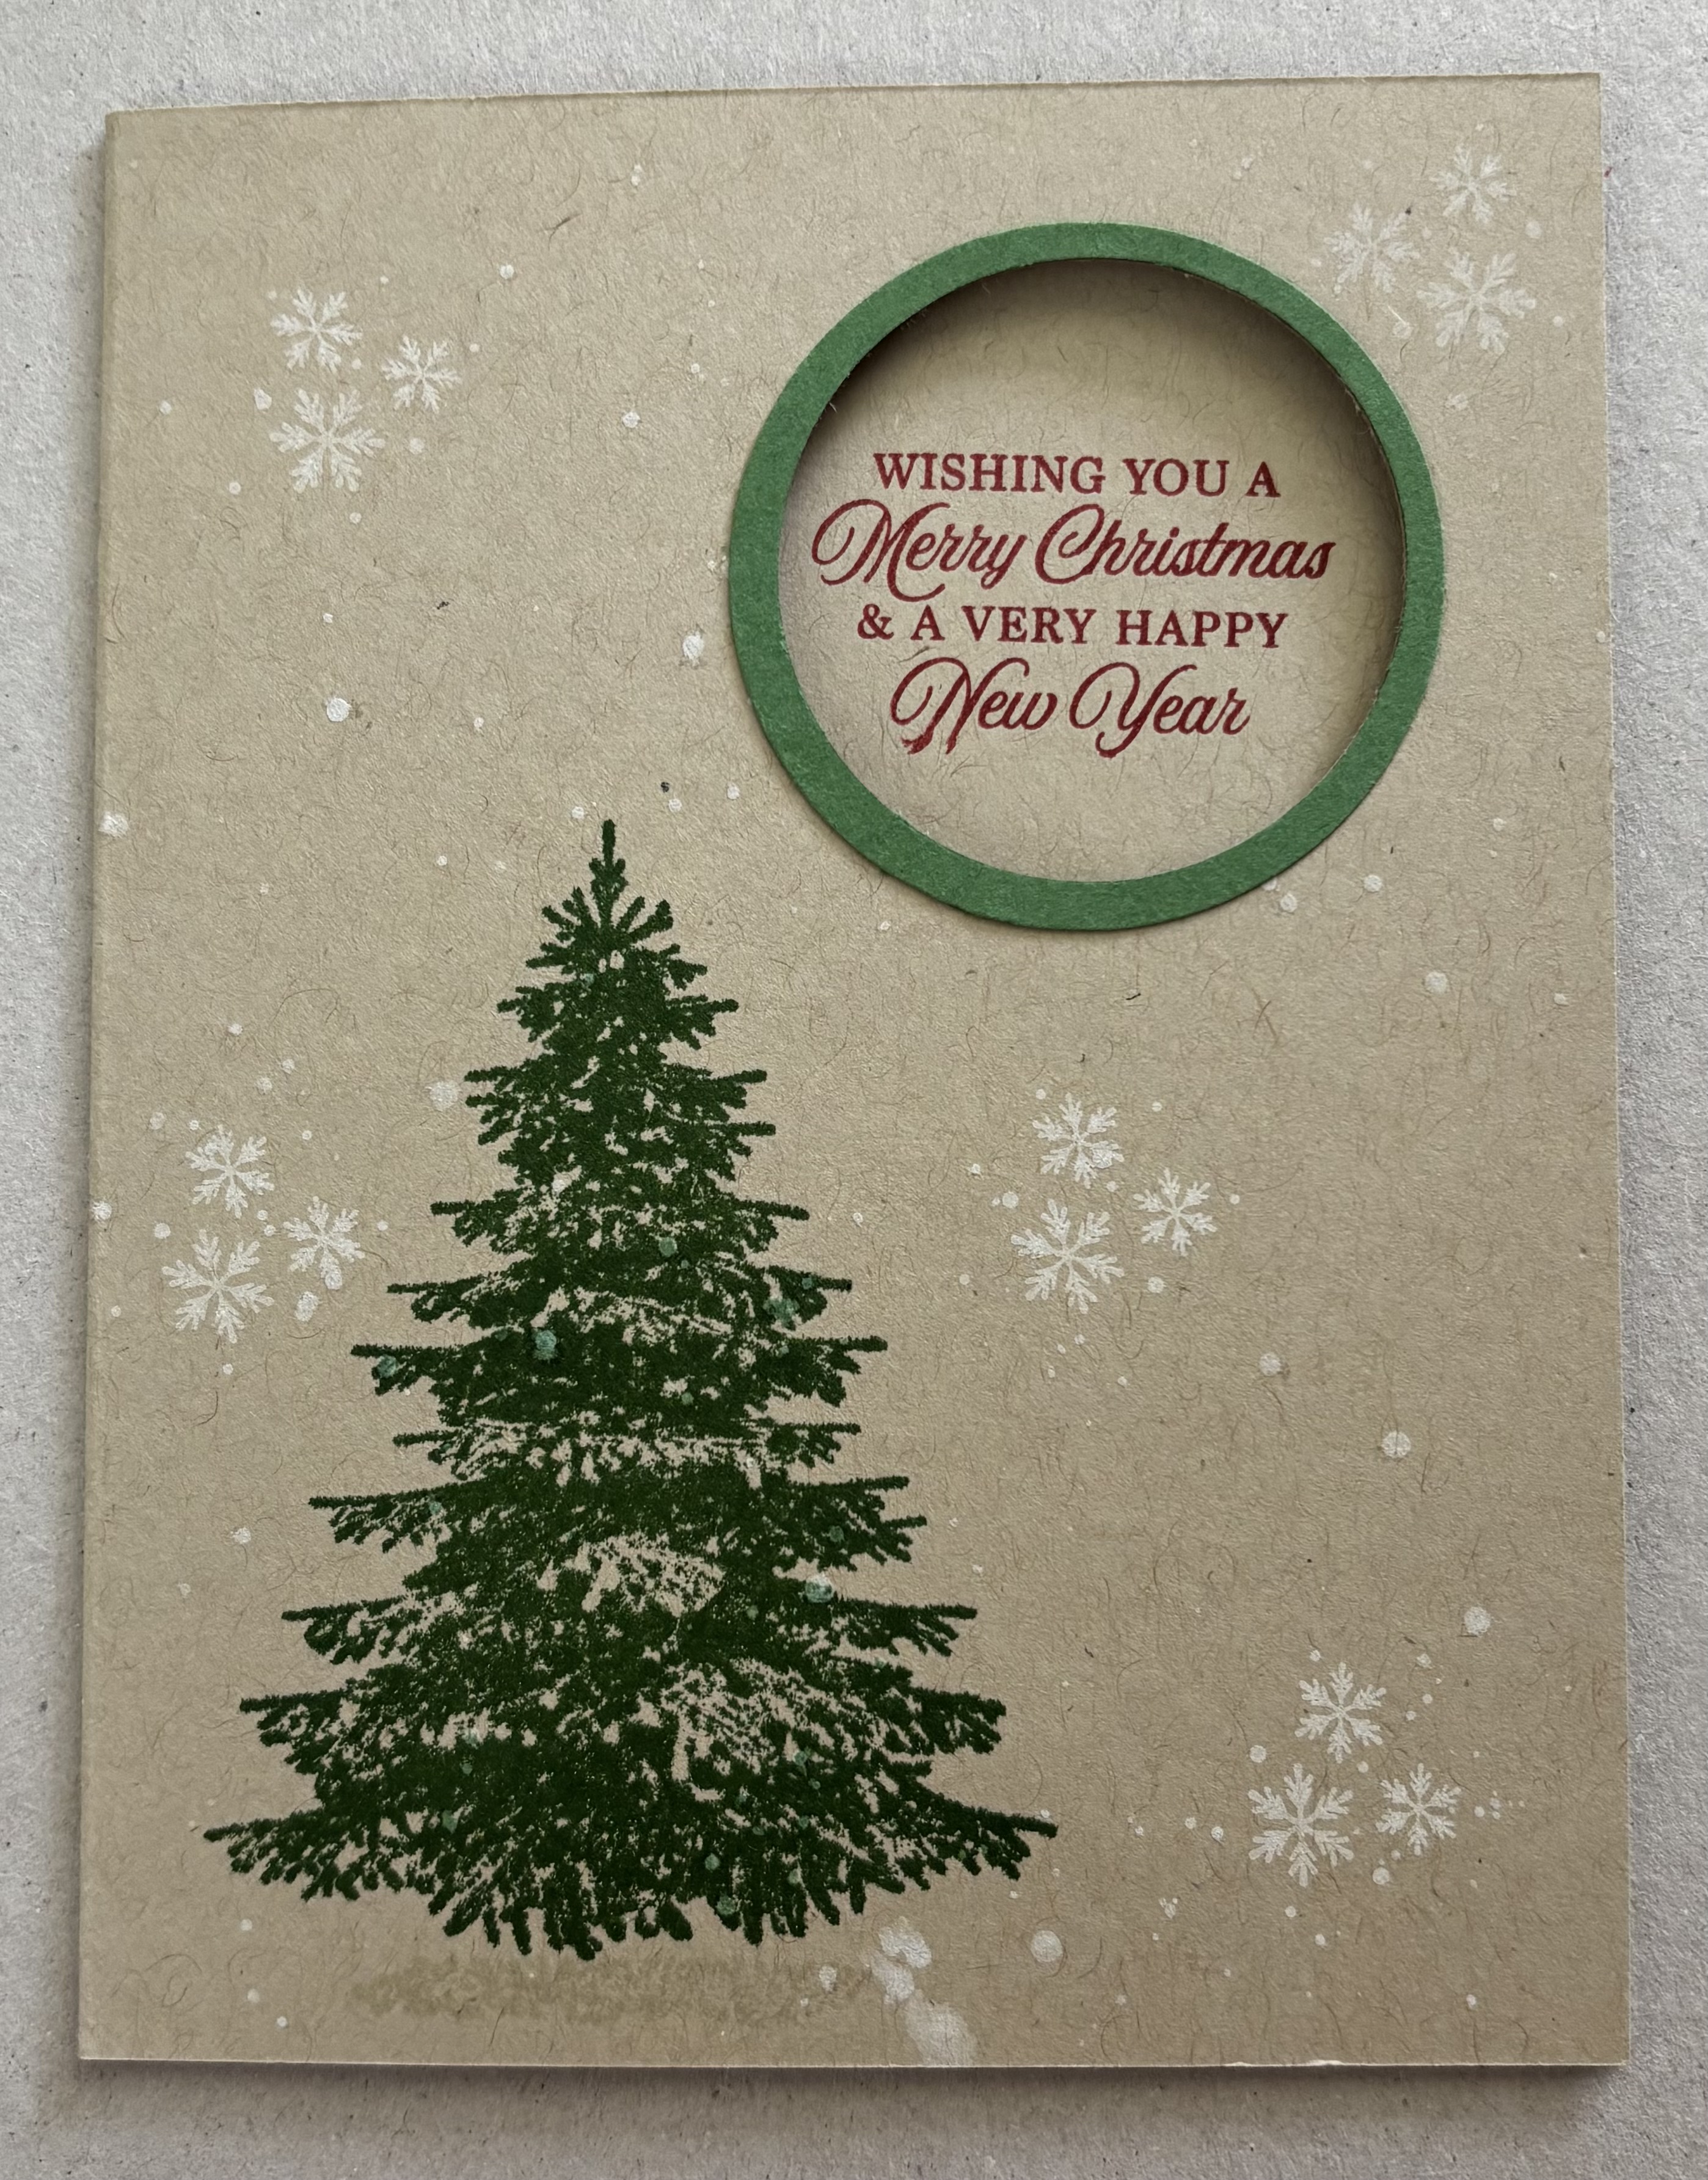
SUPPLIES I USED
* Card Base - Crumb Cake cardstock
* Stamps - Winter Woods (retired)
* Inks - Garden Green, Real Red, White Craft Ink (pigment ink)
* Small scrap of Garden Green cardstock
* Circle Punches - 1 3/4” & 2”
MAKING A FRAME WITH CIRCLE PUNCHES
STEP 1
Gather supplies -
* Two circle punches 1/4” difference in diameter. I used a 1 3/4” & 2” punches
* Cardstock large enough to accommodate the largest punch and allow you to hold the paper to position it.

STEP 2
* Use the smallest punch and punch in the center of the cardstock.

STEP 3
* Slide the cardstock into the larger punch. Center the punch on the hole previously punched. When you are satisfied with the placement, punch. You now have a frame.

NO LAYER CARDS

Thank you for stopping by today. Until next time . . .
Stamp Happy!
Kim
NOTES
*All of today’s card bases are A-2 size cut at 8 1/2” x 5 1/2” scored and folded at 4 1/4”. Card bases cut at 11” x 4 1/4” scored at 5 1/2” will work just fine too.
*I use mostly Stampin’ Up! products, because I have them. I use a mix of current and retired items. Retired items are listed as such. Products from other companies are listed as such. I list sources of my supplies as a resource only. I am not associated with. Nor do I receive compensation from any company or manufacturer.
No comments:
Post a Comment