Hi Stampers!
I have another version of a Z Fold Card for you today. I call this one the Z Fold Panel Card. It have heard it referred to by several names, but I call it a Z Fold Panel Card, because the Z Fold part is a panel attached to one quarter sheet of cardstock to form the completed card. As with the previous two Z Folds the resulting card can be created in landscape or portrait orientation.
Z FOLD PANEL CARD SAMPLES


The basic pieces needed to create the Z Fold Panel card are a piece of cardstock that measures 9 3/4” x 4” for the Z Fold Panel, and a piece of cardstock measuring 5 1/2” x 4 1/4” that will serve as the base for the panel. These two pieces of cardstock can be the same color or contrasting colors.
Below is a diagram showing where to cut and score the Z Fold panel. Once the panel is prepared, decide which way you will orient the card, Adhere all DSP / cardstock layers to the panel. Complete any stamping and embellishing. Next adhere the panel to the cardstock base as you would adhere a 5 1/4” x 4” layer to a regular card base. Place adhesive on the Z Fold panel sections that mske up the right hand side of the card for the landscape orientation, or the bottom section of the card for the portrait orientation.
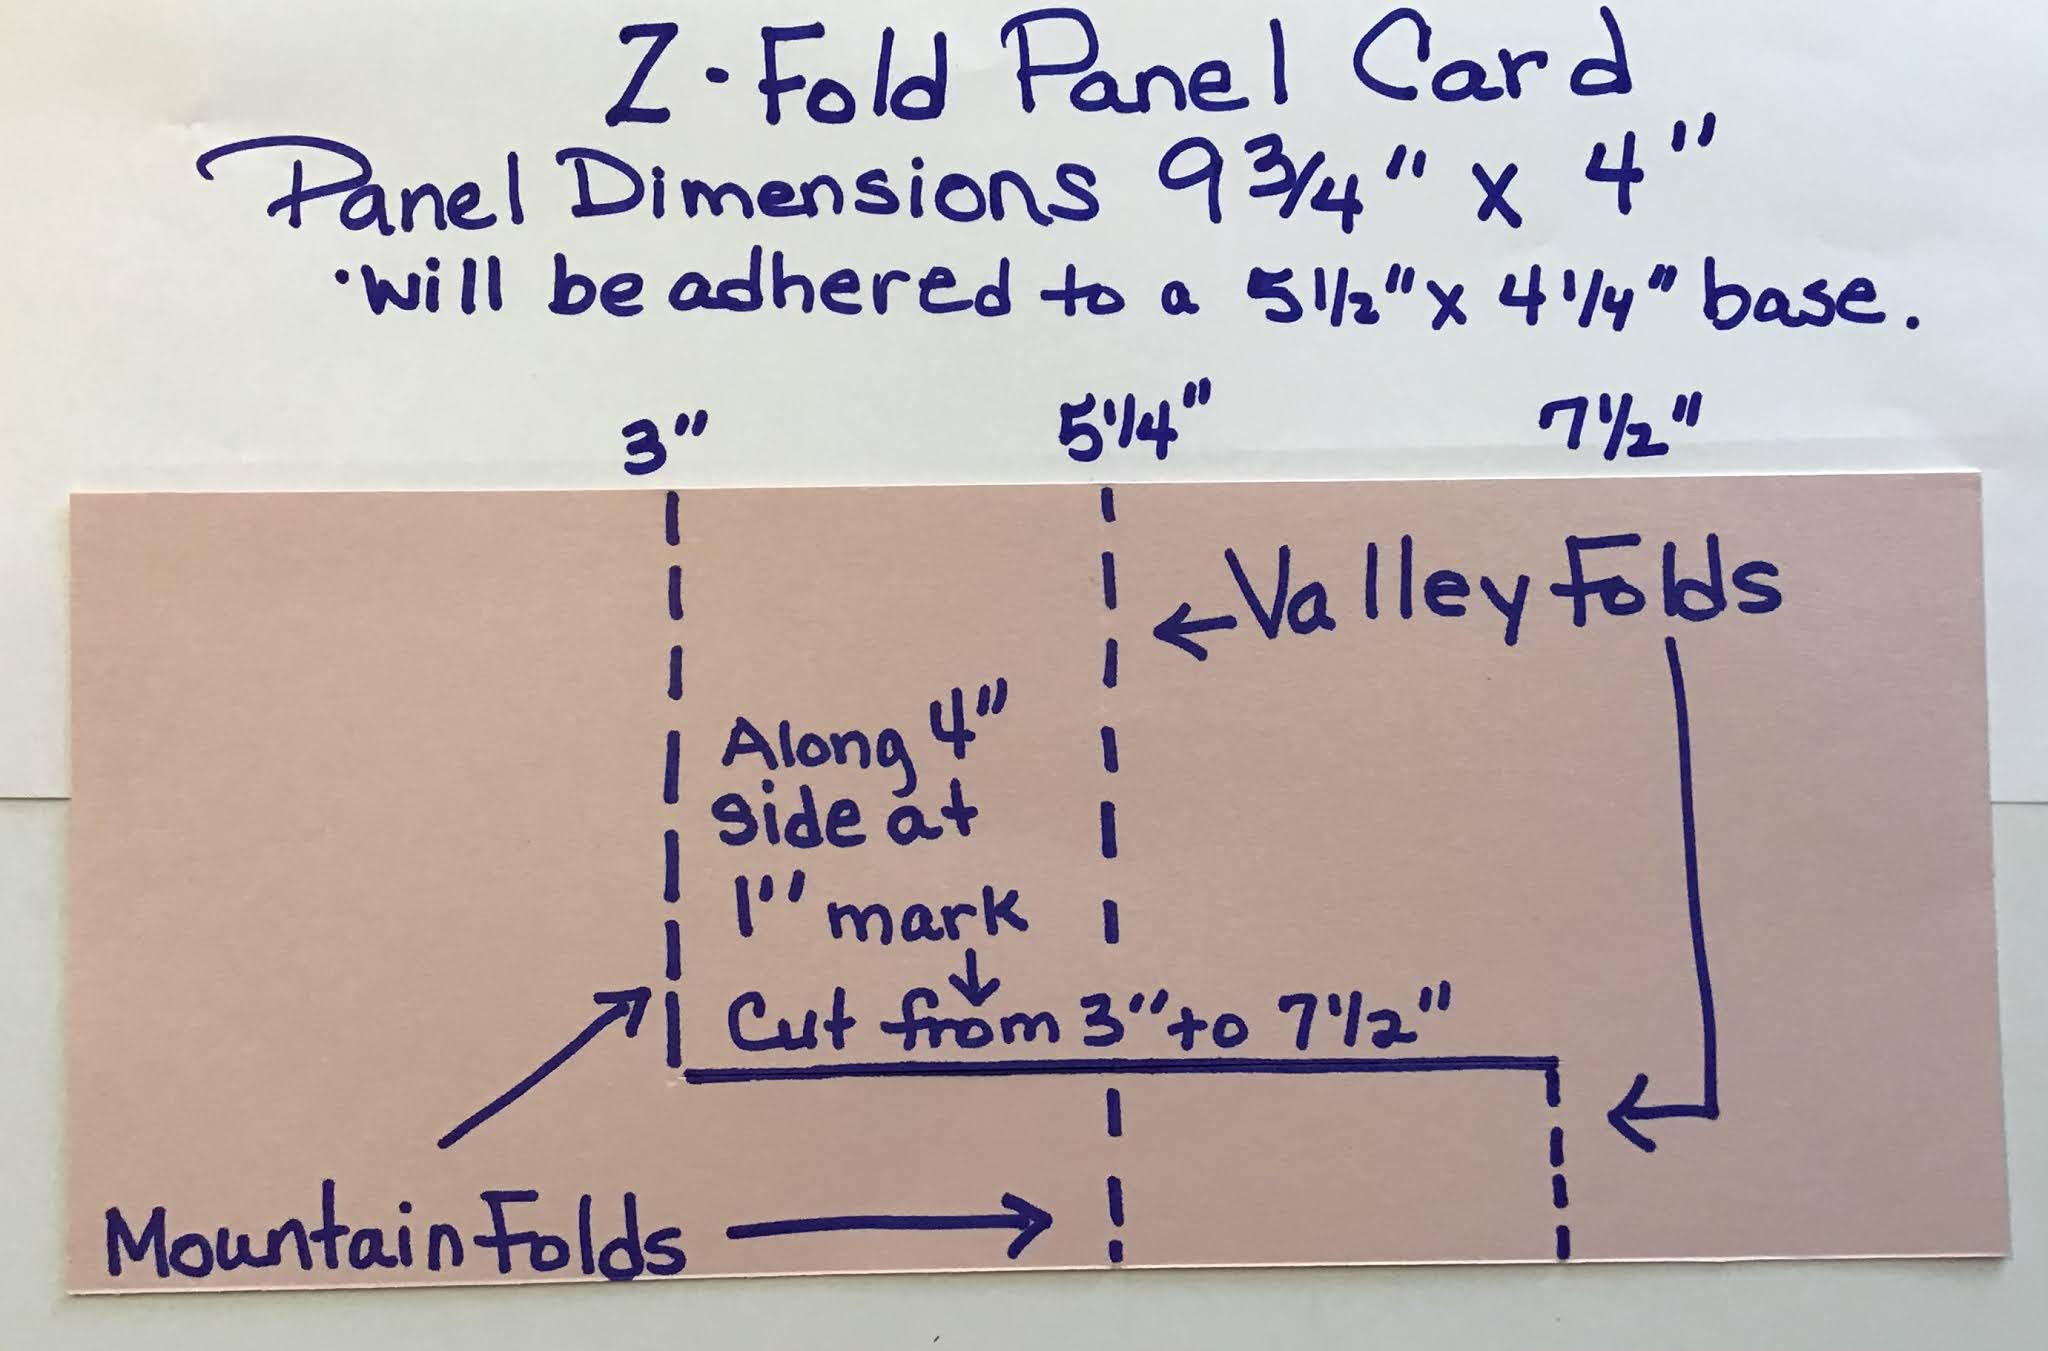
Z FOLD PANEL CUTTING AND SCORING
*Place the 9 3/4” x 4” panel in the paper trimmer with the 4” side along the top of the trimmer at the 1”mark. Place the trimmer blade at 3” and cut down to 7 1/2”.
* Score the cardstock along the 9 3/4” side at 3” from the top of the cardstock down to the cut line.
* At the 5 1/4” score the cardstock from top to bottom.
* At the 7 1/2” score the cardstock from the cut line down.
* Fold the score lines as follows:
At the 3” score line create a mountain fold.
At the 5 /4” score line the top part is a valley fold, while the bottom section is a mountain fold.
At the 7 1/2” score line fold a valley fold.
I hope you give this version of the Z Fold card a try. Check back on Friday (19 February 2021) to view a video demonstration of how to assemble this card, and other Z Fold cards featured in his week’s posts.

Until next time...
Stamp Happy!
Kim
All stamps and stamped images ©️1990-2021 Stampin’ Up!®️
No comments:
Post a Comment