Hi Stampers!
I have another version of a Z Fold Card for you today. I call this one the Z Fold Panel Card. It have heard it referred to by several names, but I call it a Z Fold Panel Card, because the Z Fold part is a panel attached to one quarter sheet of cardstock to form the completed card. As with the previous two Z Folds the resulting card can be created in landscape or portrait orientation.
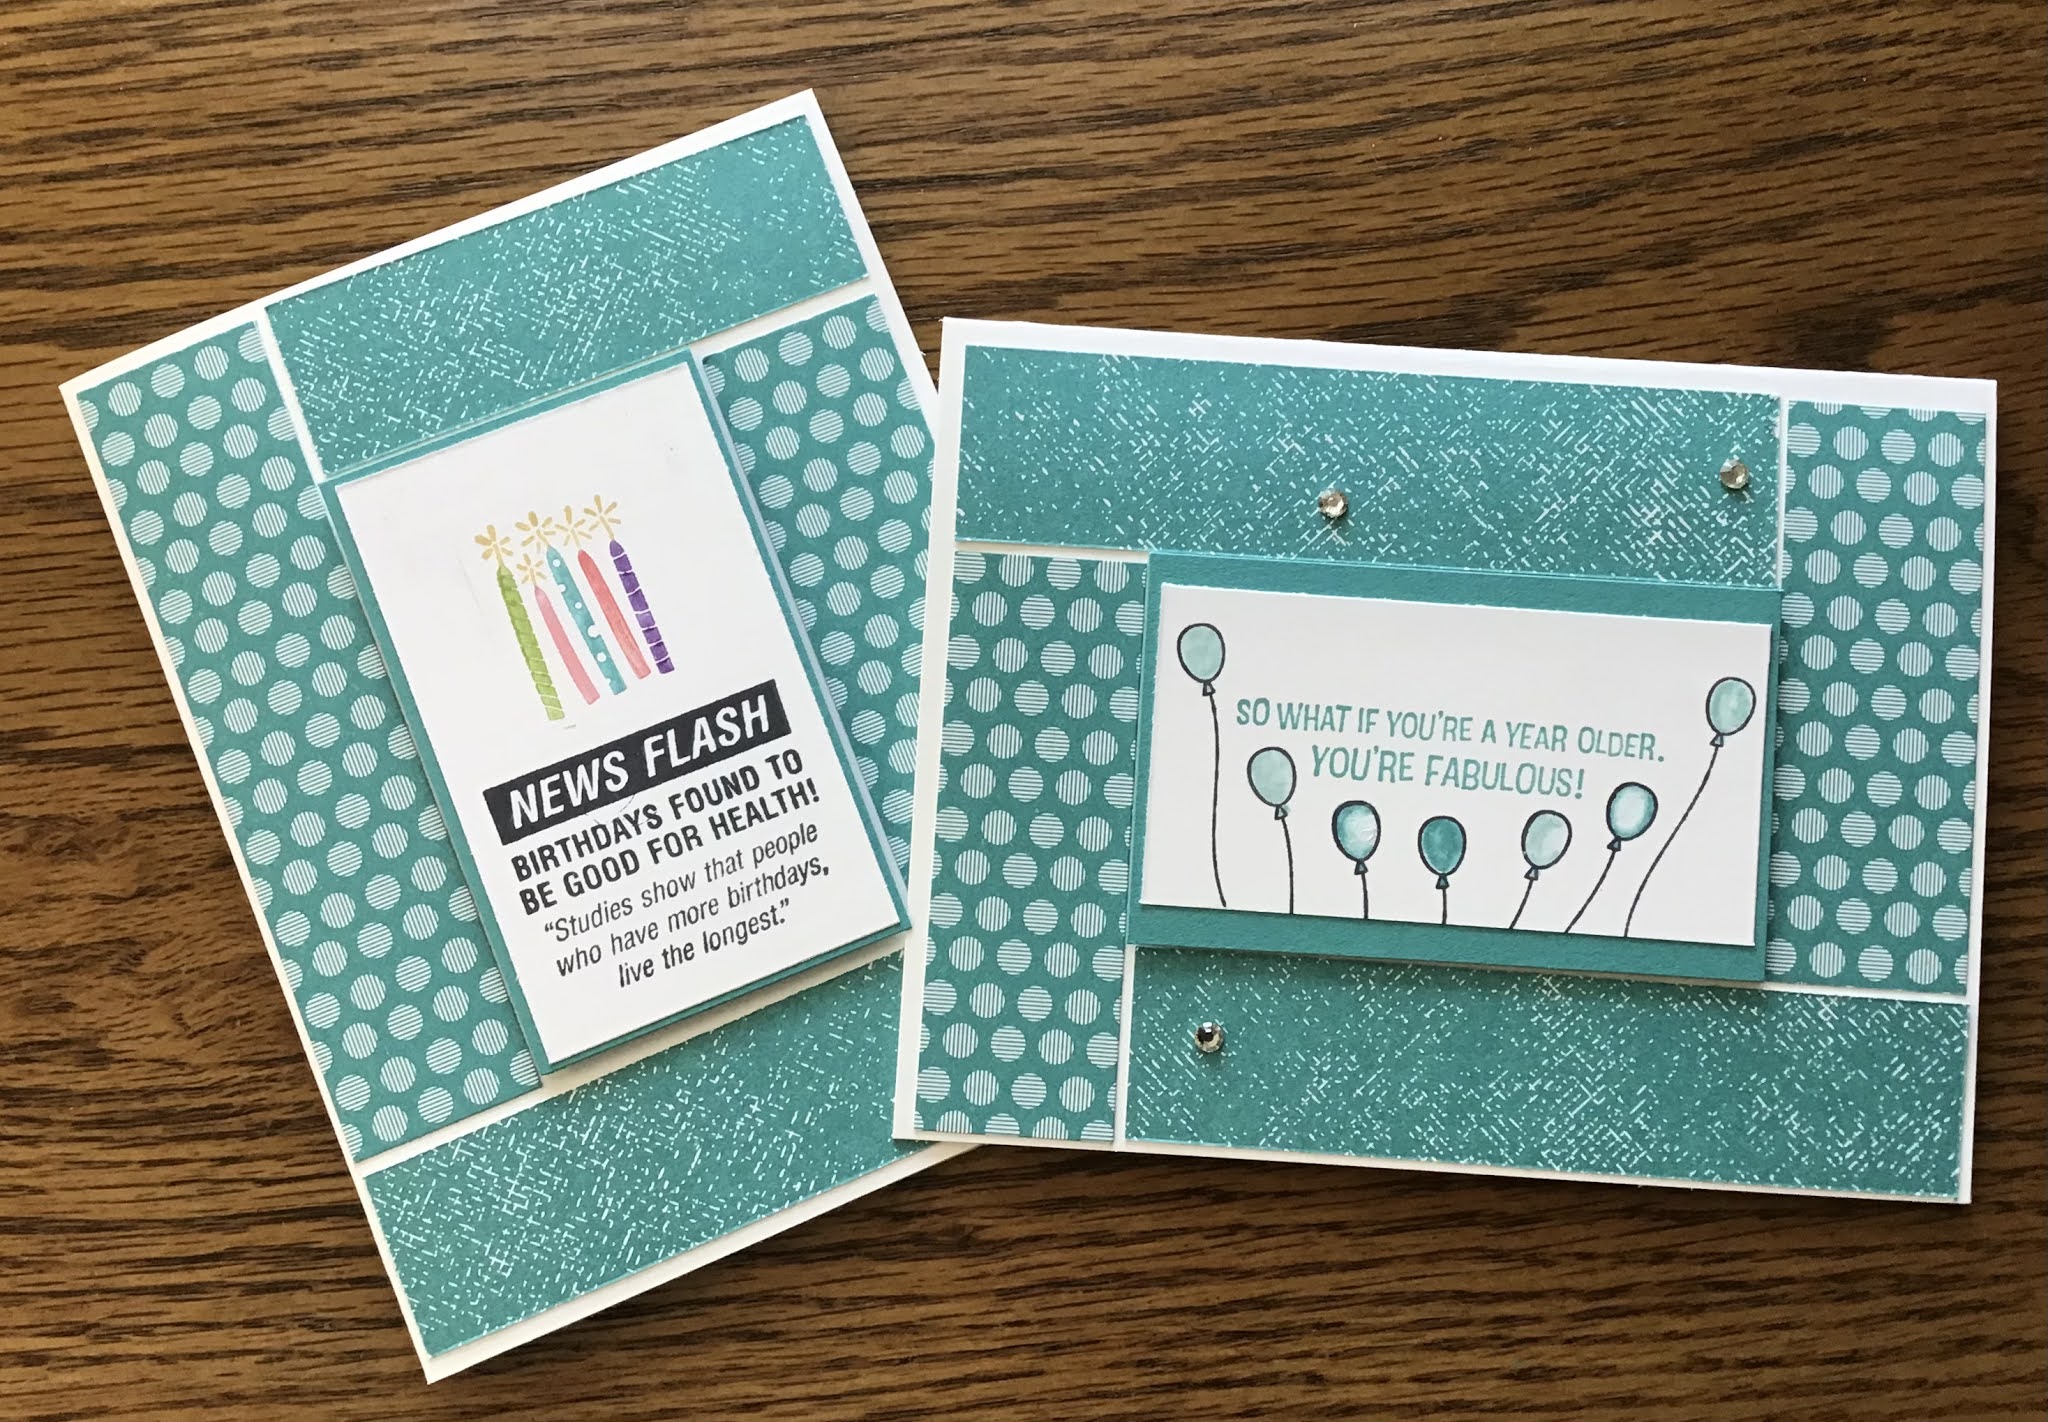
Z FOLD PANEL CARD SAMPLES
This landscape version of the card features the SNAILED IT stamp set (mini catalog). I think those snails are adorable! This version sits up nicely on its own, allowing the recipient to display the card.
Here is another sample made with the A TOUCH OF INK stamp set. This stamp set can be earned for free during the Sale-A-Bration promotion with a qualifying Stampin’ Up!®️product purchase now through 28 February 2021.
Finally here is a sample demonstrating the portrait version of the card. The portrait version does not stand up for display, but it is still an impressive way to send family and friends greetings and well wishes.
The basic Z Fold Panel Card is quite easy to assemble. Adding layers and decorative elements can become a tiny bit overwhelming, but the design is flexible enough to accommodate a single layer of DSP or matted layers. This Z Fold differs from the previous two, in that if requires doing a bit of cutting along with the scoring.
The basic pieces needed to create the Z Fold Panel card are a piece of cardstock that measures 9 3/4” x 4” for the Z Fold Panel, and a piece of cardstock measuring 5 1/2” x 4 1/4” that will serve as the base for the panel. These two pieces of cardstock can be the same color or contrasting colors.
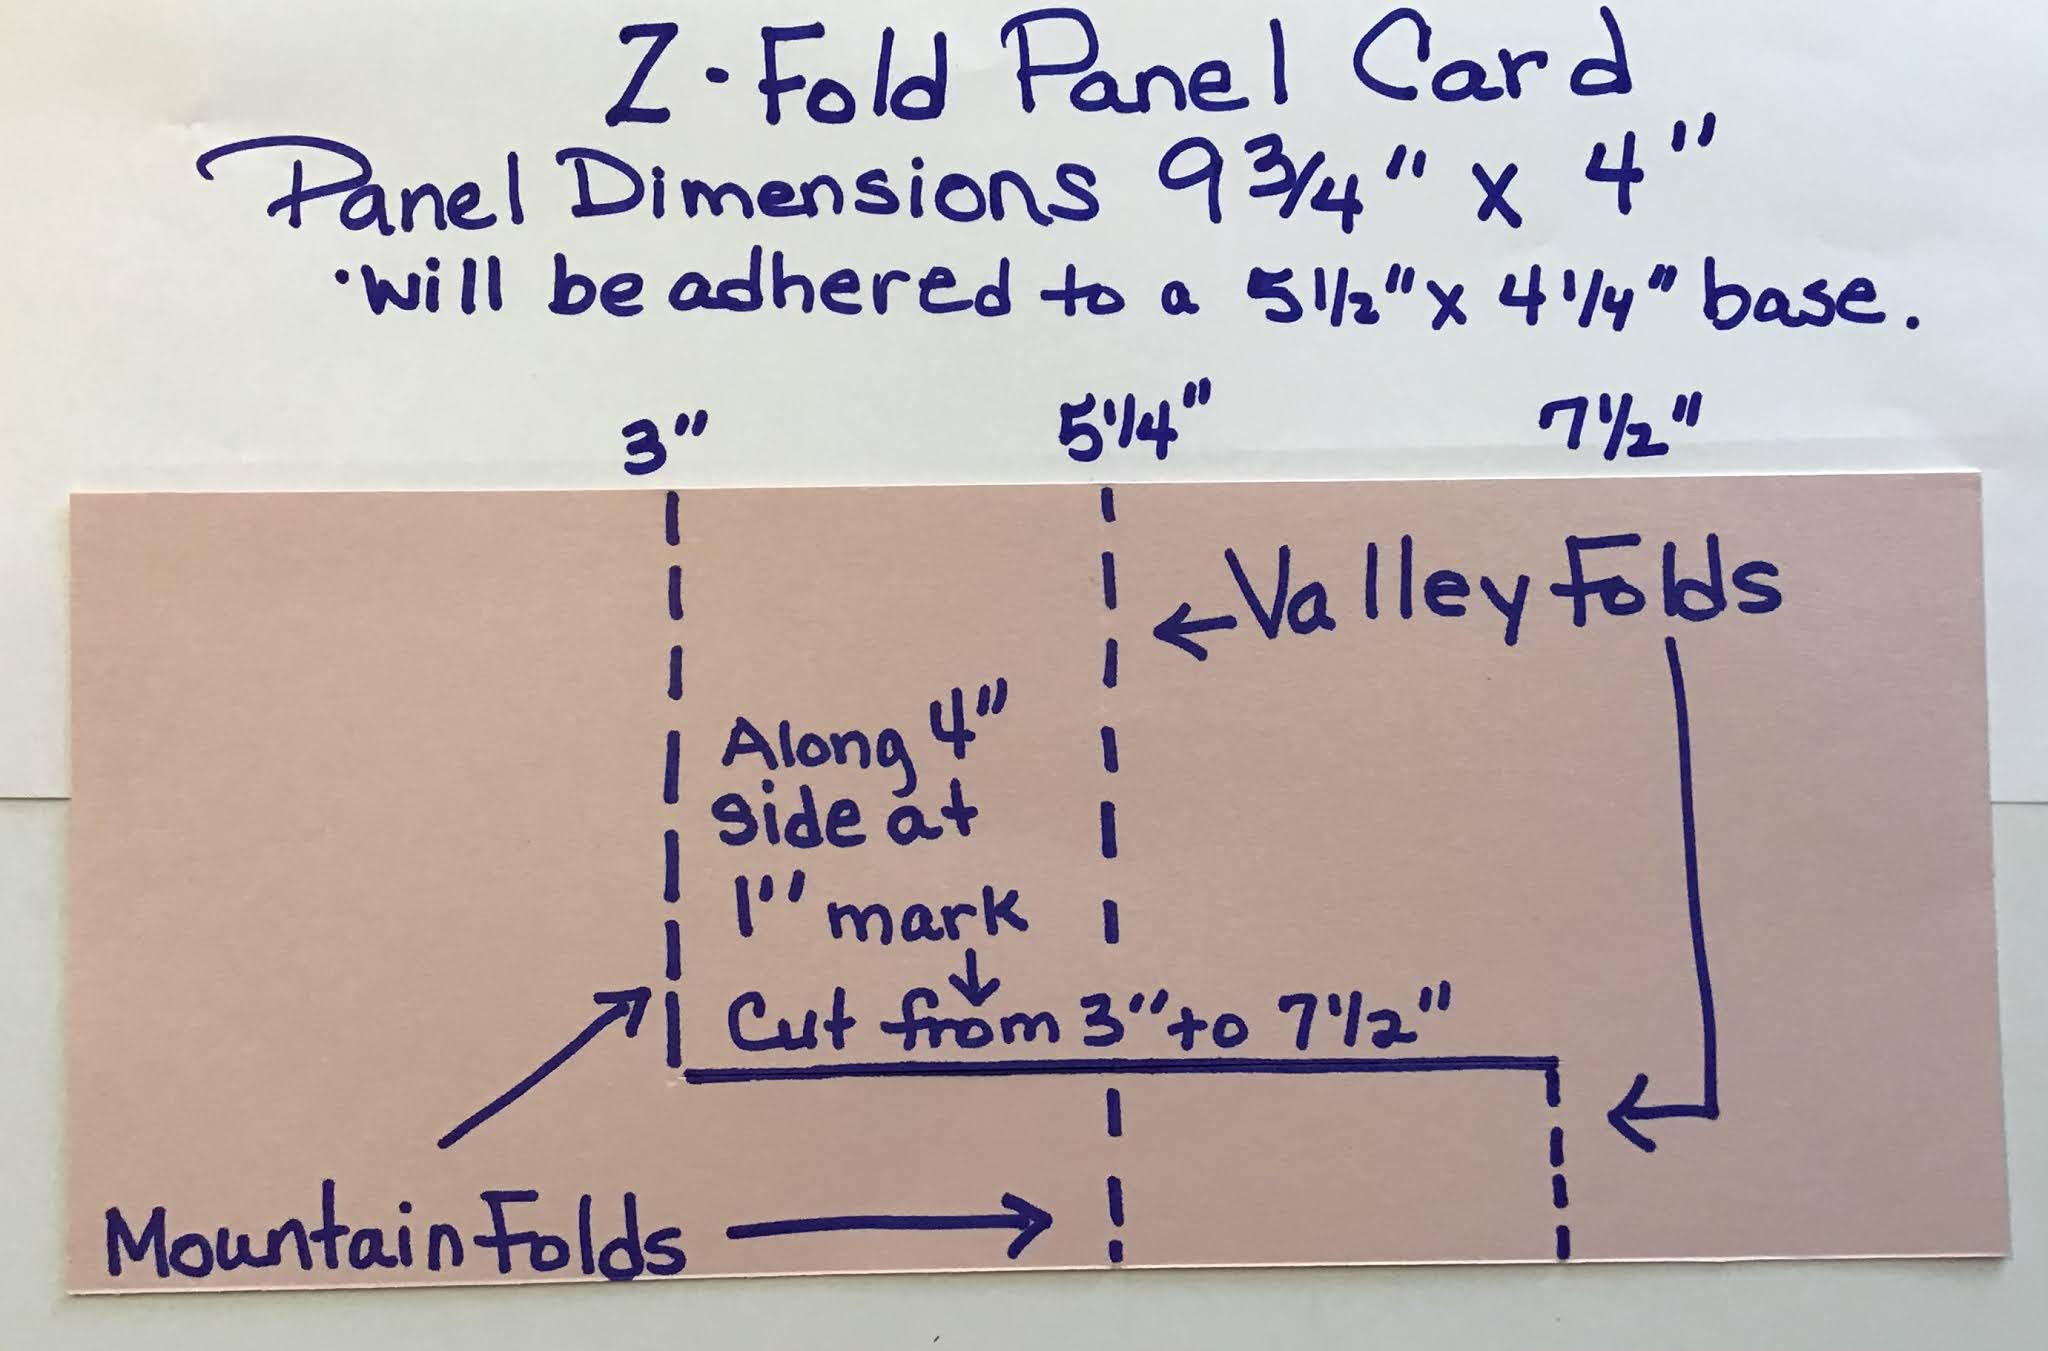
Below is a diagram showing where to cut and score the Z Fold panel. Once the panel is prepared, decide which way you will orient the card, Adhere all DSP / cardstock layers to the panel. Complete any stamping and embellishing. Next adhere the panel to the cardstock base as you would adhere a 5 1/4” x 4” layer to a regular card base. Place adhesive on the Z Fold panel sections that mske up the right hand side of the card for the landscape orientation, or the bottom section of the card for the portrait orientation.
Z FOLD PANEL CUTTING AND SCORING
*Place the 9 3/4” x 4” panel in the paper trimmer with the 4” side along the top of the trimmer at the 1”mark. Place the trimmer blade at 3” and cut down to 7 1/2”.
* Score the cardstock along the 9 3/4” side at 3” from the top of the cardstock down to the cut line.
* At the 5 1/4” score the cardstock from top to bottom.
* At the 7 1/2” score the cardstock from the cut line down.
* Fold the score lines as follows:
At the 3” score line create a mountain fold.
At the 5 /4” score line the top part is a valley fold, while the bottom section is a mountain fold.
At the 7 1/2” score line fold a valley fold.
I hope you give this version of the Z Fold card a try. Check back on Friday (19 February 2021) to view a video demonstration of how to assemble this card, and other Z Fold cards featured in his week’s posts.
Until next time...
Stamp Happy!
Kim
All stamps and stamped images ©️1990-2021 Stampin’ Up!®️