We are nearing the end of Sale-a-bration, but there is still time to earn free items with your Stampin’ Up! ®️ purchases. Most Sale-a-bration items can be earned with a $50 product purchase. Two Sale-a-bration items require a $100 purchase. (Tax and shipping charges are not included.) Sale-a-bration items include stamp sets and Designer Series Papers. This Sale-a-bration promotion ends this Sunday (28 February 2021).
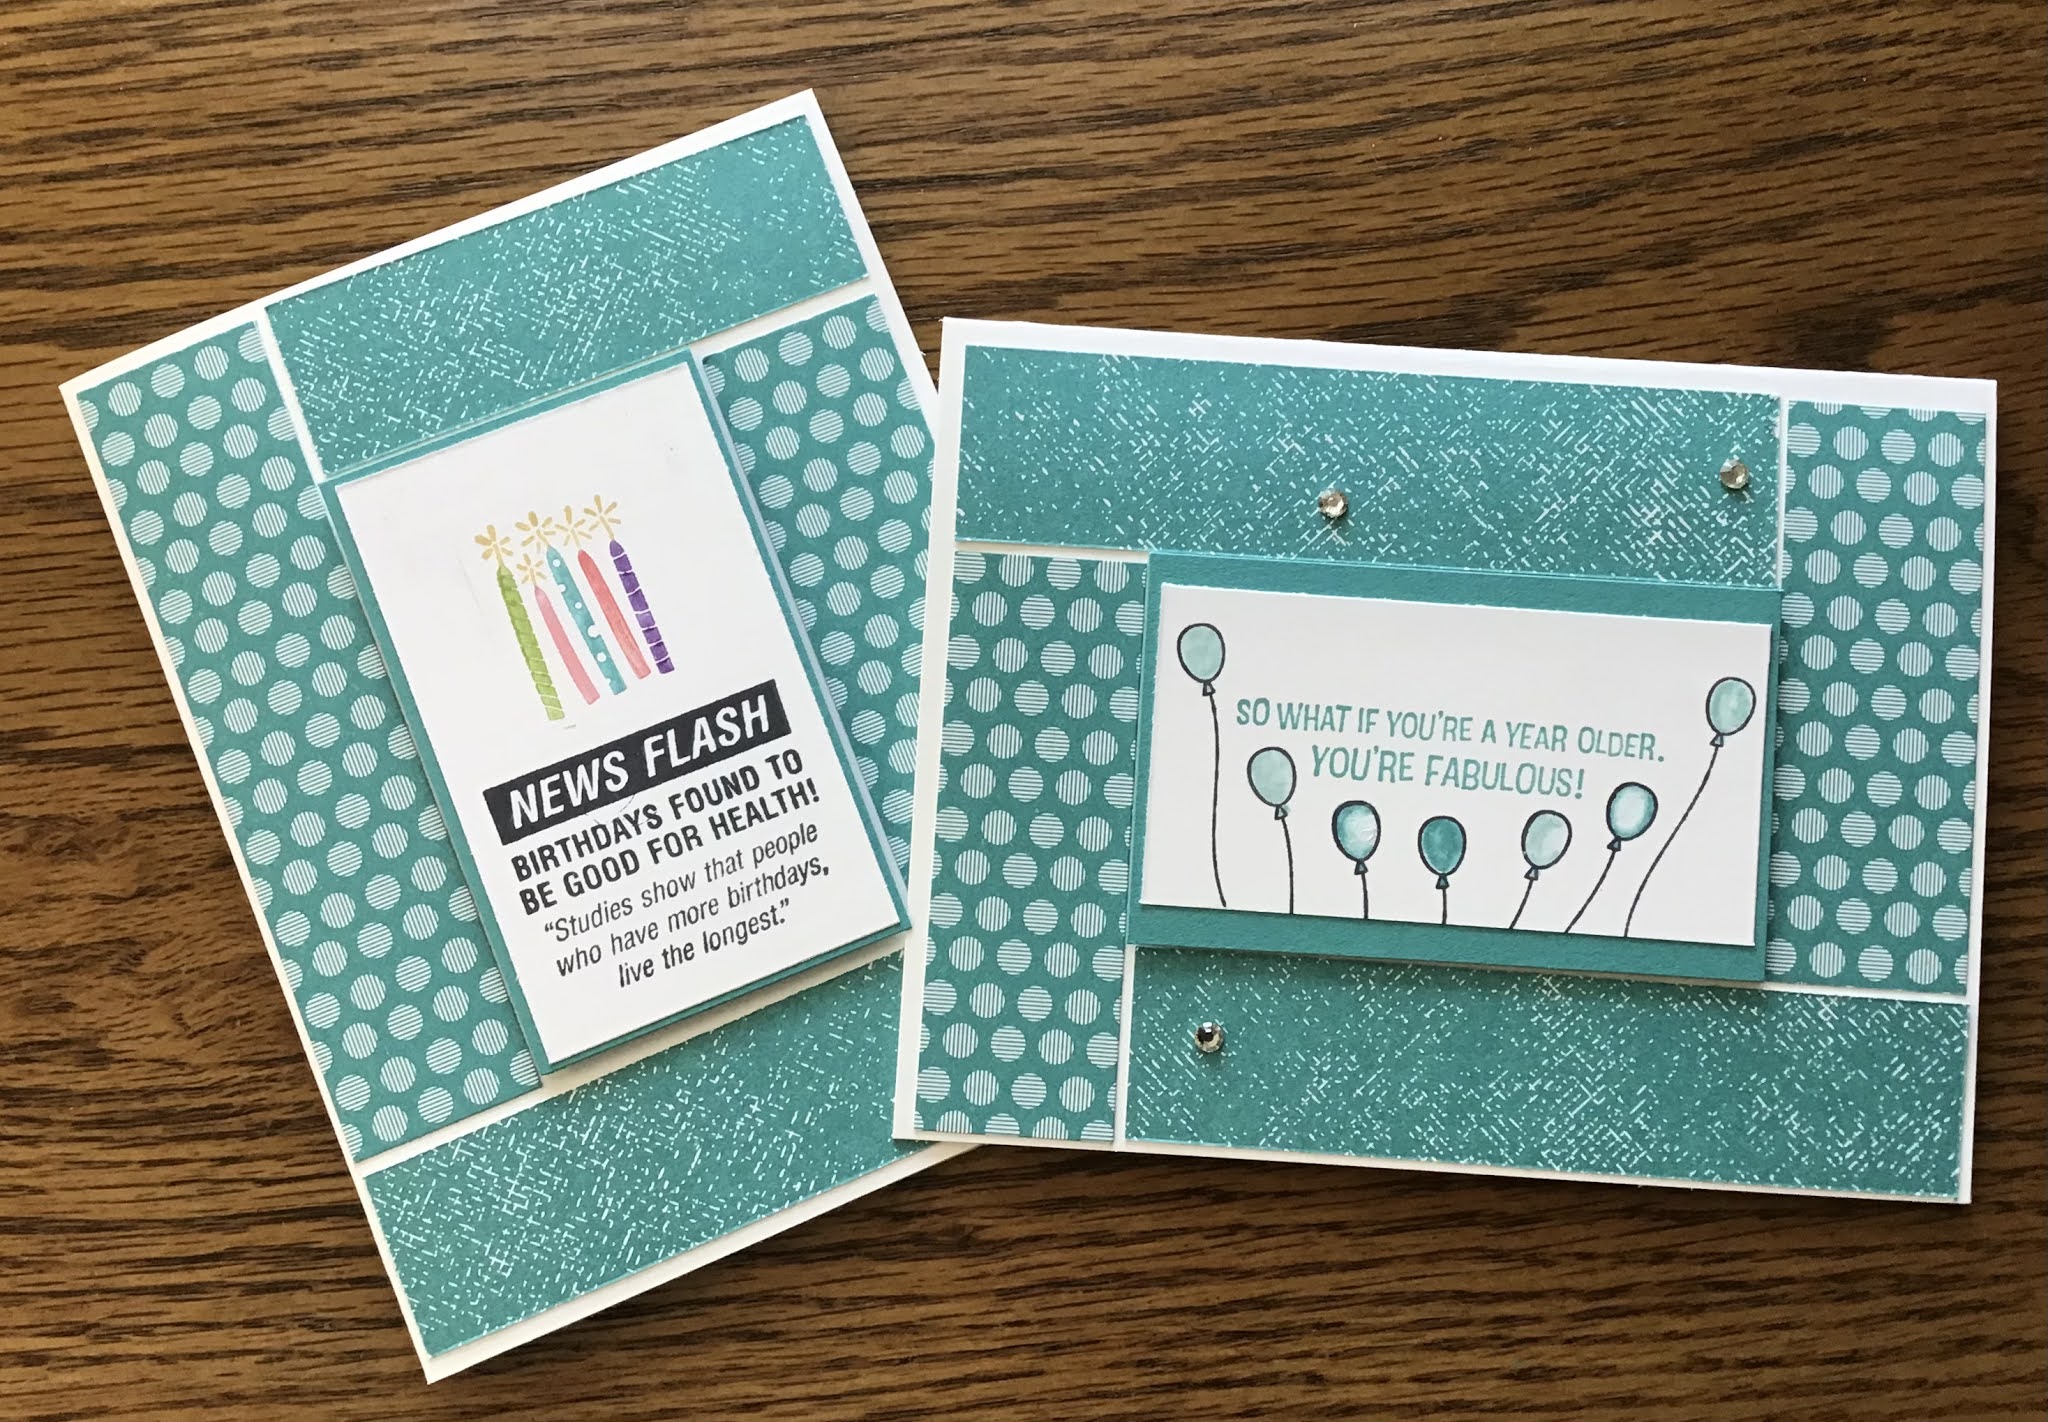
Let’s take one more look at the stamp sets and some cards I created using them.
DARLING DONKEYS
APPROACHING PERFECTION
CORNER BOUQUET
A TOUCH OF INK
HEAL YOUR HEART
BERRY BLESSINGS
To view more samples of cards using Sale-a-bration items see posts dated January 6, 15, 28 and February 7, 2021.
Valentine’s Day is coming up, so I thought I’d make a couple of fun cards to share. The cards were created using the SNAILED IT stamp set, the coordinating SNAIL DIES, and the cute RESIN HEART EMBELLISHMENTS! (Stampin’ Up!®️January - June 2021 Mini Catalog) I also used the HEARTFELT stamp set along wit the coordinating HEART PUNCH PACK. (Stampin’ Up! 2020-2021 Annual Catalog)
Here are the cards.
And, here are the stamp sets!
The cards are what I call mechanical cards, because they move. I call this card the PULL & SLIDE CARD! I have heard it referred to as a slider card and a pull tab card.
Here is the cute snail card”closed.” The snail is popped up on dimensionals. The Happy Valentine’s heart is held in place with Stampin’ Seal. It is important whatever is placed on the right side of the card be kept as flat as possible to allow the slider part of the card to pass over it!
Here is the snail card “opened.” The blank space on the pull out panel can be used to write a short message.
Here is the Heartfelt card. The Happy Valentine’s heart is attached with dimensionals. The white hearts were cut with dies from the SNAIL DIES. The “Love You Lots” sentiment is embossed. The two largest hearts on the Happy Valentine’s Heart are the Resin Hearts.
Here is what the card looks like opened. Before sending this card I will use a white gel pen to write my name inside the heart on the left side of the card.
Instead of using cardstock for the card base you can use DSP (designer series paper). For this card I used the BERRY DELIGHTFUL DSP & the BERRY BLESSINGS stamp set (Sale-a-bration Brochure), and the SWEET STRAWBERRY stamp set (Stampin’ Up! January - June 2021 Mini Catalog).
Here is the care open. When using DSP you want to pay attention to directional patterns.
As you can see there is not much room to right a message on the pulled out portion of the card. The solution- add a piece of 3 3/4” x 5” piece of Basic White cardstock to the back of the card as shown below.
SUPPLIES NEEDED TO MAKE THE BASIC CARD
Cardstock or DSP cut at 5 1/2” x 8 1/2” and Basic White or light colored cardstock cut at 3 3/4” x 4 3/4”.
Tear & Tape, Scotch tape, bone folder, 3” - 6” of ribbon, and 1 1/2” circle punch or other circle punch to punch out a notch on the cardstock. You will also need a paper hole punch or a stapler with staples to use for attaching the ribbon pull. You will also need a paper trimmer.
HOW TO MAKE THE BASIC PULL& SLIDE CARD
Score the cardstock along the 8 1/2” side at 4” and 8”. Turn the cardstock so the 8” score line is toward the left side of the trimmer at the 1 1/4” mark. Position the cutting blade at 3/4” and cut down to the 4 3/4” mark. Move the cardstock to the 3 3/4” mark and repeat the cutting process from 3/4” to 4 3/4”. You can fold the card stock along the score lines. See the photo above.
Now take the Basic White cardstock and place the 4 3/4” side along the top of the trimmer at the 2” mark. Cut until just passed the 3 1/2” mark. The cardstock will almost be cut into two pieces.
Next take the punch and line it up between the two cut lines on the card base. Punch a partial circle to form a notch.
You card base should resemble the photo above.
Line up the largest section of the Basic White cardstock with the notched end of the card base. Now move the Basic White cardstock to allow the narrowest end to thread through the cut lines of the cardbase. Use small pieces of tape to attach the bottom ends of the Basic White cardstock back together.
Place Tear & Tape along the inside short end of the card base and along the 1/2” tab made by scoring at the card base at the 8” mark.
Remove the protective covering from the tape.
Fold the card stock over and press down to adhere.
Fold the remaining tab upward and seal.
Your card is ready to be embellished. To made it easier for the recipient to pull out the sliding mechanism attach the ribbon in one of two ways: 1. Use a hole punch to punch a hole in the center of the pull out mechanism about 1/4” - 1/2” from the end and thread the ribbon through (see the snail and the heart cards), or 2. staple the ribbon in place as I did on the berry card.
HOW YO MAKE A PULL & SLIDE CARD VIDEO
Thank you for stopping by. I hope you enjoy making the PULL & SLIDE CARD. That is it for today. Until next time....
The Stampin’ Up!®️ January - June 2021Mini Catalog sales period is underway, and Sale - A - Bration (SAB) is underway! SAB will be a bit different this year. You might have noticed it runs for only two months as opposed to the usual three months, but ..... this year there will be another two months of SAB during July and August! So... four months total! Now that is something to celebrate,
What is SAB? It is one of Stampin’ Up!’s biggest promotions. During SAB you can select items for free from the SAB brochure when you reach the price points of $50 or $100.(excluding shipping and tax).There are 7 items to choose from at the $50 level and 2 items at the $100 level. Remember orders of $150 or more also earn Stampin’ Rewards. During SAB orders (single orders or workshop orders) of $300 + are eligible for the SAB items, Stampin’ Rewards, and earn the Party Punch stamp set shown on page 17 of the SAB brochure.
For those of you new to SAB here are examples of the number of products you can earn based on a product order. Remember, shipping and tax are excluded.
A $50 order means you can select one item at the $50 level. A $100 order means you can select either 2 items at the $50 level or 1 at the $100 level. A $150 order means you can select either 3 items at the $50 level or 1 item at the $50 level and 1 at the $100 level, plus you will receive Stampin’ Rewards that you can use toward more free Stampin’ Up! Products.
Let’s take a look at one of the SAB offerings. The Berry Blessings Stamp Set and the coordinating, Berry Delightful DSP is an option at the $100 level. The stamp set is photopolymer and is a Two Step®️ set. This offering coordinates with the Sweet Strawberry Bundle on page 44 of the January - June Mini. Here is a look at the stamp set:
And here is a look at the DSP. As you can see one side of the paper has a berry pattern, the other side has various patterns.
Here are two cards I made with these products:
For this card I stamped the images on a 5 1/2” x 4 1/4” piece of Whisper White cardstock using Mossy Meadow, Old Olive, Pacific Point, Rich Razzleberry, and Blackberry Bliss inks. To get lighter shades of a color (like to fill in the blueberries) I inked my stamp, stamped off on scrap paper, then stamped on the cardstock. I cut the focal point down to 4” x 5 1/4” and adhered it to a piece of Rich Razzleberry cut at 4 1/16” x 5 5/16”. I adhered that to an Old Olive card base. The greeting is stamped on Whisper White with Old Olive ink, and cut out with a die from the Tasteful Labels Dies. (Annual Catalog page 179) The little bow is a piece of Whisper White Baker’s Twine (found on page 55 of the Mini Catalog) I dyed with the dark Blackberry Bliss Stampin’ Blend.
Here is the inside of the card. The “Happy Birthday” is from the Happy Thoughts stamp set (page 28 of the Mini Catalog).
For this card I used two of the patterns from the DSP. The greeting is stamped on Whisper White with Poppy Parade ink, and cut out with another die from the Tasteful Labels Dies. The Poppy Parade mat for the greeting was cut with one of the Layering Squares Dies (Annual Catalog page 181). The embellishments are Pearl Basic Jewels (Annual Catalog page 156) I colored with the bullet end of the Poppy Parade (dark) Stampin’ Blend.
Here is the inside of the card. It features a 1/2” strip of the DSP and a berry I fussy cut from the DSP. Once again the sentiment is from the Happy Thoughts stamp set!