Showing posts with label Biggest Wish. Show all posts

Wednesday, February 1, 2023

WHAT’S SO GREAT ABOUT . . . GRID PAPER?

Hi Stampers!

I have a craft room stocked with all kinds of paraphernalia for card making  and paper crafting. There are all types of tools and consumables. Some items I use almost every time I work on a project; others not as much. Over the years I have discovered a few thing I can do without, and learned how to get the most from the items I use most. I decided to share ways I use some basic paper crafting tools and supplies. Today’s post is the first in a series I call - WHAT’S SO GREAT ABOUT . . .  ?  Today’s subject- grid paper!

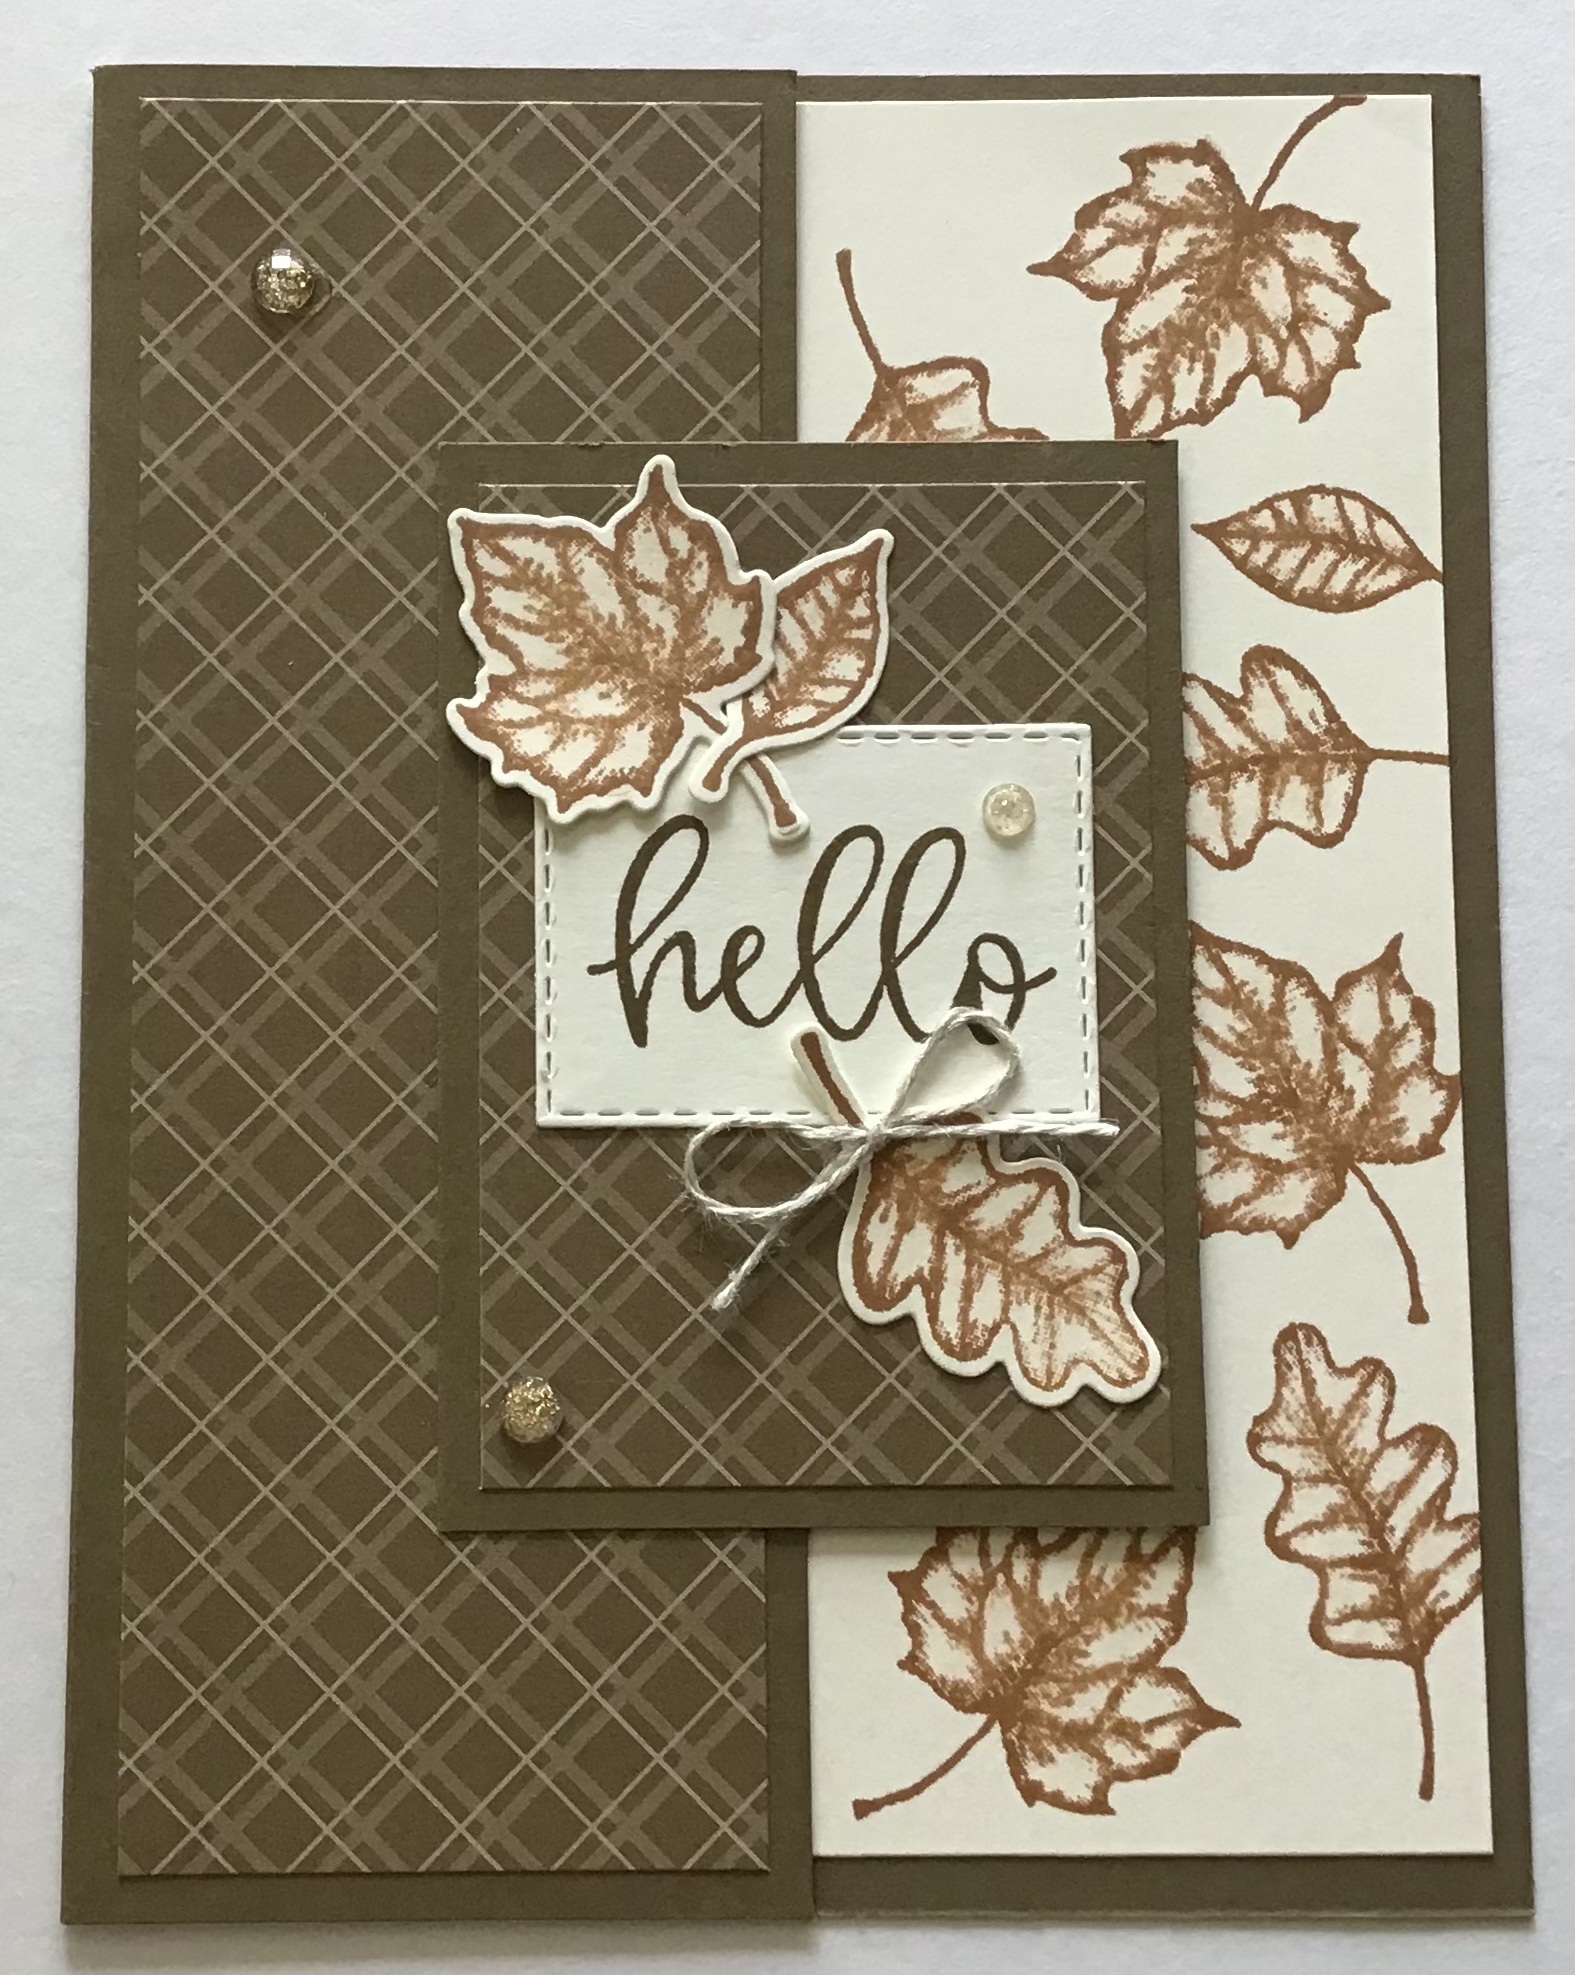
Below is a card I created with a lot of help from my grid paper:


JUST A NOTE - This series will feature STAMPIN’ UP!®️ tools and supplies. While some tips, techniques, and ideas I share might be applicable only to the Stampin’ Up! Item, many tips can be used with similar non- Stampin’ Up! products.

WHAT’S SO GREAT ABOUT. . .  GRID PAPER?
VIDEO


WAYS TO USE GRID PAPER AND WHY IT IS SO GREAT

* Cover up / protect work area
* Sketch out card designs and color in squares to test color combinations
* Jot down notes - measurements, shopping list, card ideas, etc
* Use the ruler to measure cardstock pieces, width or circumference of dies, and length of ribbon, twine, etc.
* It is a great pad for stamping with photopolymer stamps
* It helps make stamping with large background stamps easier
* Use for “stamping off” - ink stamp, stamp on grid paper then stamp on cardstock for a second generation of the ink color
* It is great for stamping off the edge of cardstock - no mess on your stamping table, and the ink absorbs into the paper and dries immediately (dye inks) so no worries about getting ink where you do not want it
* Use the grid lines to help keep your sentiments straight
* The grid lines are useful for lining up masks or stencils
* Grid paper is economical and recyclable 


STAMPIN’ UP! GRID PAPER


STAMPIN’ UP! GRID PAPER FEATURES
* grid paper pad has100 sheets with  imperil measurements (inches) on one side and metric measurements (centimeters) on the other side
* the sheets measure 11” x 17” (approximately)
* cardboard covers on the top and bottom allow you to remove the cover on either side, depending if you want to have the imperial or metric measurement facing up
* there are rulers for easy measuring
* there are places designated for notes


STAMPIN’ UP! SMALL GRID PAPER


STAMPIN’ UP! SMALL GRID PAPER FEATURES
* small grid paper has 50 sheet with imperial measurements on one side and metric on the other
* the sheets measure 7” x 7” and are made to fit perfectly in the Stamparatus.
* this grid paper is also sandwiched between 2 pieces of cardboard
* it has rulers for measuring
* the grid helps maintain correct cardstock placement when stamping 

SEASHELL BIRTHDAY CARD 
MADE USING GRID PAPER TECHNIQUES


SUPPLIES FOR THIS CARD

* Stamp sets - Friends Are Like Seashells, Biggest Wish
* Deckled Rectangles Dies - 2nd largest, to trim focal panel
* Cane Weave embossing folder - only emboss right hand side of cardstock (front of card)
* Basic White card base - 5 1/2” x 8 1/2”  scored and folded at 4 1/4” (Or use Shimmery White cardstock as an alternative)
* Basic White cardstock - 3 3/4” x 5”
* Inks - Crumb Cake, Pool Party, Balmy Blue,Calypso Coral, Blushing Bride, Flirty Flamingo, and Early Espresso
* Water Painter (flat brush) or watercolor brush - lightly watercolor background using Crumb Cake, Pool Party, and Balmy Blue inks and water painter - dry with heat tool or allow to ait dry
* Milky Adhesive Dots - 3. White


That’s all for today. Thank you for stopping by. Until next time…
Stamp Happy!

Kim

All stamps and stamped images ©️1990-2023 Stampin’ Up!®️

Thursday, April 7, 2022

NO LAYER CARDS - CREATED WITH BLENDING BRUSHES, MASKS, STENCILS, DIE CUTS, & PUNCHED IMAGES

 Hi Stampers!

One of my favorite self challenges is creating no layer cards. Today I am sharing some no layer cards created using blending brushes and various other tools. These cards are quick and easy to make, and take just a few supplies. Let’s take a look at the cards:


I used blending brushes to create each background on these cards.

BLENDING BRUSHES


STACKED DIE CUT BIRTHDAY CARD

 
This card looks a lot better in person than in the photo. Still I wish I would have added a few gems or other embellishment. The Happy Birthdays were die cut using a die from  BIRTHDAY CHICK DIES. I die cut 9 Happy Birthday images, and glued them together in stacks of 3, and adhered them to the card front. Next I applied ink with blending brushes.


BIRTHDAY CHICK DIES


SUPPLIES

* Card base - Basic White (thick) cardstock 8 1/2” x 5 1/2” scored and folded at 4 1 4”
* Basic White cardstock for die cuts - 9, stacked and glued together, adhere to card
* Inks - Daffodil Delight, Just Jade, & Pacific Point
* Adhesive
* Blending Brushes

MASKED & STENCILED BIRTHDAY CARD

To make the background for this card I use printer paper to cut a circle with a die large enough to accommodate the greeting. I used this for a mask. I used temporary adhesive to hold the mask in place on the card front. Next I placed the stencil (decorative mask) over the card front and used low tack tape to secure the stencil. I used a blending brush to apply ink over the stencil. I removed the stencil and the mask, and stamped the greeting in the center of the circle.

BUTTERFLIES & FLOWERS DECORATIVE LAYERING MASKS
(FLORAL DESIGN)


SUPPLIES

* BIGGEST WISH stamp set
* Basic White (thick) cardstock 8 1/2” x 5 1/2” scored and folded at 4 1/4”
* Die cut circle from printer paper that will accommodate greeting
* Butterflies & Flowers Decorative Layering Masks - floral pattern
* Inks - Memento Tuxedo Black, Fresh Freesia, Coastal Cabana, Flirty Flamingo
* Blending Brush
* Temporary Adhesive, low tack tape

LAYERED STENCILED CARD


For this card I used the butterfly layering decorative mask (stencil)

BUTTERFLIES & FLOWERS DECORATIVE LAYERING MASKS
(BUTTERFLY DESIGN)


SUPPLIES

* BIGGEST WISH stamp set
* Card base Basic White (thick) 8 1/2” x 5 1/2” scored and folded at 4 1/4”
* Butterflies & Flowers Decorative Layering Masks - Butterfly Pattern
* Inks - Coastal Cabana, Bermuda Bay, Night of Navy
* Blending Brush
* Low tack tape

DIES, PUNCHES, & STENCIL CARD


This card is one layer but I did add die cuts, some of which are popped up on dimensionals.

LADYBUG BUILDER PUNCH, PICTURE THIS DIE (CIRCLE), LAYERING CIRCLES DIES


BASIC PATTERNS DECORATIVE MASKS
(Dots)


SUPPLIES

* BIGGEST WISH stamp set
* Basic White (thick) card base cut at 8 1/2” x 5 1/2” scored and folded at 4 1/4”
* Poppy Parade , Basic Black, & Basic White cardstock for sentiment, die cuts, & ladybugs
* Inks - Poppy Parade, Memento Tuxedo Black
* Dies - Layering Circles and Picture This Dies (circles)
* Ladybug Builder punch - 3 ladybug bodies, 3 set of wings
* Basic Patterns Decorative Masks - dots
* Blending Brushes
* Adhesive and dimensionals
NO LAYER CARDS


NOTE - Stampin’ Up! refers to stencils as decorative masks.

I hope you give no layer cards a try. These techniques are just a of few of the techniques you can use to create one layer cards - the possibilities are endless!

That’s it for today. Until next time…
Stamp Happy!

Kim

All stamps and stamped images ©️1990 - 2022 STAMPIN’ UP!®️

Sunday, August 22, 2021

ADD A TOUCH OF FALL TO YOUR CARDS WITH THE TIME OF GIVING BUNDLE & A BLENDER PEN

 Hi Stampers!

Have you seen the Time of Giving Bundle in the Stampin’ Up!®️ July-December 2021 Mini catalog? (Page 61) I missed it the first couple of times I looked through the catalog. Once I took notice, I had to have it! The stamp set has nice sentiments and four image stamps. I think the snowflakes and swirls image is really pretty, but I love the leaves. All three leaves are one stamp, but the coordinating die cuts them out separately.

Here is a look at the stamp set:

Here are the dies:

These dies cut out images from the stamp set (wheat and leaves). The also cut out snowflake, ribbon, and vine shapes. There are four outline dies (detail dies) that cut out images attached to a rectangular border. The die cut images work well with the Tailored Made Tags Dies (Annual Catalog) for creating gift tags or tags for cards.

I used the TIME OF GIVING BUNDLE to create a fall themed card. Here is the card:


The leaf images are basically outline images with a bit of shading. I used a blender pen on the stamped image to move the ink around and add a hint of color to the leaves. Page down a bit for the video where I demonstrate how to use a blender pen to add a touch of color to stamped images.

SUPPLIES FOR THE CARD
* Time of Giving Bundle and the Biggest Wish stamp set
* Soft Suede Card base cut at 6 3/8” x 5 1/2” scored and folded at 2 1/8” (or 4 1/4” - it will be the same) along the 6 3/8” side.
* Very Vanilla cardstock cut at 5 1/4” x 4” and a large scrap for stamping
* Soft Suede cardstock cut at 3 1/4” x 2 1/4”
* 6” x 6” DSP x Neutrals - Soft Suede, one piece cut at 5 1/4” x 1 7/8” and one cut at 3” x 2”.
* Inks - Soft Suede and Cinnamon Cider and a blender pen
* Wonderful Gems - 3 clear with gold flakes
* 4-5 inches of linen thread tied in a bow
* Stitched Rectangles Dies - die that measures about 2” x 1 3/4”
* Adhesive and glue dots

ASSEMBLY
* Stamp the leaf images with the. Cinnamon Cider ink along the right side of the Very Vanilla (5 1/4” x 4”) cardstock. Use the blender pen to move some of the ink around the leaf adding a touch of color to the entire image. 
* On the scrap of Very Vanilla stamp the leaf images with Cinnamon Cider ink,  and use the blender pen as before yo add a dab of color to the leaves. Stamp the greeting (hello) with Soft Suede ink. Die cut the leaf images and use the Stitched Rectangles Die to cut out the greeting.
* Adhere the DSP to the front of the card base and to the piece of Soft Suede cardstock (focal panel base)
* Apply adhesive to only one side of the focal panel base and adhere it to the card front.
* Adhere the greeting and the leaves (see card for placement).
* Use a glue dot to adhere the linen thread bow to the single leaf.
* Place the Wonderful Gems on the card.


NOTE:
The Stampin’ Up 2021-2022 Annual Catalog suggests using  Basic White or Shimmery White cardstock with the blender pens. For my card I used the blender pen on Very Vanilla cardstock with no issues. I used a circular motion and a light touch. I avoided going back over areas I had covered. The circular motion, light touch, and going over the stamped area only once helps prevent pilling.The photos above show results using the blending pen on (from top to bottom) Basic White cardstock, Shimmery White cardstock, and Very Vanilla cardstock. 

VIDEO - USING BLENDING PENS TO ADD COLOR TO STAMPED IMAGES


In the video I mentioned using the die cut leaf images in a shaker card. Here is the shaker card I made using the die cut leaves and a few sequins for shaker elements.


SUPPLIES FOR THE SHAKER CARD
* Stamp sets - Time of Giving Bundle, Nuts About Squirrels, Banner Year (greeting)
* Soft Suede card base
* Soft Suede and Very Vanilla cardstock, Cork Specialty Paper, and window sheet all cut at 4” x 3 1/2”
* Scraps of Soft Suede, Crumb Cake, Very Vanilla, and scraps of colors for leaves (I used Crushed Curry, Pumpkin Pie, and Cherry Cobbler).
* DSP 5 1/4” x 4” I used the Pattern Party DSP - Black and White tattersall pattern.
* Inks - Cinnamon Cider, Soft Suede, and Memento Tuxedo Black; blending brush
* Layering Circles Die 2 1/2” diameter
* Adhesive, foam adhesive strips
* A few sequins

ASSEMBLY
* Use the blending brush to add ink to the DSP. First add a layer of Cinnamon Cider followed by Soft Suede. The goal is to have areas of lighter and darker coloring.
* Adhere the Cork paper to the piece of Very Vanilla cardstock (this step will give the cork more stability), use the texture stamp from the Time of Giving stamp set and Cinnamon Cider ink and stamp randomly on the cork to add more dimension to the texture of the cork. Allow this to dry or use a heat tool to set the ink (it takes just a few seconds).
* Stamp the squirrel (Nuts About Squirrels) on Very Vanilla with Memento Tuxedo Black ink. Add color with the “filler” stamp and Cinnamon Cider ink. Stamp the greeting (from Banner Year) with Soft Suede on the scrap of Crumb Cake. 
* Fussy cut the squirrel. Use scissors or a paper trimmer to cut out the greeting.
* Die cut the cork panel using the Layering Circles Die.
* Die cut the leaves using the leaves die (not the outline die)
* Adhere the window sheet to the back of the cork panel and place the foam adhesive strip on the window sheet along the outside rim of the circle.
* Place the die cut leaves and a few sequins in the center of the 4” x 3 1/2” piece of Soft Suede cardstock. Peel the backing off the foam strip and attack the cork panel to the cardstock.
* Adhere the greeting to a scrap of Soft Suede cardstock and trim the cardstock to make a mat for the greeting. Adhere this to the card above the die cut circle.
* Adhere the squirrel image to the lower left corner of the cork panel.
* Adhere the DSP to the card base.
* Adhere the cork shaker panel to the card.

That’s all for now. Thank you for taking a peek. Until next time…
Stamp Happy!
Kim

All stamps and stamped images ©️1990-2021 Stampin’ Up!®️

Thursday, August 5, 2021

CREATE INTERESTING BACKGROUNDS USING STAMPIN’ BLENDS + ALCOHOL

 Hi Stampers!

Are you looking for an interesting background technique for your cards? Grab some Stampin’ Blends, a bit of isopropyl alcohol, and some vellum cardstock. That is all it takes to make a great background piece for your cards! Here are some cards I created using this technique:


Let’s walk through the process. I will focus on the Magenta Madness card.


SUPPLIES FOR THIS CARD
*Magenta Madness card base
* Basic Black cardstock cut at 5 1/8” x 3 7/8” and 3 1/2” x 1 1/2”
* Magenta Madness cardstock cut at 5 1/4” x 4” and 3 1/4” x 1 1/4”
* Vellum cardstock cut at 5 1/4” x 4”
* Inks - Memento Tuxedo Black; Stampin’ Blends - Magenta Madness, Melon Mambo, Polished Pink, and Blackberry Bliss
* Matte Black Dots - 3
* Adhesive of choice; to adhere vellum to cardstock adhesive sheet or multipurpose glue and a piece of sponge
* Other - Alcohol, Stampin’ Spritzer and / Or a Water Painter (or paint brush), and small container for alcohol

I have used 91%, 70%,and 50% isopropyl alcohol and achieved good results with each. To apply the alcohol you can fill a Stampin’ Spritzer with alcohol, put alcohol in a Water Painter or pour a bit of alcohol in a small container (I re-purposed a lid from a bottle of fabric softener), and use the Water Painter or a paint brush to apply the alcohol. It does not take much alcohol to create the effect. If using a Water Painter or paint brush remember to clean the brush after use.


The dark Stampin’ Blends work better for this techniques then the light ones. I cut my vellum a little larger than I want for my card and trim it down.


Scribble on the vellum with the Stampin’ Blends. I prefer to put all my color on the vellum at once, but you can do one color at a time if you like. Make sure to let the ink dry before applying another color.

Use the Stampin’ Spritzer to spray a bit of alcohol onto the colored vellum, or use the Water Painter to apply drops of alcohol to the vellum. The alcohol will begin moving the ink around. Allow the piece to dry, or dry it with a heat tool.

TO FINISH THE CARD:
* Adhere the vellum piece to the 5” x 3 3/4” piece of Magenta Madness cardstock using an adhesive sheet or multipurpose glue. Trim piece to 5” x 3 1/4. (I stead of Magenta Madness you can use Basic White. I found the Magenta Madness brought out the colors better.)
* Adhere this piece to the Basic Black cardstock
* Adhere this piece to the card base
* On the small piece of Magenta Madness stamp the greeting (the Happy Birthday is from the Sweet Ice Cream stamp set) Adhere this to the Basic Black mat, ad adhere this to the center of the card.
* Add the Matte Black Dots


DAISY BIRTHDAY


SUPPLIES FOR THIS CARD
* Daisy Lane stamp set and the medium Daisy Punch, and the Sweet Ice Cream stamp set for the greeting
* Daffodil Delight card base, one piece of Daffodil Delight cut at 3 1/2” x 1 1/2”
* Basic White cardstock (adhere to back of vellum), one piece cut at 3 1/4” x 1 1/4” for greeting, larger scrap for 3 Daisy shapes and flower stem
* Pale Papaya cut at 5” x 3 3/4”
* Inks - Daffidil Delight, Just Jade; Early Espresso Stampin’ Write Marker; Stampin’ Blends - Daffodil Delight, Pale Papaya, and Pumpkin Pie (all dark)
* Multipurpose glue and dimensionals
* Supplies to make alcohol background
BIRTHDAY FISH


SUPPLIES FOR THIS CARD:
* Biggest Wish stamp set, Sea Life Dies
* Night of Navy card base
* Shaded Spruce cardstock cut at 5” x 3 3/4”
* Vellum cardstock cut at 3” x 3” and small piece of Gold Shimmer Vellum
* Simply Elegant Trim (gold) about 26”
* Inks - Versa Mark and Gold embossing powder, Stampin’ Blends - Night of Navy, Shaded Spruce, and Balmy Blue
* Layering Circles Dies - 2 3/4” diameter
* Adhesive of choice; adhesive sheet for vellum
* Supplies to make alcohol background

Once I started making these backgrounds I just kept making more! I created two. Christmas cards using two more of the backgrounds I made. I used the Merry Snowflakes stamp set for the greeting on these cards. The snowflake was die cut using the Stitched Snowflakes Dies. Here are the cards:


SEASON’S GREETINGS WITH GOLD SHIMMER VELLUM


For this card I used Evening Evergreen and Cherry Cobbler Stampin’ Blends (dark) to create the background, then I covered it with a piece of Gold Shimmer Vellum.

SUPPLIES
* Evening Evergreen card base plus a piece of Evening Evergreen that is about 4” x 2” for the greeting - this will be die cut using the 3 3/4” x 1 5/8” Stitched Rectangles Die
* Vellum cardstock 5” x 3 3/4”, Basic White cardstock cut at 5” x 3 3/4”, and Gold Shommer Vellum cut at 5 x 3 3/4” - these will all be cut with the Stitched Rectangles Die that measures 4 3/4” x 3 1/2”
* Inks - Versa Mark and gold embossing powder; Evening Evergreen and Cherry Cobbler. Stampin’ Blends (dark)
* Simply Elegant Trim (gold) about 20”
* Wonderful Gems - clear with gold flecks - 3
* Multipurpose glue, dimensionals
* Supplies to make alcohol background

MERRY SNOWFLAKES GREETINGS

SUPPLIES
* Shaded Spruce card base and piece of Shaded Spruce cardbase cut at 3 3/8” x 2”
* Basic White cardstock that will be cut down to cut at 5 x 3 3/4” to back the vellum and one piece about 3 1/2” x 2 1/ 4 “ for the greeting. This will be die cut with the Stitched Rectangles Die that measures 3 1/4” x 1 7/8”
* Gold 6” x 6” Metallic Specialty Paper cut at 5 1/4” x 4” - cut the two snowflakes from the center of this piece
* Wonderful Gems - clear with gold flecks - 1
* Inks - Versa Mark and gold embossing powder; Stampin’ Blends - Night of Navy, Bermuda Bay, and Shaded Spruce (dark)
* Multipurpose glue
* Supplies to make alcohol background


Why not give this technique a try. Every background is a unique creation! Word of warning - this technique is addicting!

That is all for today. Until next time…
Stamp Happy!
Kim

All stamps and stamped images ©️1990-2021 Stampin’ Up! ®️

Monday, August 2, 2021

A SIMPLY THANK YOU CARD USING THE TIME OF GIVING STAMP SET

 Hi Stampers!

Wow! Can you believe it is August? Summer is flying by, but there are still plenty of warm sunny days left to enjoy. August always makes me think of yellow, because my sunflowers, black eyed Susan’s, and marigolds really brighten up the yard and garden. The arrival of August has inspired me to use a color I have been ignoring - Bumblebee. It is a nice golden yellow, perfect for August. I used an image from the TIME OF GIVING stamp set which will be available for purchase tomorrow (3August) from the Stampin’ Up!®️ July-August 2021 Mini Catalog.

Here is a look at my card:


And here is a look at the stamp set:


I used a couple of techniques making this card. I used a masking technique for the focal point. (See my 16 June 2021 post for instructions.) To add texture to the focal panel’s mat I used my scoreboard and stylus.


SUPPLIES FOR THIS CARD:
* Card base - Bumblebee 8 1/2” x 5 1/2” scored and folded at 4 1/4”
* Sahara Sand cardstock cut at 5 1/4” x 4” for focal panel mat
* Basic White cardstock cut at 4 3/4” x 3 1/2” and one piece cut at 5 1/4” x 4” for inside the card
* Printer paper or other thin paper cut at 4 3/4” x 3 1/2”  and washi tape or other low tack tape for mask
* Inks - Bumblebee, Sahara Sand, and Balmy Blue
* Blending Brush
* Layering Circles Dies - 2 5/8” diameter
* Bumblebee Gingham Ribbon - about 14”
* Simply Scored Scoring Tool (score board) or use the scoring blade on the paper trimmer
* Adhesive of choice
*Time of Giving stamp set and Biggest Wish stamp set for the greeting (Annual Catalog)

ASSEMBLY:
* Use the circle die to cut a circle from the printer paper. Center the die about 5/8” from the top of the paper. This is the mask. 
* Place the mask over the Basic White cardstock (4 3/4” x 3 1/2”) and secure with the washi tape
* Add color to the unmasked portion of the card (the circle) with the Balmy Blue ink and the blending brush
* Stamp the wheat image with Sahara Sand 3 times along the bottom of the circle. 
* Remove the mask.
* Stamp the “thanks” with Bumblebee above the wheat images, toward the right of the card
*Wrap the Bumblebee gingham ribbon around the card just below the image and tie a bow
* Place the Sahara Sand cardstock on the score board or paper trimmer and make a score line at every 1/4”. Trim the cardstock to 5 1/4” long and trim 1/8” off each side making it 4” wide
* Adhere the focal panel to the Sahara Sand mat
* Adhere this piece to the card base
* On the remaining Basic White cardstock stamp the wheat image 2-3 times with Sahara Sand ink in the lower left corner of the cardstock, and adhere this to the inside of the card


That is all for today. Thank you for stopping in. Until next time…

Stamp Happy!

Kim

All stamps and stamped images ©️1990-2021 Stampin’ Up!®️


Saturday, July 17, 2021

CREATE PRETTY CARDS IN NO TIME USING THE EMBOSS RESIST TECHNIQUE & BLENDING BRUSHES

 Hi Stampers!

Today’s cards were made using the emboss resist technique and blending brushes. The emboss resist technique is easy to do, but it adds a whole lot of  “WOW” to a card. Using the blending brushes to add color to the focal panel adds another little bit of pizzazz! 

The cards were created using the PRIZED PEONY stamp set. This stamp set is found in the Stampin’ Up!®️ 2021-2022 Annual Catalog. The cards have the same layout; the focal panel dimensions are a bit different from card to card, and one card is in portrait orientation. I have listed the supplies and cutting measurements for each card below the individual card’s picture. Page down for the Emboss Resist Video Tutorial.


PRIZED PEONY 


MELON MAMBO CARD

SUPPLIES FOR THIS CARD:
* Melon Mambo card base
* Basic White for focal panel - 4 3/4” x 3 1/2” and a piece cut at 5” x 3 3/4” for inside the card.
* Basic Black cut at 5” x 3 3/4” for mat
* Inks: Granny Apple Green, Melon Mambo, Balmy Blue, Memento Tuxedo Black, Versa Mark and white embossing powder
* Blending brushes 
* Adhesive
* The greeting is from the BIGGEST WISHES stamp set. (Annual Catalog)

SOFT SEA FOAM CARD

SUPPLIES FOR THIS CARD:
* Soft Sea Foam card base
* Basic White cardstock - 2 pieces cut at 5” x 3 3/4” one for the focal panel and one for inside the card.
* Pale Papaya cut at 5 1/4” x 4” for mat
* Inks - Soft Sea Foam, Petal Pink, Pool Party, Versa Mark and white embossing powder.
* Blending brushes
* Adhesive

FRESH FREESIA CARD

SUPPLIES FOR THIS CARD:
* Fresh Freesia card base
* Basic White cardstock cut at 4 3/4” x 3 1/2” for focal panel and a piece cut at 5” x 3 3/4” for the inside of the card.
* Basic Black cardstock cut at 5” x 3 3/4” for mat.
* inks - Soft Sea Foam, Fresh Freesia, Pool Party, Memento Tuxedo Black, Versa Mark and white embossing powder.
* Adhesive
* The greeting is from the PANSY PATCH stamp set. (Annual Catalog)

EMBOSS RESIST + BLENDING BRUSHES TECHNIQUE VIDEO


The card made in the video is the Melon Mambo card  except the focal panel (Basic White cardstock) is cut at 5” x 3 3/4” and the Basic Black mat is 5 1/8” x 3 7/8”.


I have one more version of this card to share with you. I added ribbon to two corners of the card. Why? Well…I dropped a blending brush, and it left a spot of Bumblebee ink right on the top left corner of the focal panel! The ribbon covered up that little issue perfectly!

OLD OLIVE CARD

SUPPLIES FOR THIS CARD:
* Old Olive card base.
* Basic White cardstock - 2 pieces cut at 5” x 3 3/4” one for the focal panel and one for the inside.
* Bumblebee cardstock cut at 5 1/8” x 3 7/8” for mat.
*Inks - Old Olive, Bumblebee, Balmy Blue, Versa Mark and white embossing powder.
* Blending Brushes
* Ribbon - 2 pieces 4”-5” long (the Old Olive ribbon I used is retired). I used Scotch tape to hold the ribbon in place.
* Adhesive
* The greeting is from BIGGEST WISH stamp set. (Annual Catalog)

That’s all for today. Thanks so much for stopping by. Until next time…

Stamp Happy!

Kim

All stamps and stamped images ©️1990-2021 Stampin’ Up!®️