Showing posts with label Herring Bone Technique. Show all posts

Thursday, September 19, 2024

STAMP SCRAPPY CARDS FOR HALLOWEEN - A STAMP HAPPY HALLOWEEN POST

Hi Stampers! 

I have a lot of paper scraps. I have mentioned this before, and you might have even seen some of my envelopes or boxes of scraps. I use my scraps whenever I can. For today’s cards I pulled out my scraps of Halloween themed papers and paired them with three tried and true scrap techniques. Let’s take a look;


VIDEO
STAMP SCRAPPY HALLOWEEN CARDS


DIAGONALLY CUT STRIPS LAYOUT

 
For this card I used strips of paper cut 4” long x 3/4” wide.  I cut each strip in half diagonally by placing one 3/4” end of the strip in the trimmer at 1/2” and the other end at 1/4” then cut. Adhere to mat alternating wider end of strip and narrow end of strip at top of mat panel. Leave a bit of a gap between the strips as you work your way across the card.

NOTE - For a portrait version of the card cut the strips 5 1/4” long x 3/4” wide. Then follow directions above for cutting and adhering to mat panel. 

SUPPLIES 
* Card base - black cardstock cut at 8 1/2” x 5 1/2” scored and folded at 4 1/4”
* Mat - orange cardstock cut at 5 1/4” x 4”
* Patterned paper strips - about 6 pieces (different patterns) cut at 4” x 3/4” then cut in half diagonally as described above.
* For greeting - orange cardstock 5 1/4” x 1 3/4” patterned paper 5 1/4” x 1 1/2”  Happy Halloween die cut (alternate - a stamped greeting on light colored cardstock)
* Inside panel - white cardstock cut at 5 1/4” x 4” and black ink for sentiment
* Adhesive of choice and dimensionals for greeting


HALLOWEEN HERRINGBONE TECHNIQUE


The herringbone technique is an easy way to arrange strips of scraps into an eye-catching pattern. There is no specific measurement for placement of your strips, and the strips do not need to be the same length. I find it easier to cut the strips the same same length, and as I place them on the panel, trim them periodically. What is trimmed away can be used to cover other areas of the card. I cut my strips 1/2” wide x 7” long. Why 7”, because the diagonal of an A-2 card base is about 6.95” (yes, I did the math - just for fun), but if you measure with a ruler you’ll see it is almost 7”. That is where I get the 7” measurement. I cut about 10-12 strips to get a good variety of patterns.

SUPPLIES I USED
* Card base - black - 8 1/2” x 5 1/2” scored and folded at 4 1/4”
* Pattern base - white cardstock (any color will be fine as it will be covered up) cut at 5 1/2” x 4 1/4” this piece will be cut down to 5 1/4” x 4” later)
* Patterned paper _10 - 12 strips cut at 7” x 1/2”
* For images - Mini Cat Die (scrapbook.com), word bubble die (Stampin’ Up!®️), black, white, pink, green, gray, and yellow cardstock, black ink, and white gel pen
* Inside panel - white cardstock -5 1/4” x 4”
* Adhesive sheets cut at 5 1/2” x 4 1/4”, dimensionals

ASSEMBLY
* Place the adhesive sheet on the pattern base cardstock
* Place 1 strip of patterned paper diagonally across the cardstock. Place the 3/4” end of a strip of paper against the center strip, place it closer to the top of the card than the bottom. Do the same on the opposite side of the center strip, only place it closer to the bottom than the top. This creates 4 sections to fill with the remaining strips. Trim the excess paper periodically.
* Once the panel is covered with patterned paper, trim it to 5 1/4” x 4”
* Place the piece inside an embossing folder of choice. Embossing adds texture and really pushes the strips into the adhesive. Adhere this to card base. Adhere inside panel in place.
* Add die cuts

FOUR RECTANGLES TECHNIQUES


This is an easy, yet visually appealing technique. Simply cut 4 rectangles of patterned paper and adhere to a panel. The rectangles are 2 1/2” x 1 7/8” each. I used two different patterns, but one pattern, two patterns or all different patterns! Adhere these rectangles to a panel and a card base. Add focal images and a greeting.

SUPPLIES I USED
* Card base -black cardstock cut at 8 1/2” x 5 1/2” scored and folded at 4 1/4”
* Mat panel - Orange cardstock - 5 1/4” x 4”
* Patterned paper - 4 pieces each cut at 2 1/2” x 1 7/8”
* Orange cardstock and layering circle dies, black ink, and “Trick or Treat” word stamp. Mask stamp to allow for stamping each word individually with the black ink, then use circle dies to die cut greeting.
* Cat dies - Mischievous (Tim Holtz)
* Inside panel - white cardstock cut at 5 1/4” x 4”
* Adhesive and dimensionals

STAMP SCRAPPY HALLOWEEN CARDS


MORE SAMPLE CARDS
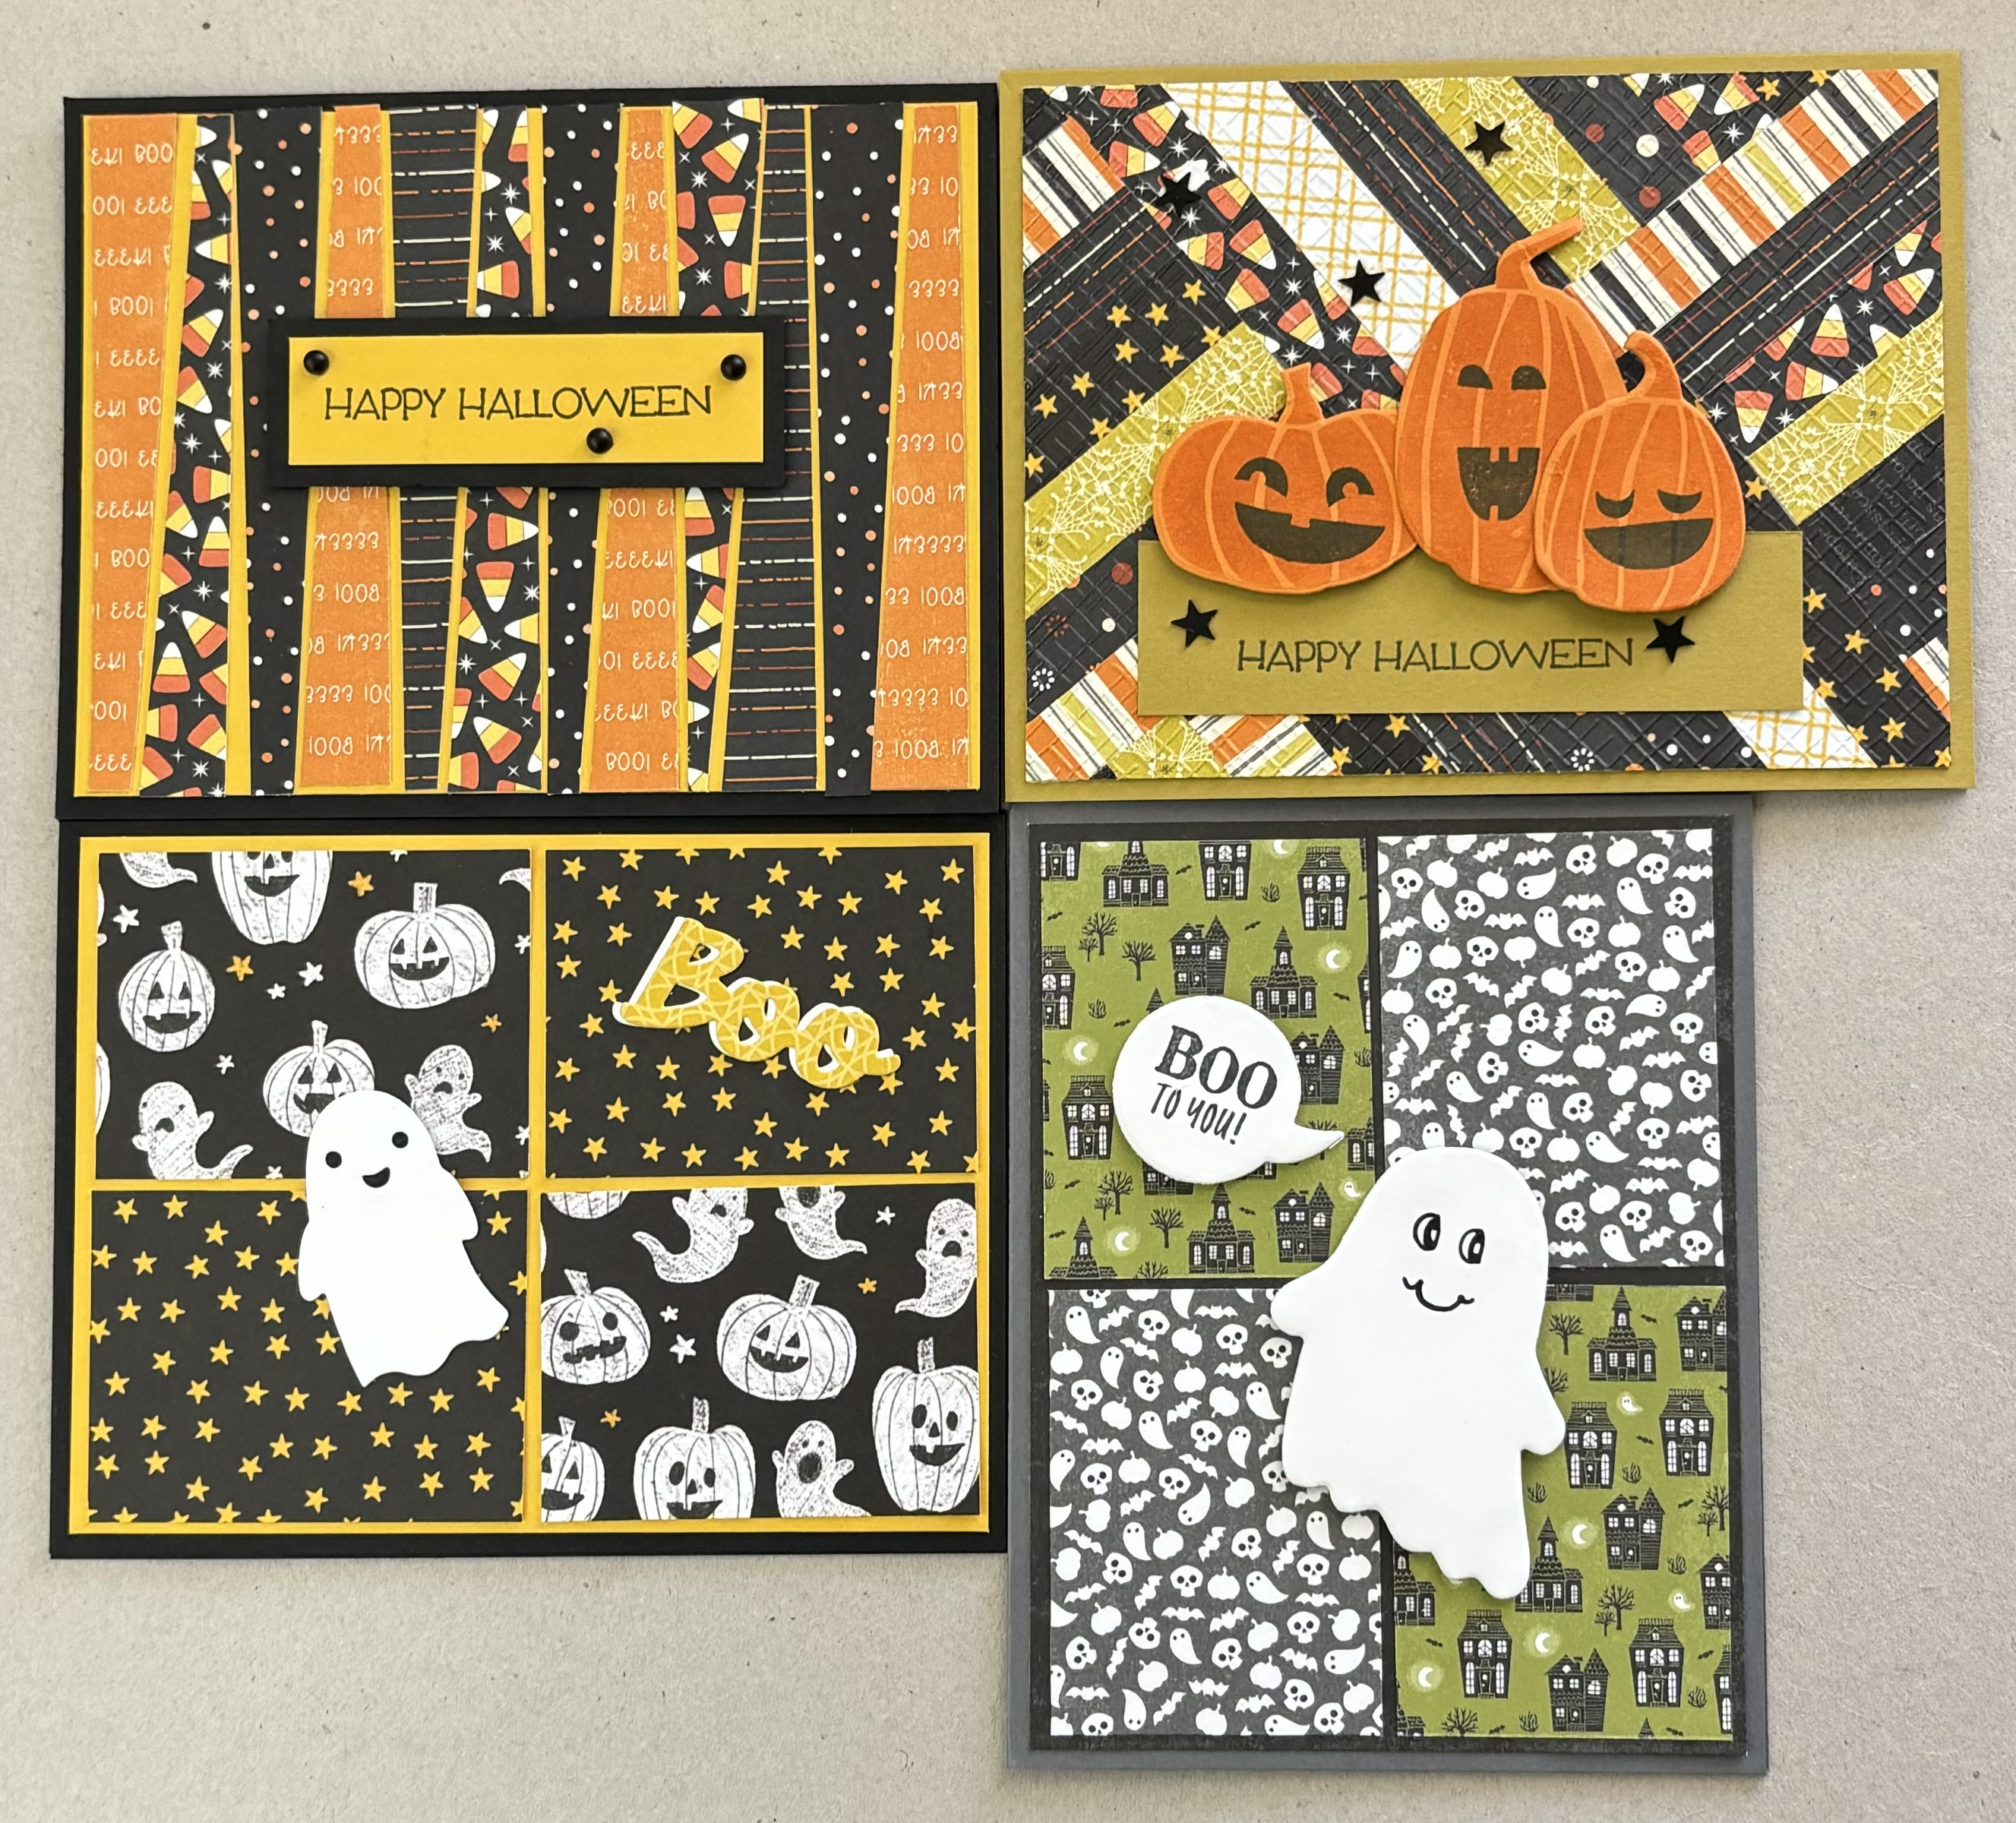

Here is a look at 3 cards I worked on in the video and one extra I made (bottom right), but did not use in the video. 

I hope these ideas inspire you to cut up those scraps and put them to use! These simple techniques make creating Halloween cards terrifyingly easy! Of course you can use these scrap techniques on cards for any occasion! Give these a try, you’ll find these techniques are quite addictive!!! Your scraps will disappear in no time!

Thanks for stopping by. Until next time . . .
Stamp Happy!

Kim

SUPPLY SOURCES

Cardstock - Stampin’ Up!
Basic Black, Basic White, Basic Gray, Pumpkin Pie, Lemon Lolly, Bubble Bath, Granny Apple Green (all are current colors)

Stamp Sets - ©️1990-2024 Stampin’ Up!©️
Best of Halloween (retired)
Tricks & Treats (retired)

Dies (currently available)
Mini Cat Die - Scrapbook.com
Mischievous - Tim Holtz

Thursday, August 26, 2021

DELICATE DAHLIAS & THE HERRING BONE TECHNIQUE

 Hi Stampers!

Can you believe August is nearing its end?  Summer is flying by, and autumn days are right around the corner. The colors and images on today’s cards portray the summer to autumn transition. The beautiful Harvest Meadow DSP contains the perfect late summer /early fall palette. The floral image from the DELICATE DAHLIA stamp set makes a great companion for the DSP. The frame and background panel on the cards is a technique called the HERRINGBONE TECHNIQUE. The herringbone pattern appears on a few pieces of my fall wardrobe, so I thought the herringbone technique would work well with the DSP and stamp set. Let’s take a look at the cards:


And here is the stamp set:


The DELICATE DAHLIAS stamp set can be yours for free with a $100 Stampin’ Up!®️ product purchase during SALE-A-BRATION (going on now through 30 September 2021).

For these cards the first step is to make the herringbone background piece, die cut that piece with the Stitched Rectangles Dies, and finally emboss the piece with the Timeworn Type embossing folder.
 (Page down for the technique video tutorial.) You will have a frame for one card and a panel for the other card.


SUPPLIES FOR THIS CARD
* Frame piece from the herringbone technique project
* Crumb Cake card base plus Crumb Cake cardstock cut at 5 1/4” x 4”, and a 1 5/8” x 1 1/4” piece to mat the greeting
* Basic White or Very Vanilla scrap for stamping
* Harvest Meadow DSP - Crumb Cake
* Herringbone Technique Frame
* Timeworn Type Embossing Folder
* Stitched Rectangles Dies 1 3/4” x 1 1/4”
* Linen Thread
* Inks - Crumb Cake, Early Espresso, Bumblebee, Pear Pizzazz
* Adhesive, Dimensionals, Glue Dots

ASSEMBLY:
* On the scrap cardstock using Bumblebee ink, stamp the Dahlia image - first ink the “filler” image, stamp off, then stamp the image. Next ink up the outline stamp with Bumblebee, and stamp it over the other image. 
* Stamp two of the leaf images with Pear Pizzazz ink using the same process as for the floral image.
* Stamp the greeting on a small piece of the Crumb Cake DSP with Early Espresso ink.
* Fussy cut the floral image and the leaves.
* Use the Stitched Rectangles Die to cut out the greeting.
* Emboss the 5 1/4” x 4” piece of Crumb Cake cardstock with the Timeworn Type embossing folder
* Adhere the Herringbone frame to the embossed Crumb Cake cardstock. Adhere this piece to the card base.
* Adhere the greeting to its mat, and put dimensionals on the back.
* Adhere the stem end of the leaves to the back side of the flower. Place dimensionals on the back of the flower and the leaves.
* Place the flower image in the upper left corner of the card, and place the greeting in the center of the embossed panel under the flower image.
* Use about 10” of linen thread, fold it in half, tie a bow, attach it to the left corner of the greeting with a glue dot. Trim the ends.


SUPPLIES FOR THIS CARD:
* Inner panel from herringbone technique 
* Crumb Cake card base and scrap of Crumb Cake for greeting
* Diamond Weave Ribbon - 2 pieces, one about 5” long and one about 1 1/2” long
* Very Vanilla Twine - about 7” long
* Inks - Crumb Cake and Early Espresso
* Layering Circles Dies - 2 1/8” diameter

ASSEMBLY
* Use the Layering Circles Die and cut a circle from the scrap of Crumb Cake.
* Use the Dahlia outline stamp and Crumb Cake ink to stamp a background on the card base.
* Use Early Espresso ink to stamp the greeting on the die cut circle, then use Crumb Cake ink and stamp petals around the edge of the greeting. Put dimensionals on the back of this piece.
* Put a bit of adhesive on the back of the herringbone panel about  3/4” from the bottom of the panel and attach the longer piece of Diamond Weave Ribbon. Repeat this on the other side of the panel and attach the shorter piece of ribbon. Bring the longer piece across the front of the panel. Tie the twine around the two pieces of ribbon, and tie a bow. Trim the ends of then ribbon and the twine.
* Adhere the herringbone panel to the card base. 
* Add the greeting - center it on the panel about 1/4” from the top of the panel.

HERRINGBONE PANEL


SUPPLIES FOR HERRINGBONE PANEL:
* Cardstock - it will be covered up, so color is not an issue, but I used Basic White - 5 1/4” x 4”
* Strips of Harvest Meadow DSP cut at 1/2” x 6”
* Adhesive sheet cut at 5 1/4” x 4”
* Timeworn Type embossing folder
* Stitched Rectangles Dies - 4 1/2” x 3”

HERRINGBONE TECHNIQUE TUTORIAL VIDEO


* NOTE: To see other cards featuring this technique, and to view step-by-step photographs of the technique see my 2 September 2020 post.

Here is the card I made using the panel created in the video.


SUPPLIES
* Herringbone Panel
* Soft Succulent card base
* Cork Paper 4” x3”
* Soft Succulent Open Weave Ribbon - about 16”
* Early Espresso ink
* Soft Succulent cardstock for greeting, cut with the Stitched Rectangles Die x 3” x 3/4”
* Stamp sets - greeting is from Sharing Sunshine; floral image is from Nature’s Harvest stamp set.
* Adhesive, dimensionals for greeting


That’s all for today. I am so glad you stopped by. until next time…
Stamp Happy!

Kim

All stamps and stamped images ©️1990-2021 Stampin’ Up!®️