Showing posts with label Ornate Thanks. Show all posts

Thursday, September 23, 2021

DIY YOUR DSP!

 Hi Stampers!

Have you ever had a card idea in mind, but just could not find the right Designer Series Paper (aka DSP)?What to do, what to do? Why not create your own? It is easy to do, and adds a one of a kind element to your cards! The BANNER YEAR stamp set found in the STAMPIN’ UP!®️ 2021-2022 ANNUAL CATALOG is a great set for making your own DSP! It has lots of images to choose from for autumn and winter seasons and holidays.

BANNER YEAR


Here is the card I made with my DIY DSP!


PROCESS:
* I started with a 5 1/4” x 4” piece of Basic White cardstock. (You can start with any size cardstock you like.)
* Next I chose my images and ink colors.
* I began stamping with the largest image (pumpkin). I stamped them “somewhat” randomly, but kept in mind the number and size of the other stamps I planned to use.
* Next I stamped the leaves, one color at a time.
* Finally, I stamped the acorns.
* I cut down the DIY DSP to the size I needed.

TIPS:
* Although you want to stamp the images somewhat randomly, have basic idea of what you want your DSP to look like. (If you decide you want your images stamped in more of a pattern, that is okay too!)
* Turn your images from left to right, up and down if you are stamping randomly.
* Stamp images off the edge of the cardstock, even if you believe you will be trimming down the cardstock.
* Start by stamping with the largest image and then stamp the images that are a bit smaller,  and lastly stamp the smallest images.


SUPPLIES FOR THIS CARD
* Bumblebee cardstock. 11” x 4 1/4” scored and folded at 5 1/2”.
* Merry Merlot cardstock cut at 5 1/8” or 3 7/8”.
*Bumblebee cardstock 3 3/4” x 1” to mat greeting
* Basic White cardstock 3 5/8” x 7/8” for greeting
* DIY DSP cut at 3 3/4” square.
* Inks - Merry Merlot, Pumpkin Pie, Cinnamon Cider, Crumb Cake, Mango Melody, Old Olive, Bumblebee, Soft Sea Foam
* Blending Brush
* Bumblebee Gingham Ribbon @ 14”.
* Ornate Thanks stamp set (annual catalog) for greeting.

Note - I used a blending brush and Soft Sea Foam ink to soften the the Basic White cardstock for the DIY DSP and for the greeting. I just applied a very light coating of the ink over the pieces. I did the similar thing for the inside of the card, except I just went around the images and the edges of the cardstock.

Here is a look at the inside of the card:

I know it is a bit difficult to see, but that little bit of color really softens the brightness of Basic White cardstock.

I hope you give DIY DSP a try!

That’s all for today. Thank you for stopping by. Until next time…
Stamp Happy!

Kim

All stamps and stamped images ©️1990-2021 Stampin’ Up!©️

Thursday, September 2, 2021

TIME OF GIVING FALL THANK YOU; A QUICK & EASY CARD

 Hi Stampers!

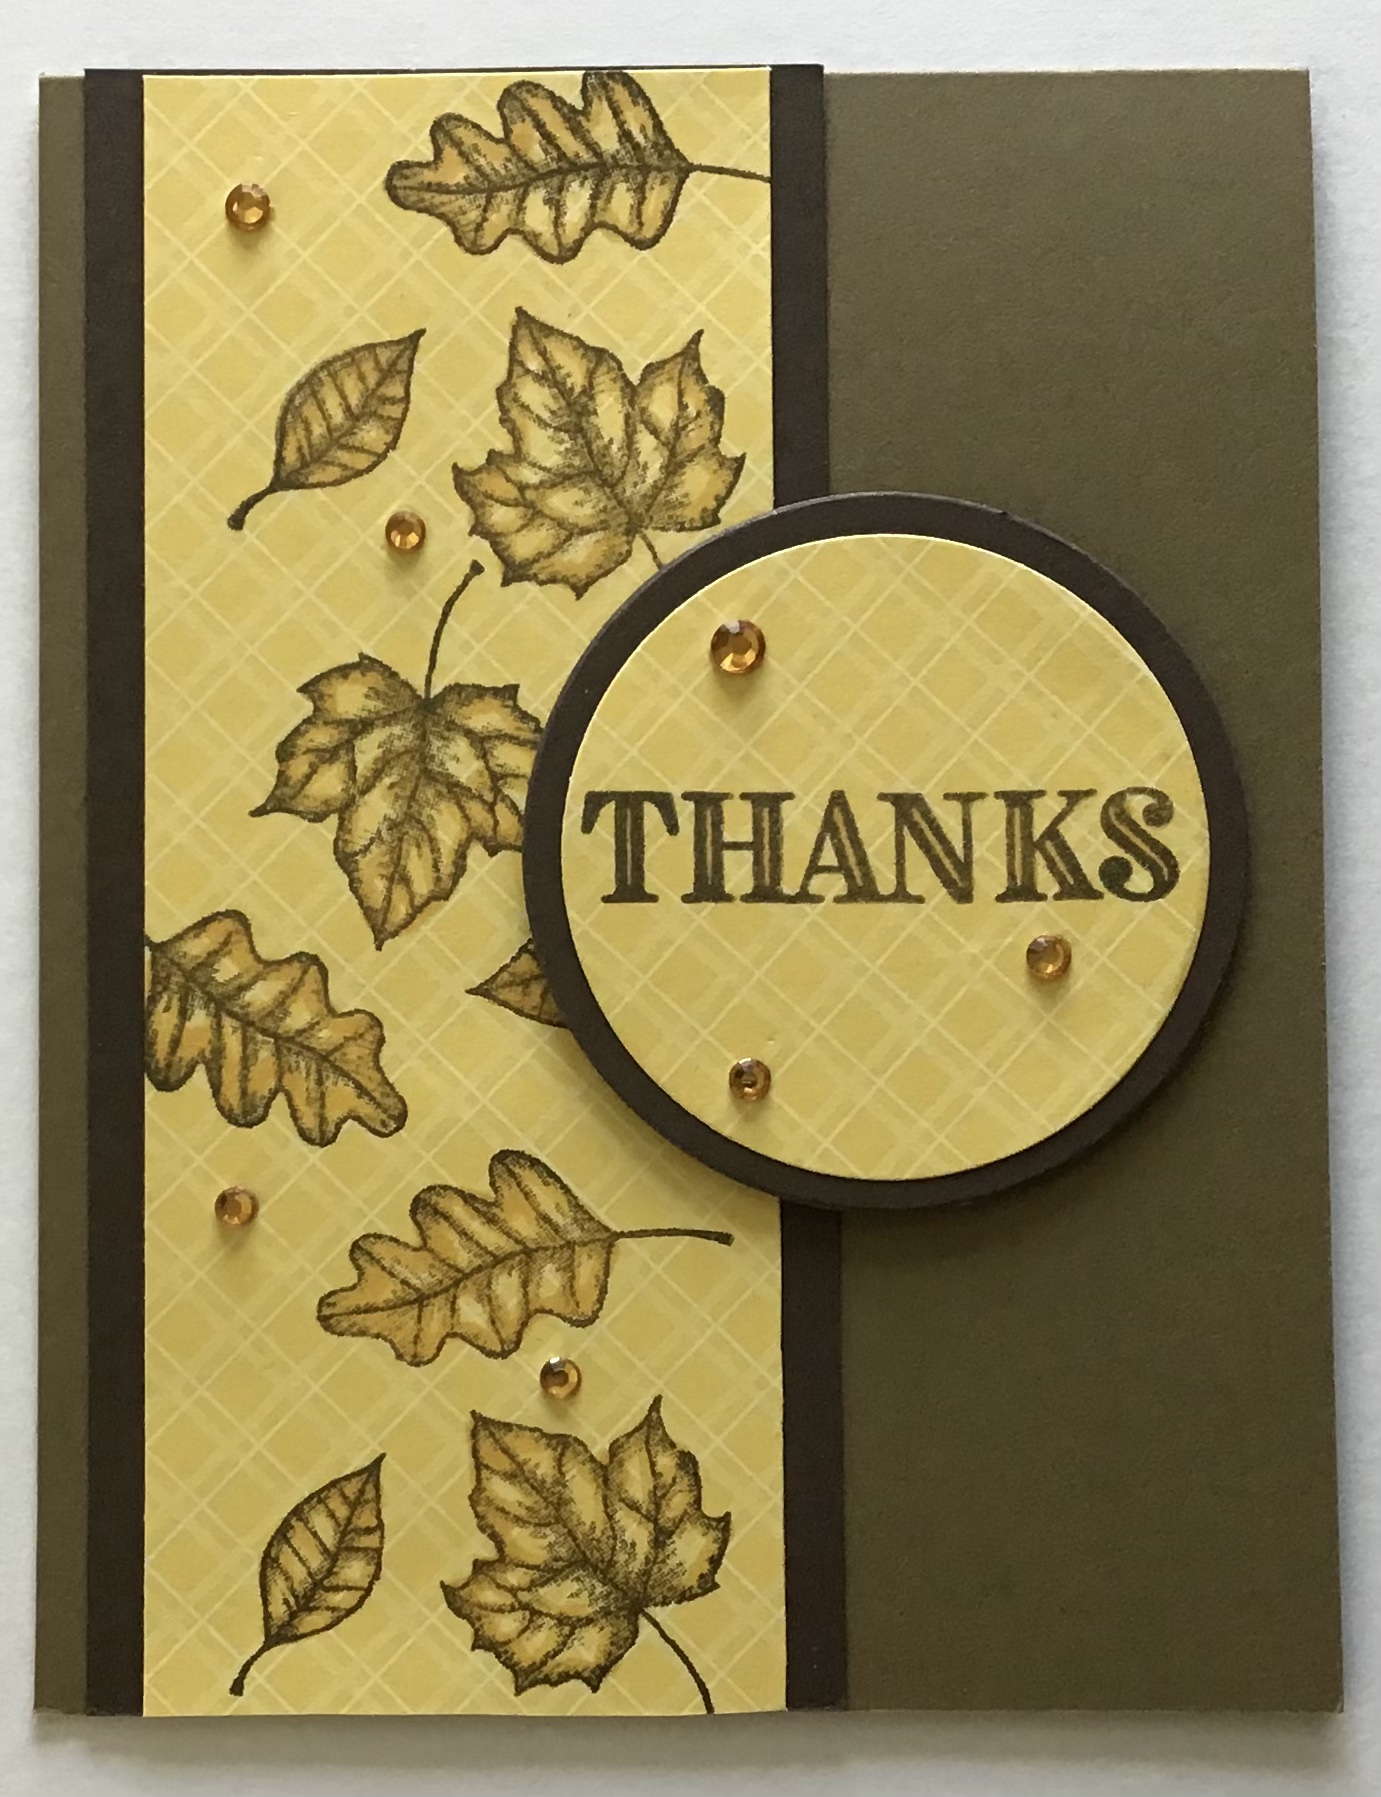
September has arrived and fall is quickly approaching! Today’s card definitely has a fall look and feel! For the card I used the leaf imagine from the TIME OF GIVING stamp set, and the greeting is from the ORNATE THANKS stamp set. The card is quick and easy to create, and the layout is simple, but interesting. Here is a look at the card:


And here is a look at the stamp sets:

TIME OF GIVING
(Mini Catalog)


ORNATE THANKS
(Annual Catalog)


SUPPLIES FOR THIS CARD


* Soft Suede card base
* Early Espresso cardstock  for mats
* Very Vanilla cardstock cut at 5” x 3 3/5”
*  6” x 6” Designer Series Paper - Brights - Daffodil Delight cut at 2” x 5 1/2” and a piece for the greeting


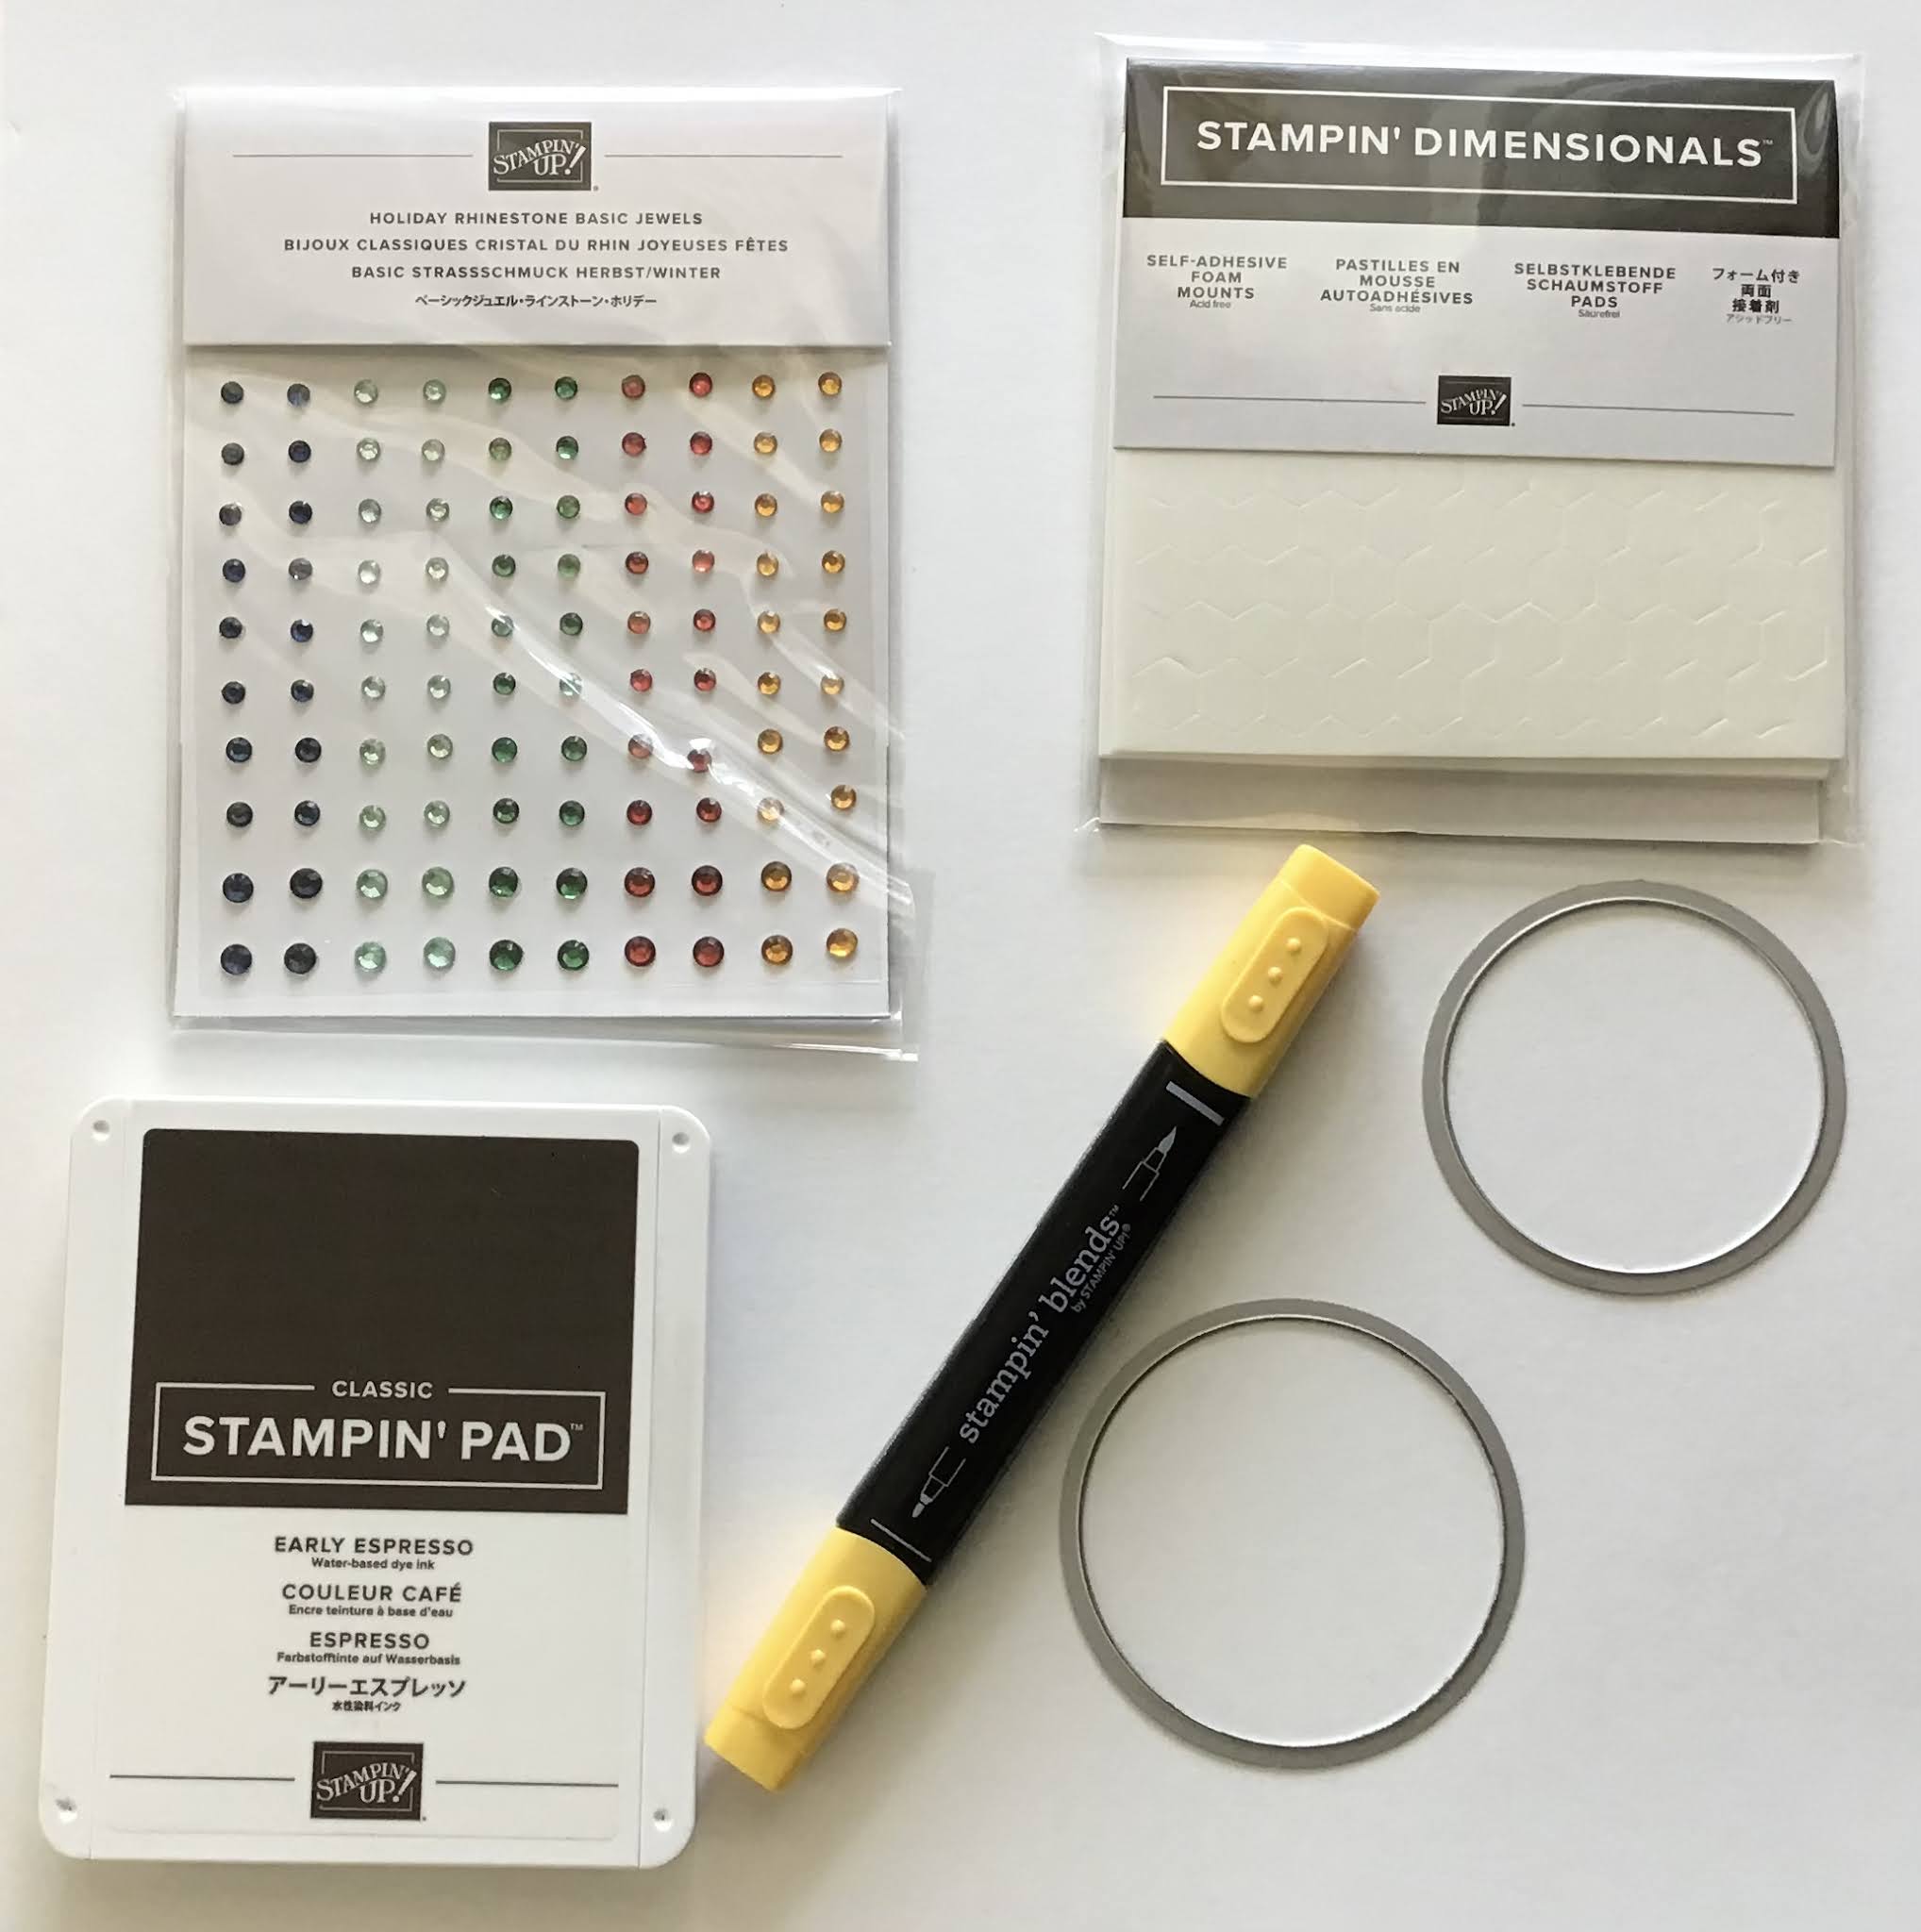
* Holiday Rhinestones - 7 Pumpkin Pie
* Early Espresso ink, Stampin’ Blend - Daffodil Delight (dark) 
* Layering Circles Dies - one that fits around the greeting and another one size larger
* Stampin’ Dimensionals


* Stamp the leaf stamp three times on the 2” x 5 1/2” piece of DSP with the Early
 Espresso ink.
* Use the Daffodil Delight Stampin’ Blend to add a bit of shading and dimension to the leaves. Just add a little color along the inside edge of the image and along the veins.
* Stamp the greeting on the other piece of DSP with the Early Espresso ink. Use the Stampin’ Blend marker to add a bit of depth to the open areas of the greeting.
* Stamp the leaves image with Early Espresso in the lower right hand corner of the Very Vanilla cardstock.
* Use the Stampin’ Blend marker on the leaves as before.
* Die cut the greeting and the Early Espresso mat with the Layering Circles Dies.
*Adhere the leaf panel to the Early Espresso mat, and the greeting to it’s mat.
* Adhere the leaf panel to the left side of the card base about 1/4” from the edge. 
* Adhere the greeting to the card front with dimensionals - center right.
* Place the Pumpkin Pie rhinestones on the card front
*Adhere the inside panel to the inside of the card.


Thank you for stopping by today. Until next time…
Stamp Happy!

Kim

All stamps and stamped images ©️1990 - 2021 Stampin’ Up!®️


Wednesday, November 4, 2020

SIMPLE CARD LAYOUTS THAT SHINE

 Hi Stampers! Today I have four cards to share, and all feature simple layouts taken up a notch with the addition of brushed metallic cardstock and DSP with foil accents. Each of these cards goes together quickly. The layouts will look great with any DSP and cardstock. 

Here is a look at the cards:


The layout for these two cards is the same, the orientations are different. 
For each card the card base is 4 1/4” x 11”, scored and folded at 5 1/2”. 
The DSP is cut y 2” x 3 3/4” and 3” x 3 3/4”. 
The Brushed Metallic Cardstock is cut at 1/2” x 3 3/4”.

Supplies for the “Thanks” card:

Old Olive and Whisper White cardstock. Brushed Metallic cardstock (gold). Ornate Garden Speciality Designer Series Paper. Old Olive ink. stitched Shapes Dies (two largest ovals). Ornate Thanks stamp set.

Supplies for the “Thank You” card:

Mint Macaron and Whisper White cardstock. Brushed Metallic cardstock (gold).  Ornate Garden Speciality Designer Series Paper. Mint Macaron ink. Ornate Thanks stamp set.


The card base for this card is Crumb Cake cut at 5 1/2” x 8 1/2”, scored and folded at 4 1/4”.
The Brushed Metallic (Gold) cardstock is cut at 4 1/4” x 3 1/2”.
Each DSP strip is cut at 1” x 4”.

Supplies for this card:

Crumb Cake cardstock. Brushed Metallic cardstock (gold). Gilded Autumn Specialty Designer Series Paper. Linen Thread. Crumb Cake ink. Timeless Tropical stamp set.


The card base is Crumb Cake cut at 5 1/2” x 8 1/2”, scored and folded at 4 1/4”.
The Early Espresso mat is cut at 5 1/8” x 3 7/8”.
The Brushed  Metallic Cardstock (gold) is 3 3/4” x 1 1/4”.
The DSP is cut at 3 3/4” x 3 3/4”.

Supplies for this card:

Crumb Cake and Early Espresso cardstock. Brushed Metallic cardstock (gold).  Guided Autumn Specialty Designer Series Paper. Word Wishes Dies (Thanksgiving with the giving cut off). Stitched Shapes Dies. Faux Suede Trim. 
That is it for today. I hope these cards provide you with greatinkspirations!

Until next time...
Stamp Happy!

Kim

All stamps and stamped images ©️1990 - 2020 Stampin’ Up!®️


Thursday, October 22, 2020

QUICK AND EASY FUN FOLD FOR ANY OCCASION

 Hello stampers! Today I have two cards to share that are variations of the same fun fold. Today’s cards are examples of the Joy Fold Card. This is one of my favorite fun folds, as it is quick and easy; can be simple or decked out with all kinds of embellishments, and it is truly fun to make!

Here are the cards:


To make these cards I used three stamp set. Mixing stamp set images is a way to get more out of your stamp  collection! All the stamp sets I used are found in the current annual catalog. Here are the sets I used:


Here are the measurements for the landscape version of my Joy Fold Card.


The Pretty Peacock card base is 8” x 4 1/4”, scored at 5 1/2”.
The smaller card is 8” x 3”, scored at 4”. 
There are two pieces of Whisper White that measure 3 3/4” x 2 3/4”. One is for the outside focal image and one for the inside of the card.
There are two pieces of DSP. Mine are from the Plaid Tidings DSP found in the current mini catalog.
The larger piece is 5 1/4” x 4”, the smaller one is 4” x 2 1/4”.

For this card my greeting and evergreen boughs were stamped with Shaded Spruce ink.
I added a bit of embellishment with a few of the Wonderful Gems found in the current mini catalog.
The Thank You is from the Ornate Thanks Stamp set. The stamp set is photopolymer. The Thank You is one stamp, but I cut the words apart so I could stamp the “you” under the thanks.” If I want the “thank you” to be on one line I just place the two pieces back together on the acrylic block, and stamp.

The evergreen boughs are from the Rustic Retreat stamp set. I also stamped the evergreen boughs in the corners of the Whisper White Cardstock for the inside of the card. 


Here are the measurements for the portrait version of the card:


The Pretty Peacock cardbase is 5 1/2” x 6 3/8”, scored along the 6 3/8” side at 4 1/4”.
The smaller card is 6” x 4”, scored along the 6” side at 3”.
The Plaid Tidings DSP pieces are cut at  5 1/4” x 4” and 2” x 4”.
The two Whisper White pieces are cut at 3 3/4” x 2 3/4”.
The greeting from Happiest of Birthdays is stamped with Pretty Peacock ink. The evergreen boughs are also stamped with Pretty Peacock full strength, and stamped off. 
I added three gilded gems for a bit of shimmer and shine.
I used another sentiment from the Happiest of Birthdays stamp set for the inside of the card.


Why not try the Joy Fold Card in both portrait and landscape versions. Another great thing about this fun fold is you can position the smaller card so it opens from either the left or the right! The fold is so versatile, no wonder it is called a Joy Fold Card! I hope these cards provide you with greatinkspirations!

Until next time...
Stamp Happy!

Kim
http://greatinkspirations.stampinup.net
greatinkspirations@gmail.com
On You Tube at Kimberly Tolbert / Greatinkspirations

* The Plaid Tidings DSP is a part of the Stampin’ Up!®️ Designer Series Paper Sale going on now through 31 October 2020 For all the details and to view the papers on sale, click  HERE


OTHER STAMPIN’ UP! PROMOTIONS


November’s Paper Pumpkin Kit will make 15 gift card containers complete with envelopes. For more information or to subscribe click HERE 


COMING 3 NOVEMBER THE QUITE CURVY VARIETY BUNDLE! 

For more details about the Quite Curvy Bundle, The Quite Curvy Variety Bundle, how and when to order, click  HERE

Monday, June 15, 2020

Have It Your Way!

HAVE IT YOUR WAY
ONE LAYOUT, FOUR CARDS


I think we can all agree, it is nice getting what we like the way we like it! Card making is no different. It is always nice when a card turns out just the way we hoped! One tool I use when I want cards to turn out just so is  is a card layout (card sketch, card recipe). The card layout I am sharing today can be oriented four different ways (at least) providing lots of card making options!

Here is the layout:


And here are the cards I made using the layout, but orienting the focal panels differently for each card:

For this card I used the layout as designed. I chose a Smoky Slate card base that was 8 1/2” long and 5 1/2” wide, and scored at 4 1/4”. For the cardstock layering panels I chose Basic Gray. The sentiment is from the Tasteful Touches stamp set, and is stamped in Basic Gray on Whisper White cardstock. The DSP layer is from the In Good Taste collection. I added some silver metallic pearls for a bit of interest.

For this version of the card I simply turned the layout upside down. For this card a used a Gray Granite card base cut at 11” long and 4 1/4 “ wide, scored and folded at 5 1/2”. The cardstock panels are Early Espresso, and the DSP is from also from the In Good Taste collection. The sentiment panel is Very Vanilla. The greeting is stamped in Gray Granite. I wrapped linen thread around the sentiment panel, tied it in a knot, adhered it to the Early Espresso panel and attached it to the card with dimensionals.

I turned the layout to the right for this card. The Mint Macaron card base is 11” x 4 1/4”, scored and folded at 5 1/2”.  I used Terracotta Tile For the cardstock panel. The DSP is from the Ornate Garden Specialty Designer Series Paper. Very Vanilla was used for the sentiment panel. The greeting is from the Ornate Thanks stamp set, and is stamped in Mint Macaron. The flower image is from the Ornate Style stamp set, and is stamped in Soft Suede and colored with Stampin’ Blends.(Calypso Coral, Mango Melody, and Mint Macaron - light and dark of each color).*  The ribbon is the Whisper White Crinkled Seam Binding that I colored with the dark Mint Macaron Stampin’ Blend.  I adhered the greeting panel to the card using dimensionals.

For the final card I turned the original layout on its side to the left. This Terracotta Tile card base is 8 1/2” x 5 1/2”, scored  and folded at 4 1/4“ . The cardstock panels are Mint Macaron. The DSP is from the Ornate Garden collection. The sentiment panel is Very Vanilla stamped with Terracotta Tile ink. It is from the ornate Thanks stamp set. The flower image
Is from the Ornate Style stamp set. It was stamped using Soft Suede ink, and colored with Stampin’ Blends markers. ( Calypso Coral, Mint Macaron, and Mamgo Medley - light and dark of each.)*. The Terracotta Tile ribbon is from the Ornate Garden Combo Pack. The sentiment panel is attached using dimensionals. 

* Generally speaking when coloring with Stampin’ Blends alcohol markers Memento Tuxedo Black Ink should be used to stamp the image before coloring. Many of the Classic Stampin’ Pad colors can be used in place of the Memento ink, but there is a greater risk of the ink bleeding. Stampin’ Up!®️ recommends using the Memento Ink with the Stampin’ Blends. 

Note: Be aware of which direction You place directionally oriented DSP designs When using this layout. 

So, there you have it! One layout, for cards. It is possible to use this method with most card layouts. By rotating or flipping the layout you really can have it your way! 

Until next time...

Stamp Happy! 

Kim