Showing posts with label Best Witches. Show all posts

Tuesday, October 11, 2022

CUTTING UP WITH BEST WITCHES - A STAMP HAPPY HOLIDAYS POST

Hi Stampers!

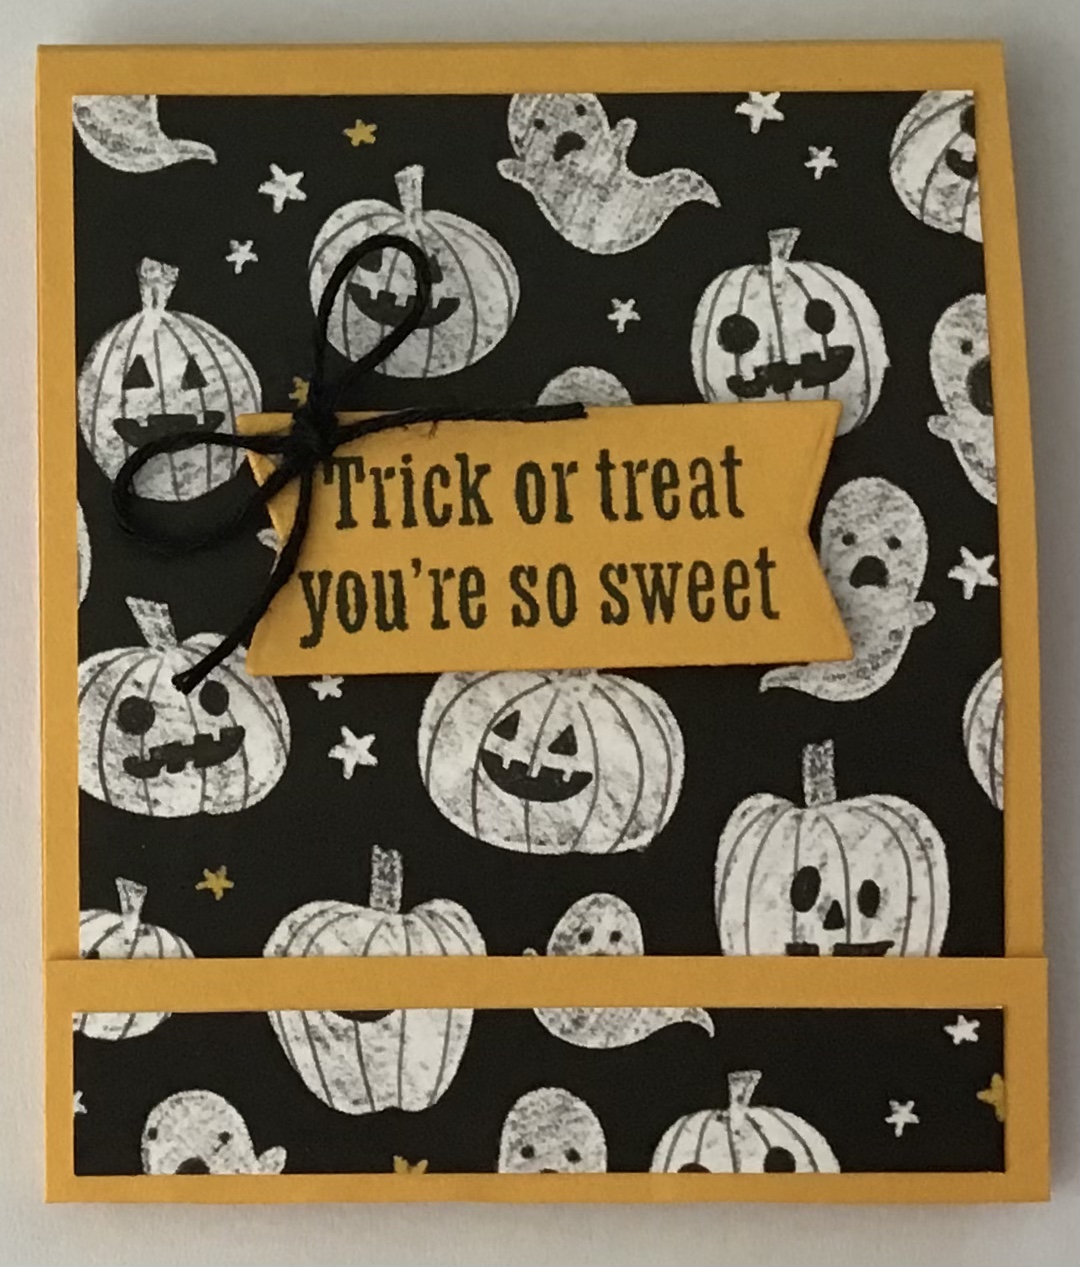
Today let’s talk about sentiments. A lot of times we focus on finding the perfect sentiment for a card. We look for a label that perfectly frames a sentiment. We strive to select just the right color ink for the sentiment, or maybe we decide to heat emboss it’s. Sometimes we layer sentiments with mats, and sometimes we stamp the sentiment directly on the card or focal panel. Today I thought we would talk about another way to present sentiments - cut them up! Stamp the sentiment on cardstock then cut the words apart. Depending on the sentiment you can cut each word separately, or cut out groups of words. After the words are cut apart you can adhere them to the card, or adhere them to contrasting cardstock and cut around the words to create a border then adhere to the card. Here are my sample cards:


To see more examples of this technique for sentiments see page 55 in the Stampin’ Up!®️ July - December 2022 Mini Catalog. There are several other examples of this technique throughout the mini catalog as well as the annual catalog.

To create these cards I used the BEST WITCHES stamp set.

BEST WITCHES


BEST WITCHES SPELLS CARD


MAKING THE CARDS


For these cards I used two layers (one DSP, one cardstock) and a focal panel all die cut with the Deckled Rectangles Dies. As you can see I stamped the sentiment, cut it apart, and adhered it to contrasting cardstock. Then I “fussy” cut around the sentiment to create a border.

SUPPLIES FOR BEST WITCHES SPELLS CARD
* Card base - Highland Heather 4 1/4” x 11” scored and folded at 5 1/2”
* DSP - Celebrate Everything - star pattern, cut with Deckled Rectangles Dies, 2nd largest
* Pumpkin Pie cardstock cut with 3rd largest Deckled Rectangles Dies
* Basic White cardstock, stamp image and color, then cut with 4th largest Deckled Rectangles Dies
* Scrap of Highland Heather cardstock and scrap of Pumpkin Pie cardstock for sentiment
* Inks - Memento Tuxedo Black, Daffodil Delight; Stampin’ Blends - Pumpkin Pie (light & dark), Highland Heather (light & dark),Soft Sea Foam (light), Daffodil Delight (light), Basic Black (light & dark), Gray Granite (light)
* Deckled Rectangles Dies
* Matte Black Dots -3
* Adhesive (I used liquid glue for the sentiment pieces) and dimensionals.

HAUNT IT CARD


SUPPLIES FOR HAUNT IT CARD
* Card base - Highland Heather
* DSP - Celebrate Everything - star pattern, cut with 2nd largest Deckled Rectangles Dies
* Parakeet Party cardstock - die cut with 3rd largest Deckled Rectangles Dies
* Basic White cardstock for stamping and coloring and die cut with 4th largest Deckled Rectangles Dies
* Scrap of Highland Heather and scrap of Parakeet Party for sentiment
* Inks - Memento Tuxedo Black, Daffodil Delight; Stampin’ Blends - Basic Black (light & dark), Smoky Slate (light), Soft Sea Foam (light), Highland Heather (light & dark), Daffodil Delight (light), Crumb Cake (light)
* Matte Black Dots -3
* Adhesive, dimensionals

CUTTING UP SENTIMENTS BEST WITCHES CARDS


Cutting sentiments is such a fun technique, and Halloween cards are the perfect opportunity for giving it a try! If the sentiments turn out a little wonky - no problem! It’s Halloween - the perfect time for wonky!!!

That’s all for today. Thank you so much for stopping by. Until next time…
Stamp Happy!
 
Kim

All stamps and stamped images ©️1990 - 2022 Stampin’ Up! 2022

Tuesday, October 4, 2022

PEEKABOO! IT’S A TREAT FOR YOU! - A STAMP HAPPY HOLIDAYS POST

Hi Stampers,

Today’s Stamp Happy Holiday’s project is super simple treat bags. The bags I am using for the project are the PEEKABOO TREAT BAGS found on page 140 of the Stampin’ Up!®️ 2022-2023 Annual Catalog or view in my ONLINE STORE.  

Each package contains 10 food safe treat bags; 5 kraft and 5 white.  The bags feature a ziplock type closure. They are ready for you to decorate and fill with a cookie or two, candies, nuts, or other treats. Let’s take a look at my samples:


To view Stampin’ Up!sample projects see pages 19 and 50 in the annual catalog and page 57 in the Stampin’ Up! July -December 2022 Mini Catalog.

I plan to use these bags as party favors for Halloween and I will put one at each place setting on Thanksgiving.

PEEKABOO TREAT BAGS


CREATING THE BACKGROUND ON THE BAGS

I added color to treat bags with a Stampin’ Spritzer that contained a mixture of isopropyl alcohol and re-inker. A mixture of water and re-inker will work as well, but the color will take longer to dry.


I used an cardboard box as a tray for my spritzing. This contained the mess. I placed paper towel in the box prior to spritzing each bag. This insured a clean surface for each bag, and kept any wet ink or pools of ink from coloring the back side of the bag. I also used a strip of scrap cardstock to cover the peekaboo window while spritzing the color onto the bag. The strip of cardstock should be cut at 1 3/8” wide. The bag is 4” across, so the length of the strip should be at least 5”  to cover the peekaboo window and give room on each end to maneuver the strip into place and remove it after spritzing. 

It is easy to mix the alcohol and ink in the spritzer. Fill the Stampin’ Spritzer 1/2 - 3/4 of the way with the alcohol. Add 6-10 drops of re-inker to the spritzer (more if you like). If you will be spritzing only a bag or two you can use less alcohol and less re-inker. Place the lid on the spritzer and give the spritzer a gentle shake or two to mix the ink with the alcohol. 


Place the paper towel on the bottom of the cardboard box. Place the treat bag on top the paper towel. Cover the peekaboo window with the strip of cardstock. You can secure the strip with tape if you like.


Begin to spritz the color onto the bag. Continue until you get the look you like. Allow the alcohol /ink to dry a few moments before adding stamped images, die cuts, etc to the treat bag.


The treat bag is ready to be decorated as you please.


LOVELIEST DAY PEEKABOO TREAT BAG

SUPPLIES FOR THIS BAG

* White Peekaboo treat bag
* Hello Harvest Bundle
* Pumpkin Pie Ink for spritzer.
* Scraps of Basic White and Pale Papaya cardstock (I lightly spritzed these pieces of cardstock with the Pumpkin Pie / alcohol mixture. 
* Small scrap of Old Olive cardstock to die cut vines
* Inks - Pumpkin Pie, Early Espresso; Stampin’ Blends - Pale Papaya (light & dark), Pumpkin Pie (light)
* Ribbon of choice - about 18” (I used some retired Old Olive twill ribbon. I encourage you to use what you have on hand. 
* Adhesive, dimensionals 

Note - I filled this bag with mixed nuts. I used about 3 - 4 Tablespoons of nuts.

BEWITCHING TREAT BAG

SUPPLIES FOR THIS BAH

* White Peekaboo Treat Bag
* Bewitching Bundle & Best Witches stamp set
* Granny Apple Green ink for spritzer
* Scraps of Basic White to stamp hat and frog
* Ink - Memento Tuxedo Black, Gorgeous Grape; Stampin’ Blends - Granny Apple Green (dark), Pumpkin Pie (light), Highland Heather (light & dark), Parakeet Party (light & dark
* Black Baker’s Twine (about 38”) and Metallic Mesh Ribbon about 5” (or twine and ribbon of choice)
* Adhesive, dimensionals 

Note - I filled this bag with 3 TBSP of Reese’s Pieces

Most schools require treats brought into the classroom be packaged. The individual snack sized bags of Reese’s Pieces, m & m’s, Skittles, etc will fit inside these treat bags.


NUTS ABOUT TREATS


SUPPLIES FOR THIS BAG

* Nuts About Squirrels stamp set
* Kraft treat bag
* Early Espresso ink to mix with alcohol (darker colored ink work best on the kraft colored bags)
* Basic White cardstock for stamping
* Inks - Early Espresso, Cajun Craze, Crumb Cake Old Olive, Crushed Curry
* Stylish Shapes Dies (circle that fits around greeting)
* Ribbon - about 8”
* Adhesive, dimensionals 

NOTE - I used a bit less than three TBSPs of nuts is this bag.

SCARY CUTE TRICK OR TREAT TIME


SUPPLIES FOR THIS BAG

* White treat bag
* Scary Cute stamp set
* Pumpkin Pie ink to mix with the alcohol
* Inks - Memento Tuxedo Black
* Basic Black Baker’s Twine (about 38”) and Metallic Mesh Ribbon 5” or so

Note - I used a mix of candy corn and peanuts in this bag about 1 1/2 TBSP each!

PEEKABOO TREAT BAGS


These treat bags are unique, and so easy to decorate. I think I will mark some with Christmas themes, fill them, and place them in a basket on my coffee table to offer to friends and family who stop by for a visit.

That is all for today. Thank you so much for stopping by. Until next time…
Stamp Happy!

Kim

All stamps and stamped images ©️1990-2022 Stampin’ Up!®️

Tuesday, September 20, 2022

KEEPING IT SLIM FOR HALLOWEEN - A STAMP HAPPY HOLIDAY POST

 Hi Stampers!

Welcome to week eight of my Stamp Happy Holidays series. Today I have two Halloween cards to share. The cards are slimline cards. The taller card fits in a business size envelope. My mini-slimline card fits in a letter size envelope. I use the envelopes that do not have the security lining. Let’s look at the cards:


I like making cards in different sizes; it is a strategy I use to get me out of creative ruts. Slimline cards are super easy to make, and help add a little variety to your card making. There are different measurements for slimline cards. I prefer cutting my cardstock at 9 1/4” x 8” and score along the 8” side at 4”. This creates a card that is 9 1/4” long x 4” wide, and it fits perfectly inside a business envelope (#10). For my mini slimline card the card base is cut at 7” x 6 3/8” and score along the 7” side at 3 1/2”. This card fits into a letter size envelope (#6 3/4).

SAY BOO! SLIMLINE CARD


SUPPLIES FOR THIS CARD
* Basic White card base 9 1/4” x 8” - along 8” side score and fold at 4”
* Mango Melody cardstock cut at 9 1/8” x 3 7/8”
* Celebrate Everything DSP - Jack-o-lantern & Ghost pattern, 8 3/4” x 3 1/2”
* Pumpkin Pie cardstock large enough to cut a 2 1/2” circle die cut
* Baker’s Twine, black - about 7”
* Inks - Memento Tuxedo Black, Pumpkin Pie -Stampin’ Blends - Pumpkin Pie (light & dark), Daffodil Delight (dark)
* Scary Silhouettes Dies, Stylish Shapes Dies
* Best Witches and Scary Cute stamp sets
* Adhesive, dimensionals 

ASSEMBLY
* Die cut the circle from the Pumpkin Pie cardstock using the Sylish Shapes Dies (circle), and die cut the banner from the Mango Melody mat using the Scary Silhouette dies
* Use the Stampin’ Blends to color the pumpkins on the DSP
* Use the Pumpkin Pie ink and the stars stamp from the Best Wishes stamp set and stamp stars on the circle die cut
* Stamp the greeting on the banner with Memento Tuxedo Black ink
* Place some adhesive on the back side of the banner and adhere the baker’s twine create a loop on each end
* Place dimensionals on the back side of the greeting and adhere it to the circle die cut
* Place dimensionals on the back side of the greeting piece
* Adhere the DSP to the Mango Melody card base and adhere this to the card base
* Place the greeting on the card
* Stamp a sentiment inside the card using Memento Tuxedo Black ink

+ If desired use Memento Tuxedo Black ink to stamp a greeting in the lowers left corner of the envelope.
+ Use Pumpkin Pie ink to stamp the crescent moon image above the greeting

SAY BOO CARD AND ENVELOPE


HAUNT IT MINI SLIMLINE CARD


SUPPLIES FOR THIS CARD
* Card base - Basic Black cut at 7” x 6 3/8” along the 7” side score and fold at 3 1/2”
* Celebrate Everything DSP - black with star pattern - cut at 6 1/8” x 3 1/4”
* Basic White cardstock cut at 6 1/8” x 3 1/4” for inside panel
* Scraps of Smoky Slate, Basic Gray, Basic Black, and Mango Melody
* Inks - Memento Tuxedo Black, Gorgeous Grape, Starry Sky
* Blending Brushes
* Best Witches and Scary Cute stamp sets
* Scary Silhouettes Dies & Stylish Shapes Dies - largest banner
* Adhesive, dimensionals, cellophane tape

+ TIP - The 6 3/8” mark is a bit difficult to find on the Paper Trimmer. One way to overcome this is to score the cardstock on the Simply Scored Scoring Tool at 6 3/8”, then on the Paper Trimmer line up the scored line right at 0 - where the blade cuts.

ASSEMBLY
* Die cut the pieces for the focal image using the Scary Silhouettes Dies - haunted house (Basic Black), moon (Mango Melody), tree frame (Basic Gray) label (Smoky Slate), and die cut the banner using the Stylish Shapes Dies (Smoky Slate)
* Use the blending brushes, Gorgeous Grape and Starry Sky inks and create a night sky look on the label die cut and the banner die cut. I started at the bottom of the pieces and added Gorgeous Grape ink. Next I added Starry Sky, then I went back over the pieces adding a bit more of each color of ink until I reached a saturation I liked.
* Put the focal image together - adhere the moon to the label die cut. Adhere the tree frame (I used liquid glue and only put it on the outside part of the frame, but not on the trees. Use small pieces of Mango Melody and tape them behind the windows of the haunted house. Adhere the house to the focal piece.
* Stamp the greeting on the banner using Memento Tuxedo Black ink.
* Stamp a greeting from the Scary Cute stamp set on the Basic White panel for inside the card using the Memento Tuxedo Black ink. 
* Adhere the DSP to the front of the card and adhere the inside panel inside the card.
* Use dimensionals to attach the focal piece and greeting banner to the front of the card.

+ If desired use the Memento Tuxedo Black ink and stamp a greeting in the lower left corner of the envelope and stamp the star images from the Best Witches stamp set in Mango Melody above the greeting.

HAUNT IT CARD AND ENVELOPE


HALLOWEEN SLIMLINE CARDS


That is all for today. Until next time…
Stamp Happy!

Kim

All stamps and stamped images ©️1990 - 2022 Stampin’ Up,©️


Tuesday, September 13, 2022

MAKE A QUICK & CUTE HALLOWEEN MATCHBOOK TREAT HOLDER - A STAMP HAPPY HOLIDAY POST

Hi Stampers!

Today’s project is an easy to make Matchbook Treat Holder. It is a great way to dress up treats for all your trick-or-treaters, friends, or coworkers; use them as party favors, or as a surprise treat in lunches. Let’s take a look:


LET’S MAKE IT


SUPPLIES
* Cardstock (color of choice) 3” x 7 3/4” score along the 7 3/4” side at 3/4”, 4 1/4”, and 4 1/2”
* Cardstock for sentiment
* Patterned Paper (DSP) - 2 3/4” x 3 1/2” then cut it at 3” - this make a 2 3/4” x 3” piece, and a 2 3/4” x 1/2” piece for the front of the matchbook
* Stapler / staples
* Fun size bag of candy Reese's Pieces, M&Ms, Skittles, etc. 
* Adhesive
* Stamp for greeting
* Ink
* Embellishments of choice

ASSEMBLE


* Score cardstock as shown, fold on score lines - all folds are mountain folds


* Slip one end of the candy bag behind the 3/4” flap and staple


* The front panel should easily tuck under the 3/4” flap


* Adhere the DSP


* Embellish as you wish


SUPPLIES FOR THIS TREAT HOLDER
* Mango Melody cardstock for treat holder and for sentiment
* Celebrate Everything DSP - star pattern
* Metallic Mesh Ribbon - about 3”
* Ink - Memento Tuxedo Black 
* Scary Cute Bundle
* Adhesive, dimensionals


SUPPLIES FOR THIS TREAT HOLDER
* Mango Melody cardstock for holder and sentiment
* Celebrate Everything DSP - jack-o-lantern pattern
* Baker’sTwine Essentials Pack - black, about 8”
* Ink - Memento Tuxedo Black
* Scary Cute Bundle
* Adhesive and dimensionals


SUPPLIES FOR THIS TREAT HOLDER
* Basic White cardstock for treat holder and sentiment
* Rustic Harvest DSP
* Gorgeous Grape cardstock
* Glitter Washi Tape - Pumpkin Pie 
* Ink - Memento Tuxedo Black
* Best Witches stamp set
* Witch Hat Builder Punch
* Adhesive and dimensionals

HALLOWEEN MATCHBOOK TREAT HOLDERS


That’s all for today. Thank you so much for stopping by. Until next time…
Stamp Happy!

Kim

All stamps and stamped images ©️1990-2022 Stampin’ Up!©️

THURSDAY 15 SEPTEMBER 2022 ONLY!
15% OFF SELECT STAMP SETS

Tuesday, September 6, 2022

BEWITCHING SPELL WITH STAIR STEP DIMENSION; A STAMP HAPPY HOLIDAYS POST

Hi Stampers!

Welcome! Today I have a Halloween card to share. I enjoy Halloween. I grew up in a close knit rural community back in the day when trick or treating meant wearing homemade costumes and receiving homemade popcorn balls, caramel apples, cookies, and sometimes cupcakes as opposed to candy.  Halloween parties meant bobbing for apples, hayrides, and wiener roasts. Fun times! Creating Halloween cards brings back all those great memories!

Today’s card uses the BEWITCHING BUNDLE (Bewitching stamp set and Witch Hat Builder punch) and help from a couple more stamp sets, plus a technique I call stair step dimension. Sometimes I want different levels of dimension. In my sample cards you will see the stamped feet / legs that is the basic layer of dimension. It is simply stamped right onto the focal panel.  The next level of dimension is the sign. The dimension for this is achieved by adhering two same sized die cut squares together. This adds just a tad bit of dimension. The final level of dimension is achieved with dimensionals (witch hat).  That is my stair step dimension technique! Let’s look at the cards!


As you can see the two cards are similar. I used the Witch Hat Builder Punch and Basic Black cardstock to create the hat. When using cardstock for the hat it is easy to switch the direction of the hat. To create the hat band I covered the punched band with Highland Heather washi tape, and trimmed the tape with paper snips.

BEWITCHING STAMP SET


BEST WITCHES & SCARY CUTE STAMP SETS


SUPPLIES FOR THE CARD


* Witch Hat Builder Punch
* Inks - Memento Tuxedo Black, Daffodil Delight
* Stampin’ Blends - Parakeet Party (light & dark), Highland Heather (dark), Daffodil Delight (dark), Smoky Slate (light), Color Lifter
* Matte Black Dots -3
* Glitter Washi Tape - Highland Heather
* Stylish Shapes Dies - square (2” x 2”)
* Adhesives & dimensionals


* Card base - Parakeet Party 4 1/4” x 11” scored & folded at 5 1/2”
* Larger scraps of Basic Black and Parakeet Party cardstock for die cutting
* Basic White cardstock for focal panel and for inside panel cut at 4 3/4” x 5”
* DSP - Celebrate Everything, Black with Crushed Curry stars. Cut 2 at 5 1/4” x 4”

TO MAKE THE CARD

* DIE CUT & PUNCH


* Punch out the witch hat and band from Basic Black cardstock. Use the die to cut two squares from the Parakeet Party scrap.


* Cover the hat band with the Highland Heather Glitter Washi Tape, and trim away access tape.


* Adhere the band to the hat.

STAMP


* Stamp the witch feet (Bewitching) and frog on focal panel, stamp the greeting (from Best Witches) in the center of one of the Parakeet Party die cut squares, stamp the inside sentiment ( Scary Cute), and witch hat with the Memento Black ink. Stamp the stars (Bewitching) on the inside panel with Daffodil Delight. Once the focal panel is assembled use the Daffodil Delight ink to stamp a few star images around the witch. Waiting until after adding the witch gives you some wiggle room for placement of the sign and witch hat.


* Use the Stampin’ Blends to add color to the feet, the frog, and the stamped witch hat. Use the Smoky Slate Stampin’ Blend and color lifter to add a bit of shadow and to ground the images.

ASSEMBLING


* Adhere the 2 Parakeet Party die cuts together.


* Adhere the sign to the focal panel along the top of the witch legs, the use dimensionals to adhere the witch hat above the sign.
* Adhere the focal panel to the DSP and adhere this piece to the card front.
* Adhere the inside panel to the DSP, and adhere this piece to the inside of the card.
* Add the Matte Black Dot to the sign.


The stair step dimension is not the only demensional elements on the card. The placement of the frog makes it appear to be behind the witch, The shadowing under the frog and witch not only “ground” the images, but also creates the illusion of the shadow being 2 dimensional under a 3 dimensional object. The hat band being adhered to the hat adds dimension. The Matte Black Dots add one more touch of dimension to the card. Finally, the card layers add dimension as well! What other ways can you think of to add dimensional interest to your cards? 


Thanks you so much for stopping by for this edition of my Stamp Happy Holiday series. Until next time… 
Stamp Happy!

Kim

All stamps and stamped images ©️1990 - 2022 Stampin’ Up!®️